Electrified Sheets with Electron
Electron is a modern toolkit for building desktop apps. Electron apps use the same technologies powering Chromium and NodeJS.
SheetJS is a JavaScript library for reading and writing data from spreadsheets.
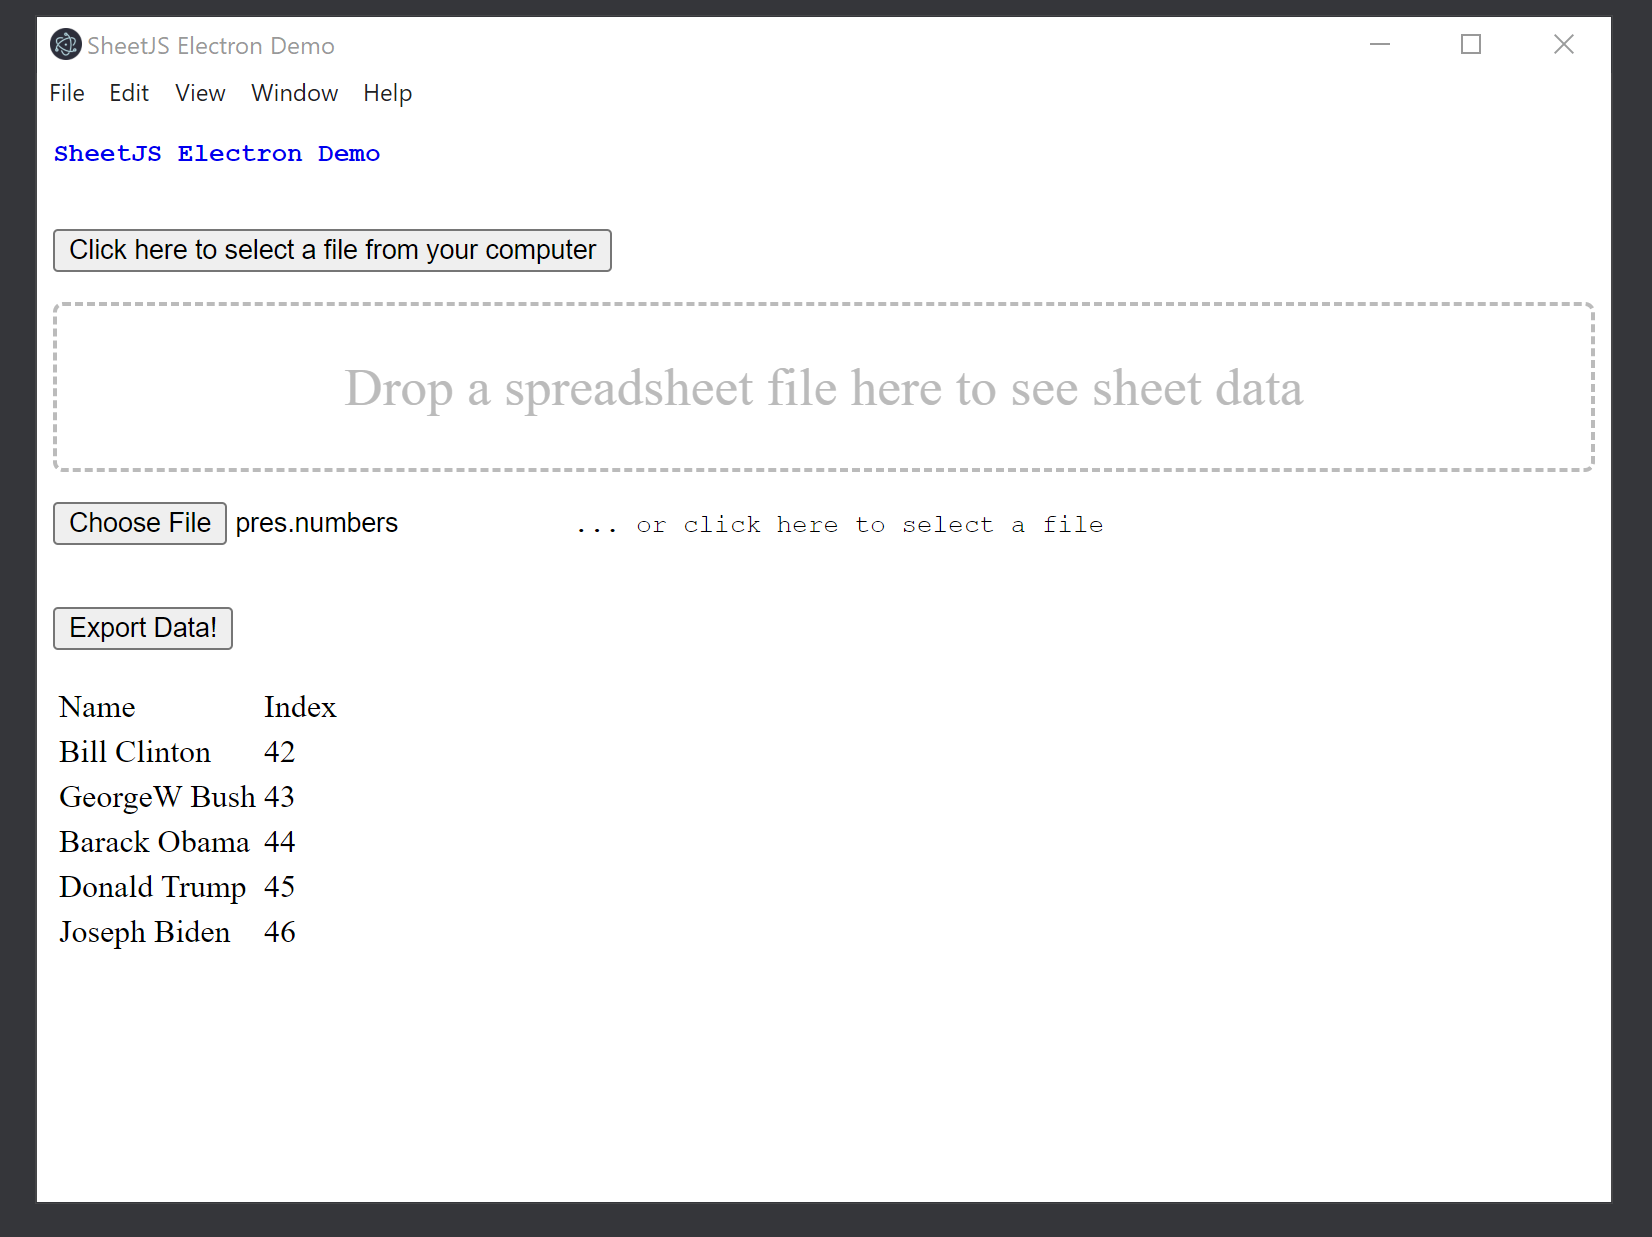
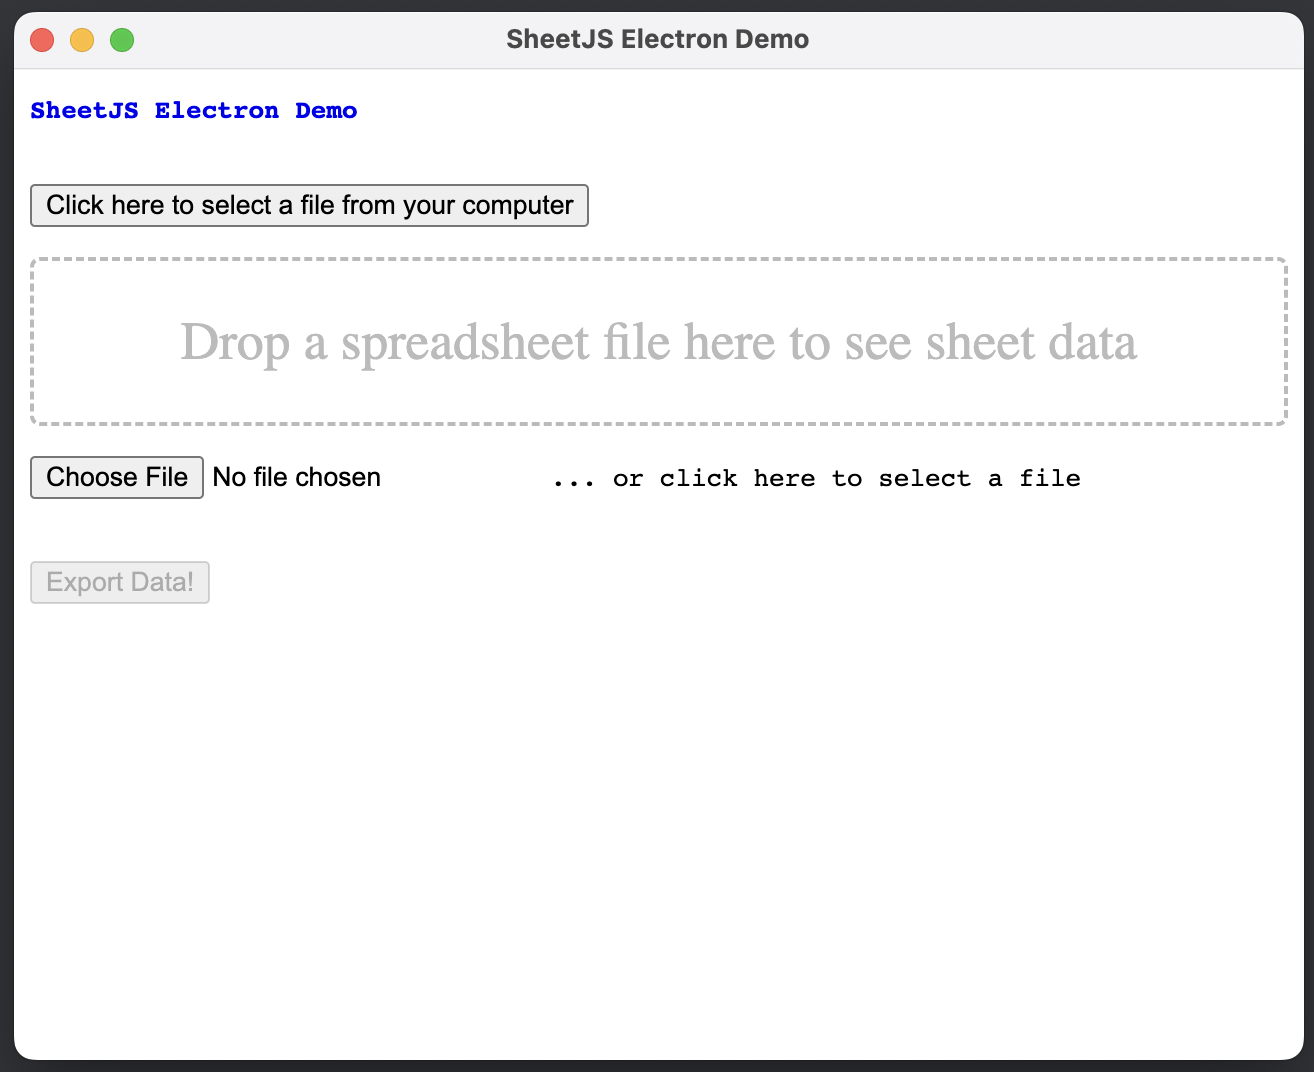
The "Complete Example" section covers a complete desktop app to read and write workbooks. The app will look like the screenshots below:
| Windows | macOS | Linux |
|---|---|---|
|
|
|

Integration Details
The SheetJS NodeJS Module can be imported from the main or the renderer thread.
The SheetJS readFile and writeFile methods will use the Electron fs module
where available.
Renderer Configuration (click to show)
Electron 9 and later require the preference nodeIntegration: true in order to
require('xlsx') in the renderer process.
Electron 12 and later also require worldSafeExecuteJavascript: true and
contextIsolation: true.
Reading Files
Electron offers 3 different ways to read files, two of which use Web APIs.
File Input Element
File input elements automatically map to standard Web APIs.
For example, assuming a file input element on the page:
<input type="file" name="xlfile" id="xlf" />
The event handler would process the event as if it were a web event:
async function handleFile(e) {
  const file = e.target.files[0];
  const data = await file.arrayBuffer();
  /* data is an ArrayBuffer */
  const workbook = XLSX.read(data);

  /* DO SOMETHING WITH workbook HERE */
}
document.getElementById("xlf").addEventListener("change", handleFile, false);
Drag and Drop
The drag and drop snippet applies to DIV elements on the page.
For example, assuming a DIV on the page:
<div id="drop">Drop a spreadsheet file here to see sheet data</div>
The event handler would process the event as if it were a web event:
async function handleDrop(e) {
  e.stopPropagation();
  e.preventDefault();

  const file = e.dataTransfer.files[0];
  const data = await file.arrayBuffer();
  /* data is an ArrayBuffer */
  const workbook = XLSX.read(data);

  /* DO SOMETHING WITH workbook HERE */
}
document.getElementById("drop").addEventListener("drop", handleDrop, false);
Electron API
XLSX.readFile reads workbooks from the file system.
showOpenDialog shows a Save As dialog and returns the selected file name.
Unlike the Web APIs, the showOpenDialog flow can be initiated by app code:
/* from the renderer thread */
const electron = require('@electron/remote');

/* this function will show the open dialog and try to parse the workbook */
async function importFile() {
  /* show Save As dialog */
  const result = await electron.dialog.showOpenDialog({
    title: 'Select a file',
    filters: [{
      name: "Spreadsheets",
      extensions: ["xlsx", "xls", "xlsb", /* ... other formats ... */]
    }]
  });
  /* result.filePaths is an array of selected files */
  if(result.filePaths.length == 0) throw new Error("No file was selected!");
  return XLSX.readFile(result.filePaths[0]);
}
showOpenDialog originally returned an array of paths:
var dialog = require('electron').remote.dialog;

function importFile(workbook) {
  var result = dialog.showOpenDialog({ properties: ['openFile'] });
  return XLSX.readFile(result[0]);
}
This method was renamed to showOpenDialogSync in Electron 6.
Writing Files
XLSX.writeFile writes workbooks to the file system.
showSaveDialog shows a Save As dialog and returns the selected file name:
/* from the renderer thread */
const electron = require('@electron/remote');

/* this function will show the save dialog and try to write the workbook */
async function exportFile(workbook) {
  /* show Save As dialog */
  const result = await electron.dialog.showSaveDialog({
    title: 'Save file as',
    filters: [{
      name: "Spreadsheets",
      extensions: ["xlsx", "xls", "xlsb", /* ... other formats ... */]
    }]
  });
  /* write file */
  XLSX.writeFile(workbook, result.filePath);
}
showSaveDialog originally returned the selected path:
var dialog = require('electron').remote.dialog;

function exportFile(workbook) {
  var result = dialog.showSaveDialog();
  XLSX.writeFile(workbook, result);
}
This method was renamed to showSaveDialogSync in Electron 6.
Complete Example
This demo was tested in the following environments:
| OS and Version | Architecture | Electron | Date |
|---|---|---|---|
| macOS 15.3 | darwin-x64 | 35.1.2 | 2025-03-31 |
| macOS 14.5 | darwin-arm | 35.1.2 | 2025-03-30 |
| Windows 11 | win11-x64 | 33.2.1 | 2025-02-11 |
| Windows 11 | win11-arm | 33.2.1 | 2025-02-23 |
| Linux (HoloOS) | linux-x64 | 33.2.1 | 2025-01-02 |
| Linux (Debian) | linux-arm | 33.2.1 | 2025-02-16 |
This demo includes a drag-and-drop box as well as a file input box, mirroring the SheetJS Data Preview Live Demo
The core data in this demo is an editable HTML table. The readers build up the
table using sheet_to_html (with editable:true option) and the writers scrape
the table using table_to_book.
The demo project is wired for electron-forge to build the standalone binary.
- Download the demo files:
package.json: project structuremain.js: main process scriptindex.html: window pageindex.js: script loaded in render context
Right-click each link and select "Save Link As...". Left-clicking a link will try to load the page in your browser. The goal is to save the file contents.
These instructions can be run in a Terminal (bash) or Command Prompt window:
mkdir sheetjs-electron
cd sheetjs-electron
curl -LO https://docs.sheetjs.com/electron/package.json
curl -LO https://docs.sheetjs.com/electron/main.js
curl -LO https://docs.sheetjs.com/electron/index.html
curl -LO https://docs.sheetjs.com/electron/index.js
In PowerShell, the command may fail with a parameter error:
Invoke-WebRequest : A parameter cannot be found that matches parameter name 'LO'.
curl.exe must be invoked directly:
curl.exe -LO https://docs.sheetjs.com/electron/package.json
curl.exe -LO https://docs.sheetjs.com/electron/main.js
curl.exe -LO https://docs.sheetjs.com/electron/index.html
curl.exe -LO https://docs.sheetjs.com/electron/index.js
- Install dependencies:
npm install
- To verify the app works, run in the test environment:
npx -y electron .
The app will run.
- To build a standalone app, run the builder:
npm run make
This will create a package in the out\make folder and a standalone binary.
On Linux, the packaging step may require additional dependencies1
When the demo was last tested on Windows ARM, the generated binary targeted x64. The program will run on ARM64 Windows.
Testing
-
Download the test file
pres.numbers -
Launch the generated application:
| Architecture | Command |
|---|---|
darwin-x64 | open ./out/sheetjs-electron-darwin-x64/sheetjs-electron.app |
darwin-arm | open ./out/sheetjs-electron-darwin-arm64/sheetjs-electron.app |
win11-x64 | .\out\sheetjs-electron-win32-x64\sheetjs-electron.exe |
win11-arm | .\out\sheetjs-electron-win32-x64\sheetjs-electron.exe |
linux-x64 | ./out/sheetjs-electron-linux-x64/sheetjs-electron |
linux-arm | ./out/sheetjs-electron-linux-arm64/sheetjs-electron |
Electron API
- Click "Click here to select a file from your computer". With the file picker,
navigate to the Downloads folder and select
pres.numbers.
The application should show data in a table.
- Click "Export Data!" and click "Save" in the popup. By default, it will try
to write to
Untitled.xlsin the Downloads folder.
In some tests, the dialog did not have a default name.
If there is no default name, enter Untitled.xls and click "Save".
The app will show a popup once the data is exported. Open the file in a spreadsheet editor and compare the data to the table shown in the application.
Drag and Drop
-
Close the application, end the terminal process and re-launch (see step 6)
-
Open the Downloads folder in a file explorer or finder window.
-
Click and drag the
pres.numbersfile from the Downloads folder to the bordered "Drop a spreadsheet file" box. The file data should be displayed.
File Input Element
-
Close the application, end the terminal process and re-launch (see step 6)
-
Click "Choose File". With the file picker, navigate to the Downloads folder and select
pres.numbers.
Electron Breaking Changes
The first version of this demo used Electron 1.7.5. The current demo includes
the required changes for Electron 35.1.2.
There are no Electron-specific workarounds in the library, but Electron broke backwards compatibility multiple times. A summary of changes is noted below.
Electron 6 changed the return types of dialog API methods. The old dialog
methods have been renamed:
| Electron 1 - 5 | Electron 6 |
|---|---|
showOpenDialog | showOpenDialogSync |
showSaveDialog | showSaveDialogSync |
This change was not properly documented!
Electron 9 and later require the preference nodeIntegration: true in order to
require('xlsx') in the renderer process.
Electron 12 and later also require worldSafeExecuteJavascript: true and
contextIsolation: true.
Electron 14 and later must use @electron/remote instead of remote. An
initialize call is required to enable Developer Tools in the window.