Data Wrangling in Tauri Apps
Tauri is a modern toolkit for building desktop apps. Tauri apps leverage platform-native browser engines to build lightweight programs.
SheetJS is a JavaScript library for reading and writing data from spreadsheets.
This demo uses Tauri and SheetJS to pull data from a spreadsheet and display the data in the app. We'll explore how to load SheetJS in a Tauri app and exchange file data between the JavaScript frontend and Rust backend.
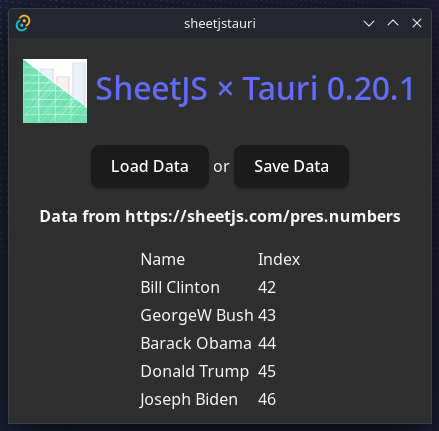
The "Complete Example" section covers a complete desktop app to read and write workbooks. The app will look like the screenshots below:
| Windows | macOS | Linux |
|---|---|---|
|
|
|


This demo was tested in the following environments:
| OS and Version | Architecture | Tauri | Date |
|---|---|---|---|
| macOS 15.3.2 | darwin-x64 | v1.6.0 | 2025-03-31 |
| macOS 14.5 | darwin-arm | v1.6.0 | 2025-03-30 |
| Windows 11 | win11-x64 | v1.6.0 | 2025-05-27 |
| Windows 11 | win11-arm | v1.6.0 | 2025-02-23 |
| Linux (HoloOS) | linux-x64 | v1.6.0 | 2025-07-06 |
| Linux (Debian) | linux-arm | v1.6.0 | 2025-05-27 |
Integration Details
The SheetJS NodeJS Module can be installed and imported from JavaScript code.
The following explanation applies to Tauri 1.
The allowlist security model was abandoned in Tauri 2.
Tauri 1.x does not provide the equivalent of NodeJS fs module. The raw
@tauri-apps/api methods used in the examples are not expected to change.
For security reasons, Tauri apps must explicitly enable system features.1
They are enabled in src-tauri/tauri.conf.json in the allowlist subsection of
the tauri section of the configuration file.
- The
fsentitlement2 enables reading and writing file data.
  "tauri": {
    "allowlist": {
      "fs": {
        "all": true
      }
- The
dialogentitlement3 enables the open and save dialog methods.
  "tauri": {
    "allowlist": {
      "dialog": {
        "all": true
      }
- The
httpentitlement4 enables downloading files. Note thathttpis not needed for reading or writing files in the local filesystem.
  "tauri": {
    "allowlist": {
      "http": {
        "all": true,
        "request": true,
        "scope": ["https://**"]
      }
Reading Files
There are three steps to reading files:
-
Show an open file dialog to allow users to select a path. The
openmethod in@tauri-apps/api/dialog5 simplifies this process. -
Read raw data from the selected file using the
readBinaryFilemethod in@tauri-apps/api/fs6. This method resolves to a standardUint8Array -
Parse the data with the SheetJS
readmethod7. This method returns a SheetJS workbook object.
The following code example defines a single function openFile that performs
all three steps and returns a SheetJS workbook object:
import { read } from 'xlsx';
import { open } from '@tauri-apps/api/dialog';
import { readBinaryFile } from '@tauri-apps/api/fs';

const filters = [
  {name: "Excel Binary Workbook", extensions: ["xlsb"]},
  {name: "Excel Workbook", extensions: ["xlsx"]},
  {name: "Excel 97-2004 Workbook", extensions: ["xls"]},
  // ... other desired formats ...
];

async function openFile() {
  /* show open file dialog */
  const selected = await open({
    title: "Open Spreadsheet",
    multiple: false,
    directory: false,
    filters
  });

  /* read data into a Uint8Array */
  const d = await readBinaryFile(selected);

  /* parse with SheetJS */
  const wb = read(d);
  return wb;
}
At this point, standard SheetJS utility functions8 can extract data from the
workbook object. The demo includes a button that calls sheet_to_json9 to
generate an array of arrays of data.
- VueJS
- Kaioken
The following snippet uses the VueJS framework:
import { utils } from 'xlsx';
import { shallowRef } from 'vue';
const data = shallowRef([[]]); // update data by setting `data.value`

const open_button_callback = async() => {
  const wb = await openFile();

  /* get the first worksheet */
  const ws = wb.Sheets[wb.SheetNames[0]];

  /* get data from the first worksheet */
  const array = utils.sheet_to_json(ws, { header: 1 });
  data.value = array;
};
The following snippet shows a simple Kaioponent:
import { utils } from 'xlsx';
import { useState } from 'kaioken';

function SheetJSImportKaioponent() {
  const [data, setData] = useState<any[][]>([]);

  const open_callback = async() => {
    const wb = await openFile();

    /* get the first worksheet */
    const ws = wb.Sheets[wb.SheetNames[0]];

    /* get data from the first worksheet */
    const array = utils.sheet_to_json(ws, { header: 1 });
    setData(array);
  };

  return ( <>
    <button type="button" onclick={open_callback}>Load Data</button>
    <table><tbody>{data.map((row) =>
      <tr>{row.map((cell) => <td>{cell}</td>)}</tr>
    )}</tbody></table>
  </> );
}
Writing Files
There are three steps to writing files:
-
Show a save file dialog to allow users to select a path. The
savemethod in@tauri-apps/api/dialog10 simplifies this process. -
Write the data with the SheetJS
writemethod11. The output book type can be inferred from the selected file path. Using thebufferoutput type12, the method will return aUint8Arrayobject that plays nice with Tauri. -
Write the data using
writeBinaryFilein@tauri-apps/api/fs13.
The following code example defines a single function saveFile that performs
all three steps starting from a SheetJS workbook object:
import { write } from 'xlsx';
import { save } from '@tauri-apps/api/dialog';
import { writeBinaryFile } from '@tauri-apps/api/fs';

const filters = [
  {name: "Excel Binary Workbook", extensions: ["xlsb"]},
  {name: "Excel Workbook", extensions: ["xlsx"]},
  {name: "Excel 97-2004 Workbook", extensions: ["xls"]},
  // ... other desired formats ...
];

async function saveFile(wb) {
  /* show save file dialog */
  const selected = await save({
    title: "Save to Spreadsheet",
    filters
  });
  if(!selected) return;

  /* Generate workbook */
  const bookType = selected.slice(selected.lastIndexOf(".") + 1);
  const d = write(wb, {type: "buffer", bookType});

  /* save data to file */
  await writeBinaryFile(selected, d);
}
The demo includes a button that calls aoa_to_sheet14 to generate a sheet
from array of arrays of data. A workbook is constructed using book_new and
book_append_sheet15.
- VueJS
- Kaioken
The following snippet uses the VueJS framework:
import { utils } from 'xlsx';
import { shallowRef } from 'vue';
const data = shallowRef([[]]); // `data.value` is an array of arrays

const save_button_callback = async() => {
  /* generate worksheet from the data */
  const ws = utils.aoa_to_sheet(data.value);

  /* create a new workbook object */
  const wb = utils.book_new();

  /* append the worksheet to the workbook using the sheet name "SheetJSTauri" */
  utils.book_append_sheet(wb, ws, "SheetJSTauri");

  await saveFile(wb);
}
The following snippet shows a simple Kaioponent:
import { utils } from 'xlsx';
import { useState } from 'kaioken';

function SheetJSExportKaioponent() {
  const [data, setData] = useState<any[][]>(["SheetJS".split(""), "Kaioken".split("")]);

  const save_callback = async() => {
    /* generate worksheet from the data */
    const ws = utils.aoa_to_sheet(data);

    /* create a new workbook object */
    const wb = utils.book_new();

    /* append the worksheet to the workbook using the sheet name "SheetJSTauri" */
    utils.book_append_sheet(wb, ws, "SheetJSTauri");

    await saveFile(wb);
  }

  return ( <button type="button" onclick={save_callback}>Save Data</button> );
}
Complete Example
- Read Tauri "Getting Started" guide and install prerequisites.16
Installation Notes (click to show)
At a high level, the following software is required for building Tauri apps:
- a native platform-specific C/C++ compiler (for example, macOS requires Xcode)
- a browser engine integration (for example, Linux requires
webkit2gtk) - Rust
The platform configuration can be verified by running:
npx @tauri-apps/cli@1 info
If required dependencies are installed, the output will show a checkmark next to "Environment". The output from the most recent macOS test is shown below:
[✔] Environment
    - OS: Mac OS 14.5.0 arm64 (X64)
    ✔ Xcode Command Line Tools: installed
    ✔ rustc: 1.87.0 (17067e9ac 2025-05-09)
    ✔ cargo: 1.87.0 (99624be96 2025-05-06)
    ✔ rustup: 1.28.2 (e4f3ad6f8 2025-04-28)
    ✔ Rust toolchain: stable-aarch64-apple-darwin (default)
    - node: 20.18.0
    - pnpm: 9.12.3
    - npm: 10.8.2
    - bun: 1.2.14
    - deno: deno 2.3.3
When the demo was last tested on ARM64 macOS, the output mentioned X64. The
build step will correctly detect the platform architecture.
- Create a new Tauri app:
- VueJS
- Kaioken
npm create [email protected] -- -m npm -t vue-ts SheetJSTauri -y
There is no official Tauri Kaioken template. This demo starts from the vanilla TypeScript template and manually wires Kaioken
npm create [email protected] -- -m npm -t vanilla-ts SheetJSTauri -y
- Enter the directory and install dependencies:
cd SheetJSTauri
npm i --save https://cdn.sheetjs.com/xlsx-0.20.3/xlsx-0.20.3.tgz
npm i --save @tauri-apps/api
npm i --save-dev @tauri-apps/cli
- VueJS
- Kaioken
Install the Kaioken dependencies:
npm add kaioken --save
npm add vite-plugin-kaioken -D --save
- Add the highlighted lines to
src-tauri/tauri.conf.jsonin thetauri.allowlistsection:
  "tauri": {
    "allowlist": {
      "http": {
        "all": true,
        "request": true,
        "scope": ["https://**"]
      },
      "dialog": {
        "all": true
      },
      "fs": {
        "all": true
      },
In the same file, look for "title" and change the value to SheetJS x Tauri:
    "windows": [
      {
        "title": "SheetJS x Tauri",
        "width": 800,
In the same file, look for "identifier" and change the value to com.sheetjs.tauri:
      "targets": "all",
      "identifier": "com.sheetjs.tauri",
      "icon": [
- VueJS
- Kaioken
- Download
App.vueand replacesrc/App.vuewith the downloaded script.
curl -o src/App.vue https://docs.sheetjs.com/tauri/App.vue
- Wire up Kaioken to the Tauri app:
- Add the highlighted lines to
vite.config.ts:
import { defineConfig } from "vite";
import kaioken from "vite-plugin-kaioken";

// https://vitejs.dev/config/
export default defineConfig(async () => ({
  plugins: [kaioken()],
- Edit
tsconfig.json. IncompilerOptionsadd the option"jsx": "preserve":
{
  "compilerOptions": {
    "jsx": "preserve",
- Replace
index.htmlwith the following codeblock:
<!doctype html>
<html lang="en">
  <head>
    <meta charset="UTF-8" />
    <link rel="stylesheet" href="/src/styles.css" />
    <meta name="viewport" content="width=device-width, initial-scale=1.0" />
    <title>SheetJS x Tauri</title>
    <script type="module" src="/src/main.ts" defer></script>
  </head>

  <body>
    <div id="container" class="container"></div>
  </body>
</html>
- Add the following lines to
src/styles.css:
.logo {
  padding: 0px;
  height: 64px; width: 64px;
  vertical-align: middle;
}
.logo:hover {
  filter: drop-shadow(0 0 2em #646cffaa);
}
.centre { text-align: center; }
table.center {
  margin-left: auto;
  margin-right: auto;
}
- Replace
src/main.tswith the following codeblock:
import { mount } from "kaioken";
import App from "./App";

const root = document.getElementById("container");
mount(App, root!);
- Download
App.tsxand save tosrc/App.tsx:
curl -o src/App.tsx https://docs.sheetjs.com/tauri/App.tsx
- Build the app with
npm run tauri build
At the end, it will print the path to the generated installer.
If the build fails, see "Troubleshooting" for more details.
- Run the program.
- Linux/MacOS
- Windows
Depending on the version of Tauri, the command may be
./src-tauri/target/release/sheetjstauri
or
./src-tauri/target/release/sheet-js-tauri
or
./src-tauri/target/release/SheetJSTauri
.\src-tauri\target\release\SheetJSTauri.exe
The following features should be manually verified:
- When it is loaded, the app will download https://docs.sheetjs.com/pres.numbers and display the data in a table.
- Clicking "Save Data" will show a save dialog. If there is no filename, type
SheetJSTauri.xlsb. Click "Save". The app will write a file which can be opened in a spreadsheet editor. - Edit the file in a spreadsheet editor, then click "Load Data" and select the edited file. The table will refresh with new contents.
Troubleshooting
In some tests, the build failed with the error message:
Search string not found: "/supportedTSExtensions = .*(?=;)/"
This is a known issue with vue-tsc. The dependency must be upgraded:
npm install vue-tsc@latest
During the last Linux ARM64 test, the build failed to create an AppImage:
Error [tauri-cli-node] failed to bundle project: error running appimage.sh
This is a known Tauri AppImage packaging bug. Since the actual application and
the .deb distributable are created, the error can be ignored.
During the last Linux x64 test, the build failed with the error message:
'openssl/opensslv.h' file not found
OpenSSL must be installed. On Arch Linux and HoloOS (Steam Deck):
sudo pacman -S openssl
In some macOS tests, the build failed with the following error message:
Error failed to bundle project: error running bundle_dmg.sh
The root cause of the error can be discovered by running
npm run tauri build -- --verbose
The most recent test failed with a message:
execution error: Not authorized to send Apple events to Finder
This error was resolved by allowing Terminal to control Finder.
In the "System Settings" app, select "Privacy & Security" in the left column and select "Automation" in the body. Look for "Terminal", expand the section, and enable "Finder".
In some tests, the fonts did not match the screenshots.
The Inter font static TTFs must be manually downloaded and installed.17
Footnotes
-
See "Security" in the Tauri documentation ↩
-
See
FsAllowlistConfigin the Tauri documentation ↩ -
See
DialogAllowlistConfigin the Tauri documentation ↩ -
See
HttpAllowlistConfigin the Tauri documentation ↩ -
See "Utility Functions" ↩
-
See "Prerequisites" in the Tauri documentation ↩
-
Click "Get font" in the Inter Google Fonts listing ↩