Sheets in Photoshop and InDesign
Adobe Creative Suite1 applications, including the Photoshop graphics editor and InDesign desktop publishing software, support JavaScript-based extensions.
SheetJS is a JavaScript library for reading and writing data from spreadsheets.
This demo uses SheetJS in Creative Suite extensions to import data from spreadsheet files and export data to spreadsheets. We'll explore how to use SheetJS scripts in extensions and programmatically interact with documents.
The InDesign demos translate between InDesign tables and workbooks.
This demo explores three different JavaScript platforms supported in various versions of Photoshop and InDesign:
-
"ExtendScript": The ExtendScript platform uses a nonstandard JavaScript dialect. It is the only option in older versions of Creative Suite.
-
"Common Extensibility Platform" (CEP): This was introduced in Creative Suite. App automation uses ExtendScript, but integration logic uses modern JS.
-
"Unified Extensibility Platform" (UXP): This platform supports modern JavaScript but is only supported in recent releases of Photoshop and InDesign.
This demo was verified in the following deployments:
| App | Platform | Date |
|---|---|---|
| Photoshop | ExtendScript | 2025-01-03 |
| InDesign | ExtendScript | 2025-01-03 |
| InDesign | CEP | 2025-01-03 |
| InDesign | UXP | 2025-01-03 |
ExtendScript
The SheetJS ExtendScript build
can be included from a script in the same directory using #include:
#include "xlsx.extendscript.js"
ExtendScript is not performant. Even modest files may cause Adobe apps to crash.
On the SheetJS chat, a user presented a workaround that uses a precompiled command-line tool to process data and pass JSON data back to ExtendScript.
The original conversation is accessible to members of the SheetJS chat server.
Reading Files
The SheetJS readFile2 method can directly accept an absolute URI:
var workbook = XLSX.readFile("~/Documents/test.xlsx");
File.openDialog shows a file picker and returns a path:
/* Show File Picker */
var thisFile = File.openDialog("Select a spreadsheet");
if(!thisFile) { alert("File not found!"); return; }

/* Read file from disk */
var workbook = XLSX.readFile(thisFile.absoluteURI);
Complete Example (click to hide)
- Photoshop
- InDesign
In this example, the script will show a dialog to select a file. After reading
the file, the workbook Author property will be extracted and the Photoshop doc
author (activeDocument.info.author) will be changed accordingly.
-
Download the test workbook.
-
Download the following scripts and move to the scripts directory3:
-
Restart Photoshop.
-
Create a new file using the default settings.
-
In the menu bar, select File > Scripts > parse and select the test workbook
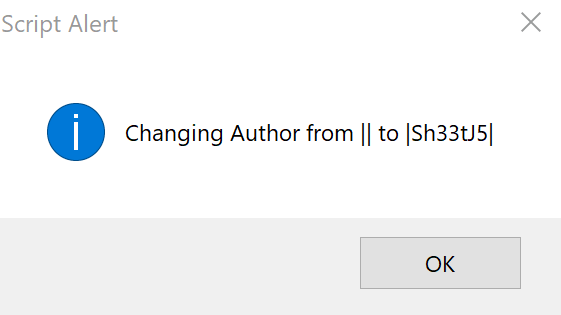
An alert will confirm that the file was read and the author will be changed:
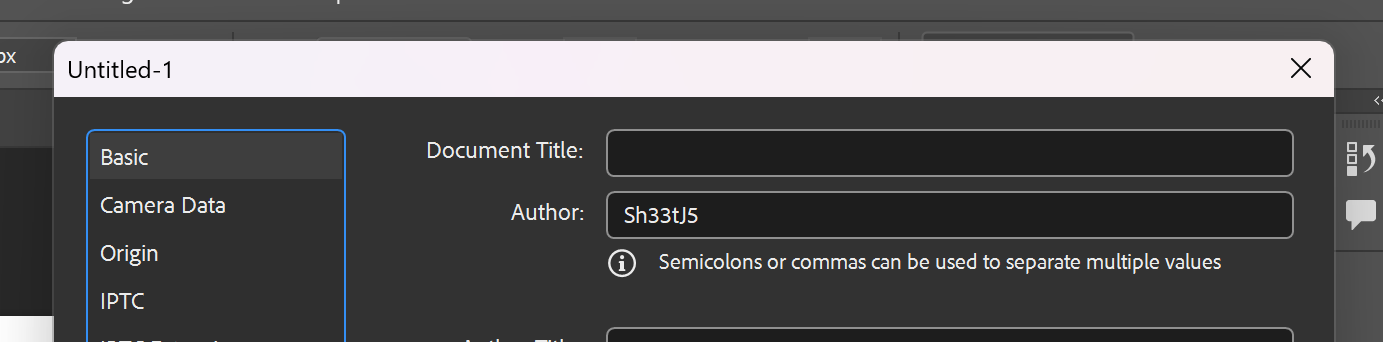
- In the menu bar, select File > File Info… and select "Basic" in the popup.
The text box next to "Author:" will show
Sh33tJ5.
In this example, the script will show a dialog to select a file. After reading the file, the script will store data in the document:
-
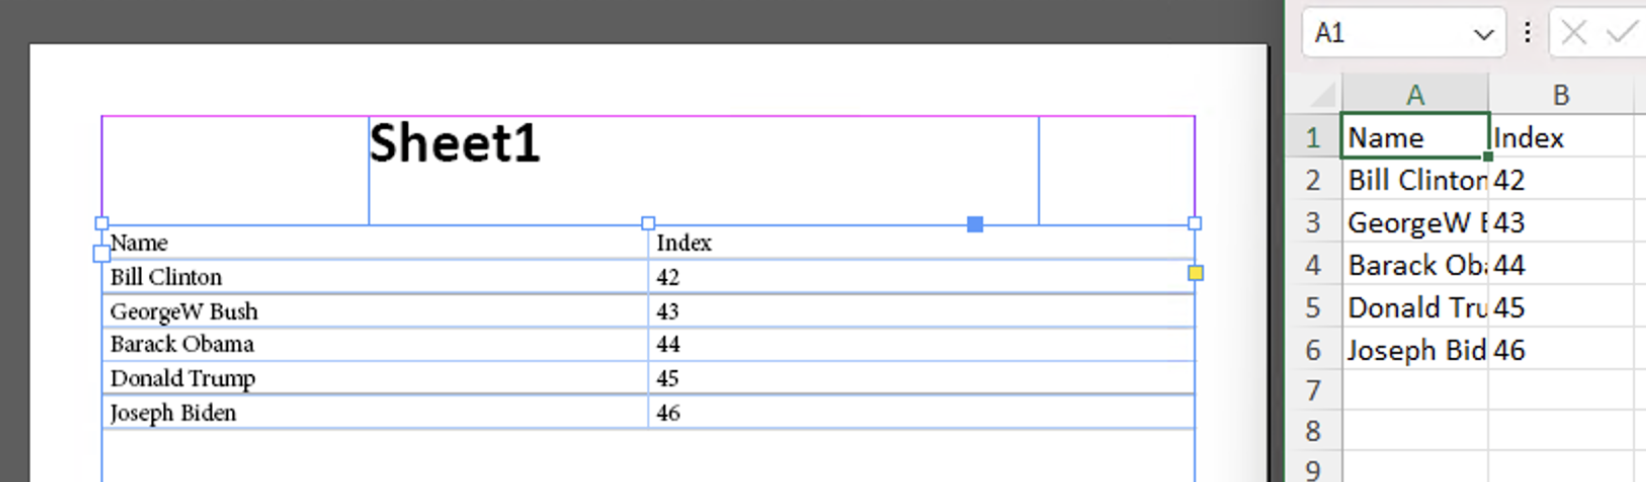
The first Text object in the "Title" TextFrame (the name of the TextFrame in the Layers window is "Title") will be set to the name of the first worksheet.
-
The data from the first sheet will be added to the "Table Frame" TextFrame.
-
Download the
pres.xlsxtest workbook andTemplate.idmlInDesign template -
Download the following scripts and move to the scripts directory3:
-
Open
Template.idmlin InDesign. -
Activate the Scripts panel. Expand the "User" folder and double-click
esidparsein the list. -
In the "Select a spreadsheet" file picker, select the test file
pres.xlsx
A new table will be added and the title will be the name of the first worksheet.
Writing Files
The SheetJS writeFile4 method can directly accept an absolute URI:
XLSX.writeFile(workbook, "~/Documents/test.xlsx");
File.saveDialog shows a save picker and returns a path:
/* Show File Picker */
var thisFile = File.saveDialog("Select an output file", "*.xlsx;*.xls");
if(!thisFile) { alert("File not found!"); return; }

/* Write file to disk */
XLSX.writeFile(workbook, thisFile.absoluteURI);
Complete Example (click to hide)
- Photoshop
- InDesign
In this example, the script will show a dialog to select an output file. Once
selected, the library will create a new workbook with one worksheet. Cell A1
will be "Author" and cell B1 will be the active Photoshop document Author.
The PS author is available as activeDocument.info.author.
- Download the following scripts and move to the scripts directory3:
-
Restart Photoshop.
-
Create a new file using the default settings.
-
In the menu bar, select File > File Info… and add an Author if it is blank.
-
In the menu bar, select File > Scripts > write.
Select the Documents folder, enter the file name SheetJSPSTest.xlsx and
press "Save".
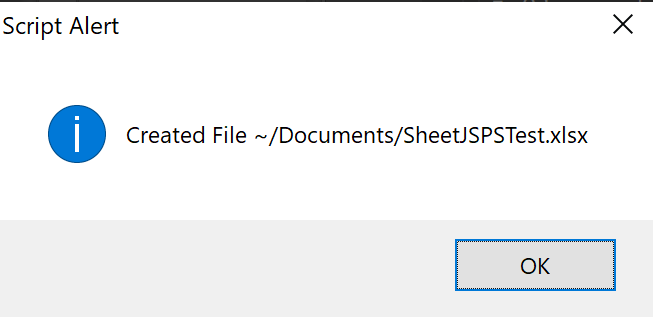
- Click "OK" in the "Created File" alert:
- Open the generated
SheetJSPSTest.xlsxfile.
Cell A1 will be "Author" and cell B1 will match the Photoshop file author.
In this example, the script will show a dialog to select an output file. Once selected, the library will scan all text frames for table objects. Each table object will be scanned and a new worksheet will be created.
-
Download the
Filled.idmldocument -
Download the following scripts and move to the scripts directory3:
-
Open
Filled.idmlin InDesign. -
Activate the Scripts panel. Expand the "User" folder and double-click
esidwritein the list. Use the popup to select the Documents folder. EnterSheetJSIDTest.xlsxand press "Save" -
An alert will confirm that the file was created. Open
SheetJSIDTest.xlsxand compare to the InDesign doc.
CEP
The SheetJS Standalone scripts can be added to CEP extension HTML. It should be downloaded from the CDN and included in the extension.
For performing file operations in CEP extensions, NodeJS is not required! The
manifest must include the following flags to enable cep.fs:
<CEFCommandLine>
  <Parameter>--allow-file-access</Parameter>
  <Parameter>--allow-file-access-from-files</Parameter>
</CEFCommandLine>
Unsigned Extensions
With newer versions of Creative Cloud apps, a special player debug mode must be enabled to use unsigned extensions. The command depends on the CEP version.
InDesign and Photoshop 2024 use CEP 11. In the examples, the 11 should be
replaced with the appropriate CEP version number.
On Windows, within the registry key HKEY_CURRENT_USER\SOFTWARE\Adobe\CSXS.11,
a string value named PlayerDebugMode must be set to 1. This can be set in
PowerShell using the reg command:
reg add HKCU\SOFTWARE\Adobe\CSXS.11 /v PlayerDebugMode /t REG_SZ /d 1 /f
On macOS, the setting must be added to com.adobe.CSXS.11.plist . After writing
to the property list, cfprefsd must be restarted:
defaults write com.adobe.CSXS.11.plist PlayerDebugMode 1
killall cfprefsd
Reading Files
The second argument to cep.fs.readFile is an encoding. cep.encoding.Base64
instructs the method to return a Base64-encoded string.
The SheetJS read method5, with the option type: "base64"6, can parse
Base64 strings and return SheetJS workbook objects.
The typical flow is to read data from CEP and pass the data into the host ExtendScript context. The following snippet parses a workbook:
/* show file picker (single file, no folders) */
const fn = cep.fs.showOpenDialogEx(false, false, "Select File", "", ["xlsx"]);
/* read data as Base64 string */
const data = cep.fs.readFile(fn.data[0], cep.encoding.Base64);
/* parse with SheetJS */
const wb = XLSX.read(data.data, { type: "base64" });
Complete Example (click to hide)
- InDesign
-
Download
com.sheetjs.data.zipand extract to acom.sheetjs.datasubdirectory. -
Move the entire
com.sheetjs.datafolder to the CEP extensions folder7.
If prompted, give administrator privileges.
-
Download and open
Template.idml -
Download the test workbook
-
Show the extension (in the menu bar, select Window > Extensions > SheetJS)
If the extension panel is blank, unsigned extensions must be enabled. See the "Unsigned Extensions" note for more details.
- In the extension panel, click "Import from file" and select
pres.xlsx
After "success" popup, the first worksheet should be written to the document.
Writing Files
The SheetJS write method8, with the option type: "base64"9, can
generate spreadsheet files encoded as Base64 strings.
The third argument to cep.fs.writeFile is an encoding. cep.encoding.Base64
instructs the method to interpret the data as a Base64-encoded string.
The typical flow is to invoke a function with CSInterface#evalScript that
returns data from the host ExtendScript context. The callback should build the
workbook and initiate a file save. The following snippet exports to XLSX:
/* generate XLSX as base64 string */
const b64 = XLSX.write(wb, {type:"base64", bookType: "xlsx"})
/* show file picker */
const fn = cep.fs.showSaveDialogEx("Save File","",["xlsx"],"SheetJSIDCEP.xlsx");
/* write file */
cep.fs.writeFile(fn.data, b64, cep.encoding.Base64);
Complete Example (click to hide)
- InDesign
-
Download
com.sheetjs.data.zipand extract to acom.sheetjs.datasubdirectory. -
Move the entire
com.sheetjs.datafolder to the CEP extensions folder7:
If prompted, give administrator privileges.
-
Download and open
Filled.idml -
Show the extension (in the menu bar, select Window > Extensions > SheetJS)
If the extension panel is blank, unsigned extensions must be enabled. See the "Unsigned Extensions" note for more details.
-
In the extension panel, click "Export to XLSX" and "Save" in the dialog.
-
A popup will display the path to the generated file (
SheetJSIDCEP.xlsxin the Documents folder). Open the new file.
UXP
UXP uses scripts with .psjs (PS) or .idjs (InDesign) file extensions.
The SheetJS Standalone scripts
can be loaded directly in UXP scripts with require:
/* assuming xlsx.full.min.js is in the same folder as the idjs / psjs script */
const XLSX = require("./xlsx.full.min.js");
Filesystem access is provided by the UXP storage module:
const UXP = require("uxp");
const storage = UXP.storage, ufs = storage.localFileSystem;
Reading Files
The getFileForOpening method resolves to a File object. Reading the file
with the binary format returns an ArrayBuffer object that can be parsed
with the SheetJS read method5:
/* show file picker (single file, no folders) */
const file = await ufs.getFileForOpening({ types: ["xlsx", "xls", "xlsb"] });
/* read data into an ArrayBuffer */
const ab = await file.read({ format: storage.formats.binary });
/* parse with SheetJS */
const wb = XLSX.read(ab);
Complete Example (click to hide)
- InDesign
-
Open the "Scripts Panel" folder3.
-
Download the following scripts:
Move them to the Scripts Panel folder.
-
Download and open
Template.idml -
Download the test workbook
-
In the Scripts Panel, double-click "parse". Select the downloaded
pres.xlsxin the file picker.
If the InDesign version does not support UXP, a tooltip shows a message:
This file is not executable by any supported script language.
ExtendScript should be used when UXP is not supported.
Writing Files
The SheetJS write method8, with the option type: "buffer"9, returns
file data stored in a Uint8Array.
The getFileForSaving method resolves to a File object. The write method
accepts an options argument. If the data: storage.formats.binary option is
set, the method will correctly interpret Uint8Array data.
The following snippet exports to XLSX:
/* generate XLSX with type: "buffer" */
const buf = XLSX.write(wb, { type: "buffer", bookType: "xlsx" });
/* show file picker */
const file = await ufs.getFileForSaving("SheetJSUXP.xlsx");
/* write data */
await file.write(buf, { data: storage.formats.binary });
Complete Example (click to hide)
- InDesign
-
Open the "Scripts Panel" folder3.
-
Download the following scripts:
Move them to the Scripts Panel folder.
-
Download and open
Filled.idml -
In the Scripts Panel, double-click "Write". Click "Save" in the dialog.
-
When the process finishes, open
SheetJSUXP.xlsxand verify the contents.
Miscellany
Scripts Panel
The scripts panel folder is used for ExtendScript and UXP scripts. The location can be revealed from the relevant applications.
InDesign
-
Activate Scripts panel (Windows > Utilities > Scripts)
-
In the new panel window, select the User folder
-
Click
☰and select "Reveal in Explorer" or "Reveal in Finder".
A new Explorer (Windows) or Finder (macOS) window will open the folder.
Some versions of InDesign will open the parent "Scripts" folder. If there is a "Scripts Panel" subdirectory, that folder should be used.
Photoshop
The scripts folder is located in \Presets\Scripts within the app folder.
For example, on Windows, the Photoshop 2025 scripts folder is typically
c:\Program Files\Adobe\Adobe Photoshop 2025\Presets\Scripts
CEP Extensions
CEP extension scripts are typically stored in a system-wide folder:
| OS | Folder |
|---|---|
| Windows | C:\Program Files (x86)\Common Files\Adobe\CEP\extensions\ |
| Macintosh | /Library/Application\ Support/Adobe/CEP/extensions |
Administrator privileges are usually required for writing to the folder.
Footnotes
-
Historically, Adobe applications were separate entities. Eventually they were bundled in a package called "Creative Suite". It was rebranded to "Creative Cloud" later. As ExtendScript was introduced during the Creative Suite era, this page will use the phrase "Creative Suite". ↩
-
See "CEP Extensions" ↩ ↩2