Amazon Web Services
Amazon Web Services (AWS) is a cloud services platform which includes traditional virtual machine support, "Serverless Functions" and cloud storage.
SheetJS is a JavaScript library for reading and writing data from spreadsheets.
This demo explores two key AWS offerings:
-
"Lambda Functions" ("Lambda") explores the serverless computing offering. The demo creates a JavaScript function that can process user-submitted files and generate spreadsheets.
-
"S3 Storage" explores the cloud storage ("S3") offering. The demo uses the NodeJS connection library to read spreadsheets from S3 and write spreadsheets to a S3 bucket.
AWS iterates quickly and there is no guarantee that the referenced services will be available in the future.
This demo was last tested on 2025-04-21.
Lambda Functions
AWS offers NodeJS runtimes for running JavaScript serverless functions.1
The SheetJS NodeJS module can be
required in Lambda functions. When deploying, the entire node_modules folder
can be added to the ZIP package.
In this demo, the "Function URL" (automatic API Gateway management) features are used. Older deployments required special "Binary Media Types" to handle formats like XLSX. At the time of testing, the configuration was not required.
Node.js runtime can use x86_64 or arm64 CPU architectures. SheetJS libraries
work on both platforms in Linux, Windows, and macOS operating systems.
Reading Data
In the Lambda handler, the event.body attribute is a Base64-encoded string
representing the HTTP request form data. This body must be parsed.
Processing Form Bodies
The busboy body parser2 is battle-tested in NodeJS deployments.
busboy fires a 'file' event for every file in the form body. The callback
receives a NodeJS stream that should be collected into a Buffer:
/* accumulate the files manually */
var files = {};
bb.on('file', function(fieldname, file, filename) {
  /* concatenate the individual data buffers */
  var buffers = [];
  file.on('data', function(data) { buffers.push(data); });
  file.on('end', function() { files[fieldname] = Buffer.concat(buffers); });
});
busboy fires a 'finish' event when the body parsing is finished. Callbacks
can assume every file in the form body has been stored in NodeJS Buffer objects.
Processing NodeJS Buffers
The SheetJS read method3 can read the Buffer objects and generate SheetJS
workbook objects4 which can be processed with other API functions.
For example, a handler can use sheet_to_csv5 to generate CSV text:
/* on the finish event, all of the fields and files are ready */
bb.on('finish', function() {
  /* grab the first file */
  var f = files["upload"];
  if(!f) callback(new Error("Must submit a file for processing!"));

  /* f[0] is a buffer */
  var wb = XLSX.read(f[0]);

  /* grab first worksheet and convert to CSV */
  var ws = wb.Sheets[wb.SheetNames[0]];
  callback(null, { statusCode: 200, body: XLSX.utils.sheet_to_csv(ws) });
});
Complete Code Sample (click to show)
This example takes the first uploaded file submitted with the key upload,
parses the file and returns the CSV content of the first worksheet.
const XLSX = require('xlsx');
var Busboy = require('busboy');

exports.handler = function(event, context, callback) {
  /* set up busboy */
  var ctype = event.headers['Content-Type']||event.headers['content-type'];
  var bb = Busboy({headers:{'content-type':ctype}});

  /* busboy is evented; accumulate the fields and files manually */
  var fields = {}, files = {};
  bb.on('error', function(err) { callback(null, { body: err.message }); });
  bb.on('field', function(fieldname, val) {fields[fieldname] = val });
  bb.on('file', function(fieldname, file, filename) {
    /* concatenate the individual data buffers */
    var buffers = [];
    file.on('data', function(data) { buffers.push(data); });
    file.on('end', function() { files[fieldname] = [Buffer.concat(buffers), filename]; });
  });

  /* on the finish event, all of the fields and files are ready */
  bb.on('finish', function() {
    /* grab the first file */
    var f = files["upload"];
    if(!f) callback(new Error("Must submit a file for processing!"));

    /* f[0] is a buffer */
    var wb = XLSX.read(f[0]);

    /* grab first worksheet and convert to CSV */
    var ws = wb.Sheets[wb.SheetNames[0]];
    callback(null, { statusCode: 200, body: XLSX.utils.sheet_to_csv(ws) });
  });

  /* start the processing */
  bb.end(Buffer.from(event.body, "base64"));
};
Writing Data
For safely transmitting binary data, Base64 strings should be used.
The SheetJS write method6 with the option type: "base64" will generate
Base64-encoded strings.
/* sample SheetJS workbook object */
var wb = XLSX.read("S,h,e,e,t,J,S\n5,4,3,3,7,9,5", {type: "binary"});
/* write to XLSX file in Base64 encoding */
var b64 = XLSX.write(wb, { type: "base64", bookType: "xlsx" });
The Lambda callback response function accepts options. Setting isBase64Encoded
to true will ensure the callback handler decodes the data. To ensure browsers
will try to download the response, the Content-Disposition header must be set:
callback(null, {
  statusCode: 200,
  /* Base64-encoded file */
  isBase64Encoded: true,
  body: b64,
  headers: {
    /* Browsers will treat the response as the file SheetJSLambda.xlsx */
    "Content-Disposition": 'attachment; filename="SheetJSLambda.xlsx"'
  }
});
Complete Code Sample (click to show)
This example creates a sample workbook object and sends the file in the response:
var XLSX = require('xlsx');

exports.handler = function(event, context, callback) {
  /* make workbook */
  var wb = XLSX.read("S,h,e,e,t,J,S\n5,4,3,3,7,9,5", {type: "binary"});
  /* write to XLSX file in Base64 encoding */
  var body = XLSX.write(wb, { type: "base64", bookType: "xlsx" });
  /* mark as attached file */
  var headers = { "Content-Disposition": 'attachment; filename="SheetJSLambda.xlsx"'};
  /* Send back data */
  callback(null, {
    statusCode: 200,
    isBase64Encoded: true,
    body: body,
    headers: headers
  });
};
Lambda Demo
At the time of writing, the AWS Free Tier included an allowance of 1 million free requests per month and 400 thousand GB-seconds of compute resources.
- Create a new AWS free tier account7 or sign into an existing AWS account.
Create Project ZIP
- Create a new project folder:
mkdir -p SheetJSLambda
cd SheetJSLambda
- Download
index.js:
curl -LO https://docs.sheetjs.com/aws/index.js
- Install the SheetJS NodeJS module and
busboydependency:
mkdir -p node_modules
npm i --save https://cdn.sheetjs.com/xlsx-0.20.3/xlsx-0.20.3.tgz busboy
- Create a .zip package of the contents of the folder:
zip ../SheetJSLambda.zip -r .
Lambda Setup
-
Sign into the AWS Management Console with a root user account.
-
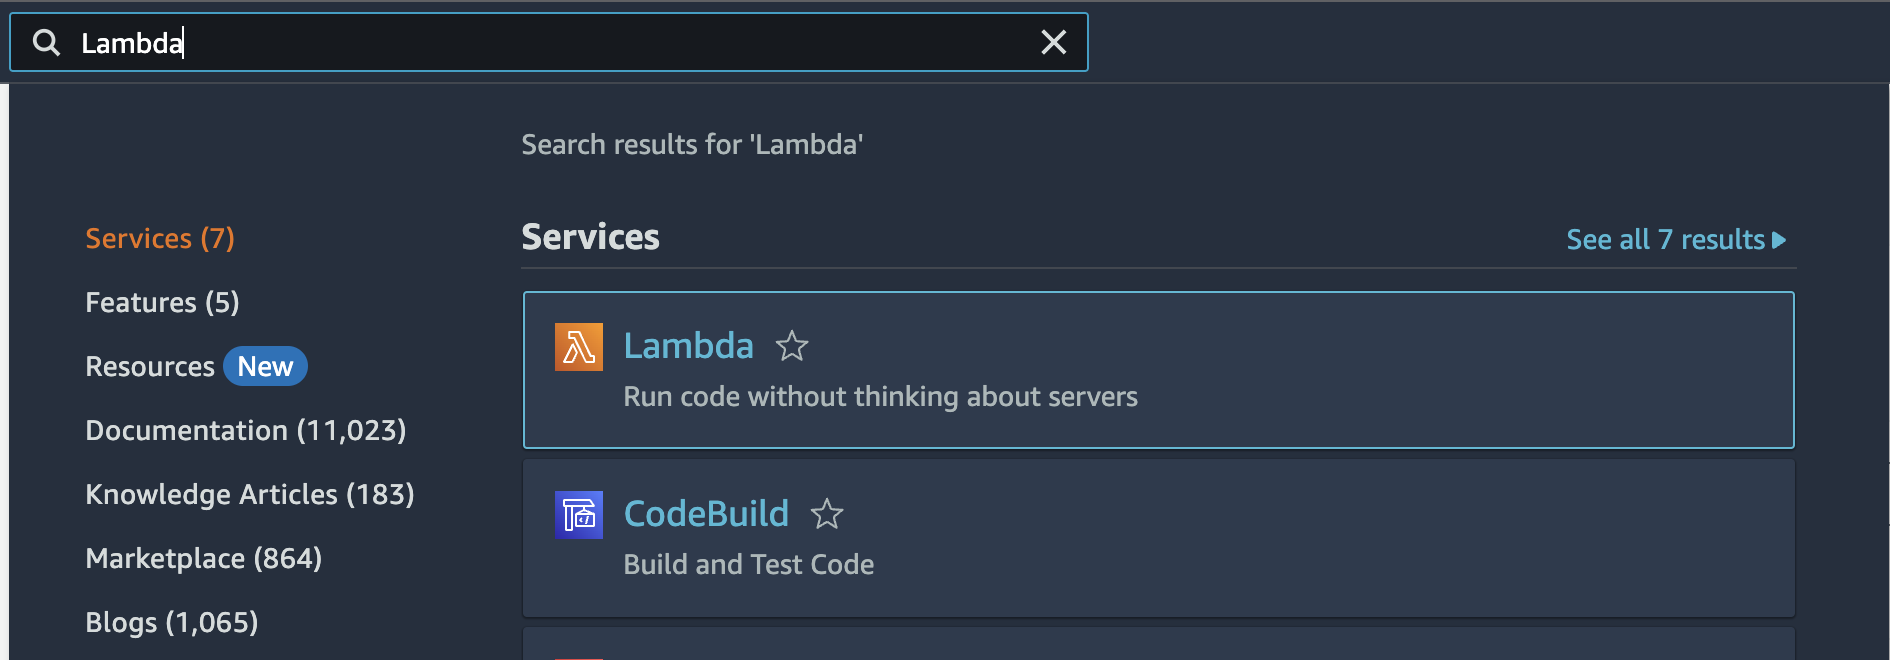
Type "Lambda" in the top search box and click Lambda (under Services).
- Open "Functions" in the left sidebar.
If the left sidebar is not open, click the ≡ icon in the left edge of the page.
-
Click the "Create function" button in the main panel.
-
Select the following options:
-
In the top list, select "Author from scratch" (default choice)
-
Type a memorable "Function Name" ("SheetJSLambda" when last tested)
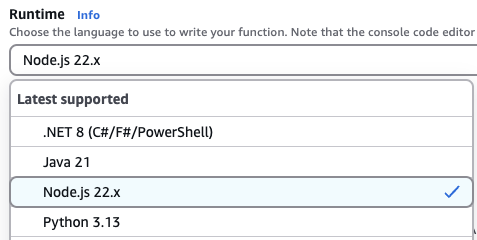
-
In the "Runtime" dropdown, look for the "Latest supported" section and select "Node.js" ("Node.js 22.x" when last tested)
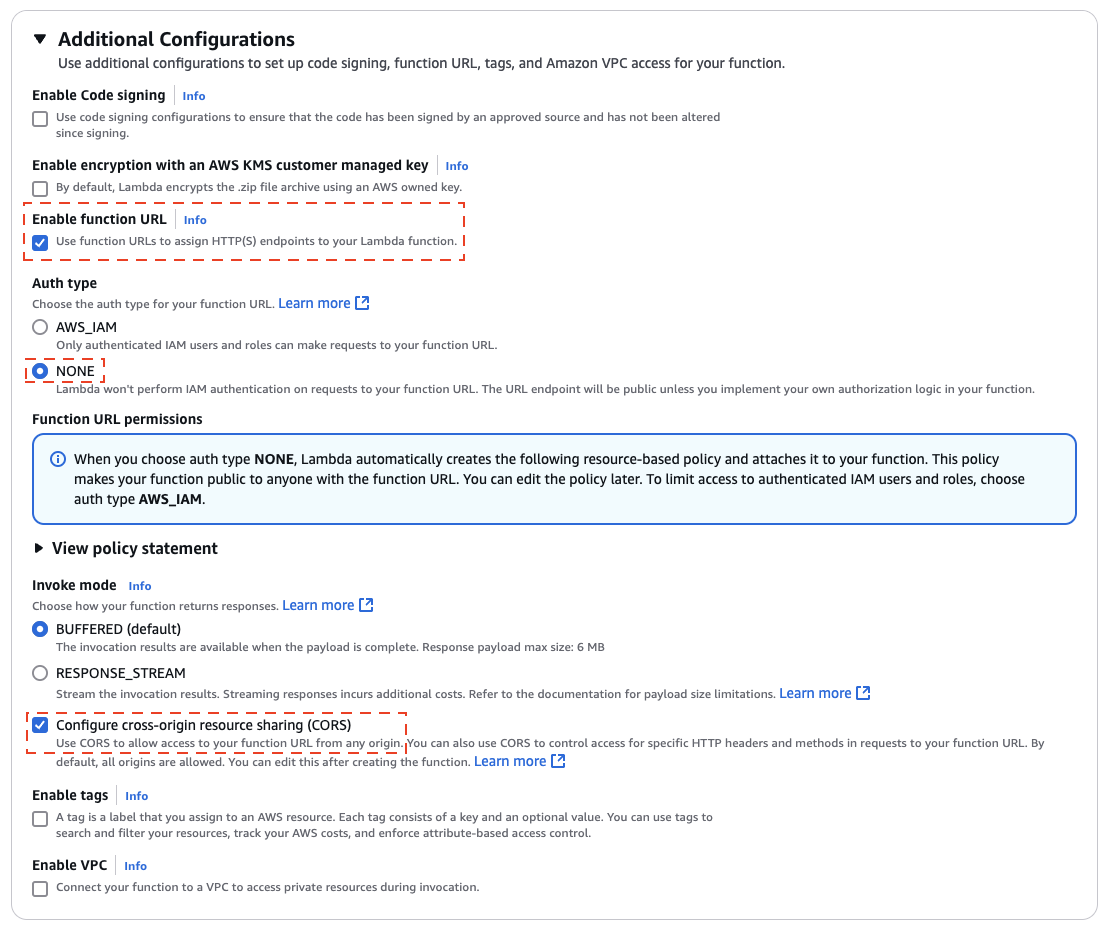
- Expand "Additional Configurations" and check "Enable function URL". The page
will show additional sub-options:
- "Auth type" select "NONE" (disable IAM authentication)
- Check "Configure cross-origin resource sharing (CORS)"
- Click "Create function" to create the function.
Upload Code
-
In the Interface, scroll down and select the "Code" tab.
-
Click the "Upload from" dropdown and select ".zip file".

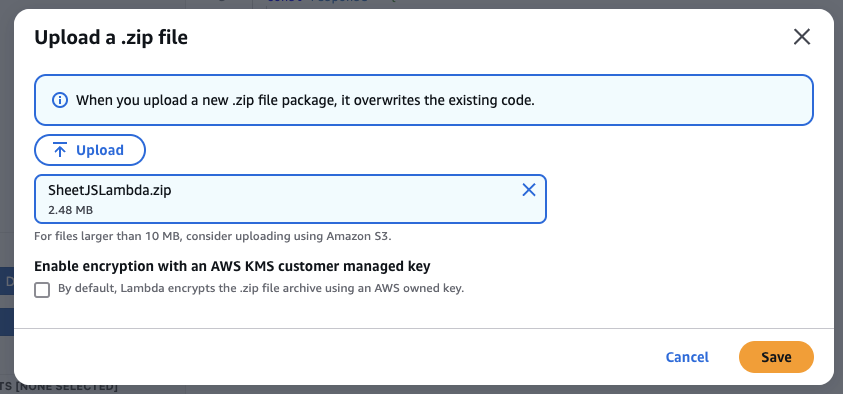
- Click the "Upload" button in the modal. With the file picker, select the
SheetJSLambda.zipfile created in step 3. Click "Save".
When the demo was last tested, the ZIP was small enough that the Lambda code editor loaded the package.
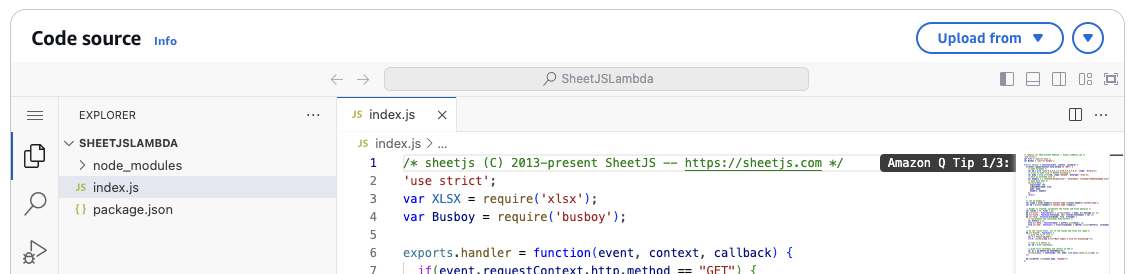
- In the code editor, double-click
index.jsand confirm the code editor displays JavaScript code.
External Access
-
Click "Configuration" in the tab list.
-
In the sidebar below the tab list, select "Function URL" and click "Edit".
-
Set the "Auth type" to "NONE" and click Save. The page will redirect to the Function properties.
-
Select the "Configuration" tab and select "Permissions" in the left sidebar.
-
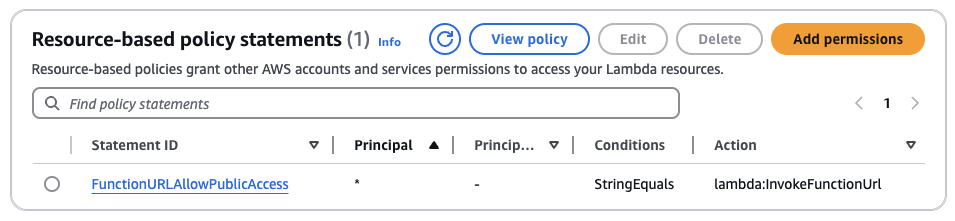
Scroll down to "Resource-based policy statements" and ensure that
FunctionURLAllowPublicAccessis listed.
If no policy statements are defined, select "Add Permission" with the options:
- Select "Function URL" at the top
- Auth type: NONE
- Ensure that Statement ID is set to
FunctionURLAllowPublicAccess - Ensure that Principal is set to
* - Ensure that Action is set to
lambda:InvokeFunctionUrl
Click "Save" and a new Policy statement should be created. The corresponding row should match the details in the following screenshot:
Lambda Testing
-
Find the Function URL (It is in the "Function Overview" section).
-
Try to access the function URL in a web browser.
The site will attempt to download SheetJSLambda.xlsx. Save and open the file
to confirm it is valid.
- Download https://docs.sheetjs.com/pres.numbers and make a POST request to the public function URL.
This can be tested on the command line. Change FUNCTION_URL in the commands:
curl -LO https://docs.sheetjs.com/pres.numbers
curl -X POST -F "[email protected]" FUNCTION_URL
The terminal will display CSV output of the first sheet.
S3 Storage
The main NodeJS module for S3 and all AWS services is aws-sdk8.
The SheetJS NodeJS module can be required in NodeJS scripts.
Connecting to S3
The aws-sdk module exports a function S3 that performs the connection. The
function expects an options object that includes an API version and credentials.
Access keys for an IAM user9 must be used:
/* credentials */
var accessKeyId = "...", secretAccessKey = "..."";

/* file location */
var Bucket = "...", Key = "pres.numbers";

/* connect to s3 account */
var AWS = require('aws-sdk');
var s3 = new AWS.S3({
  apiVersion: '2006-03-01',
  credentials: { accessKeyId, secretAccessKey }
});
Downloading Data
Fetching Files from S3
The s3#getObject method returns an object with a createReadStream method.
createReadStream returns a NodeJS stream:
/* open stream to the file */
var stream = s3.getObject({ Bucket: Bucket, Key: Key }).createReadStream();
Concatenating NodeJS Streams
Buffers can be concatenated from the stream into one unified Buffer object:
/* array of buffers */
var bufs = [];
/* add each data chunk to the array */
stream.on('data', function(data) { bufs.push(data); });
/* the callback will be called after all of the data is collected */
stream.on('end', function() {
  /* concatenate */
  var buf = Buffer.concat(bufs);

  /* AT THIS POINT, `buf` is a NodeJS Buffer */
});
Parsing NodeJS Buffers
The SheetJS read method10 can read the final object and generate SheetJS
workbook objects11 which can be processed with other API functions.
For example, a callback can use sheet_to_csv12 to generate CSV text:
stream.on('end', function() {
  /* concatenate */
  var buf = Buffer.concat(bufs);

  /* parse */
  var wb = XLSX.read(Buffer.concat(bufs));

  /* generate CSV from first worksheet */
  var first_ws = wb.Sheets[wb.SheetNames[0]];
  var csv = XLSX.utils.sheet_to_csv(first_ws);
  console.log(csv);
});
Uploading Data
The SheetJS write method13 with the option type: "buffer" will generate
NodeJS Buffers. S3#upload directly accepts these Buffer objects.
This example creates a sample workbook object, generates XLSX file data in a NodeJS Buffer, and uploads the data to S3:
/* generate sample workbook */
var wb = XLSX.read("S,h,e,e,t,J,S\n5,4,3,3,7,9,5", {type: "binary"});

/* write to XLSX file in a NodeJS Buffer */
var Body = XLSX.write(wb, {type: "buffer", bookType: "xlsx"});

/* upload buffer */
s3.upload({ Bucket, Key, Body }, function(err, data) {
  if(err) throw err;
  console.log("Uploaded to " + data.Location);
});
S3 Demo
At the time of writing, the AWS Free Tier included 5GB of S3 storage with 20,000 Get requests and 2000 Put requests per month.
This sample fetches a buffer from S3 and parses the workbook.
- If you do not have an account, create a new AWS free tier account14.
Create S3 Bucket
-
Sign into the AWS Management Console with a root user account.
-
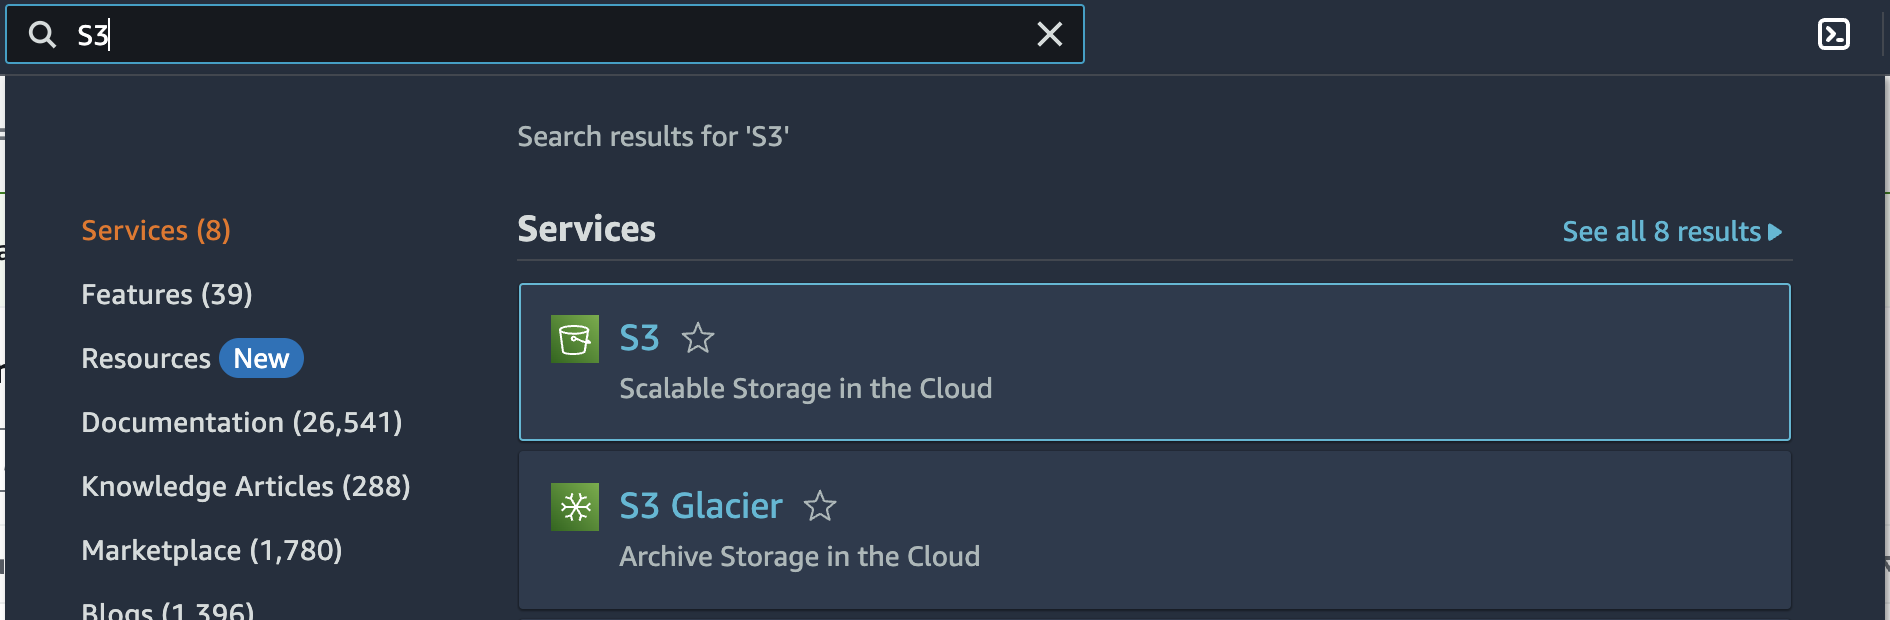
Type "S3" in the top search box and click S3 (under Services).
- Open "General purpose buckets" in the left sidebar.
If the left sidebar is not open, click the ≡ icon in the left edge of the page.
-
Click the "Create bucket" button in the main panel.
-
Select the following options:
-
Bucket Type: "General purpose" (default)
-
Type a memorable "Bucket Name" ("sheetjsbuckit" when last tested)
-
In the "Object Ownership" section, select "ACLs disabled"
-
Check "Block all public access"
-
Look for the "Bucket Versioning" section and select "Disable"
- Click "Create bucket" to create the bucket.
Create IAM User
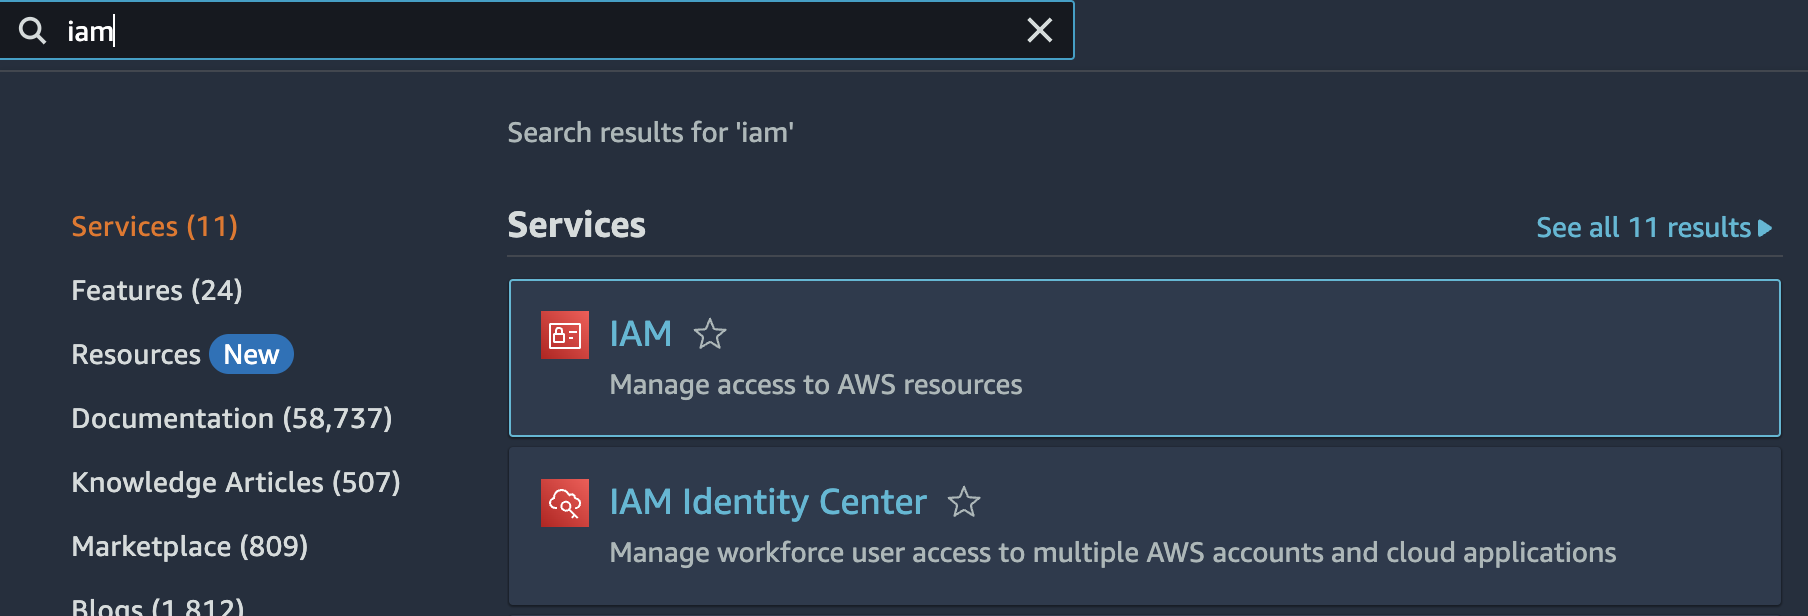
- Type "IAM" in the top search box and click IAM (under Services).
- Open "Users" in the left sidebar.
If the left sidebar is not open, click the ≡ icon in the left edge of the page.
-
Click the "Create user" button in the main panel.
-
In step 1, type a memorable "Bucket Name" ("sheetjs-user" when last tested). Click "Next".
-
In step 2, click "Next"
-
In step 3, click "Create user" to create the user.
Add Permissions
-
Click the new user name in the Users table.
-
Select the "Permissions" tab
-
Click the "Add permissions" dropdown and select "Add permissions".
-
Select "Attach policies directly".
-
In the "Permissions policies" section, search for "AmazonS3FullAccess". There should be one entry.
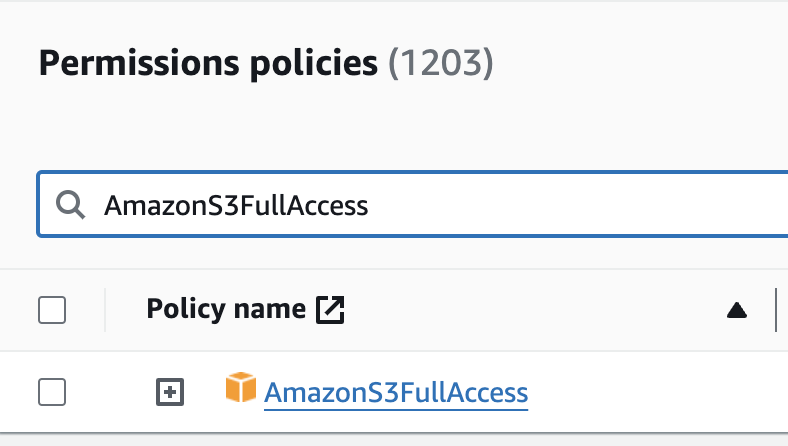
-
Check the checkbox next to "AmazonS3FullAccess" and click the "Next" button.
-
In the "Review" screen, click "Add permissions"
Generate Keys
-
Click "Security credentials", then scroll down to the "Access keys" section and click "Create access key".
-
Select the "Local code" option. Check "I understand the above recommendation and want to proceed to create an access key." and click "Next"
-
Click "Create Access Key" and click "Download .csv file" in the next screen.
In the generated CSV:
- Cell A2 is the "Access key ID" (
accessKeyIdin the AWS API) - Cell B2 is the "Secret access key" (
secretAccessKeyin the AWS API)
Set up Project
- Create a new NodeJS project:
mkdir SheetJSS3
cd SheetJSS3
npm init -y
- Install dependencies:
mkdir -p node_modules
npm i --save https://cdn.sheetjs.com/xlsx-0.20.3/xlsx-0.20.3.tgz [email protected]
Write Test
This sample creates a simple workbook, generates a NodeJS buffer, and uploads the buffer to S3.
   | A | B | C | D | E | F | G |
---+---|---|---|---|---|---|---|
 1 | S | h | e | e | t | J | S |
 2 | 5 | 4 | 3 | 3 | 7 | 9 | 5 |
- Save the following script to
SheetJSWriteToS3.js:
var XLSX = require("xlsx");
var AWS = require('aws-sdk');

/* replace these constants */
var accessKeyId = "<REPLACE WITH ACCESS KEY ID>";
var secretAccessKey = "<REPLACE WITH SECRET ACCESS KEY>";
var Bucket = "<REPLACE WITH BUCKET NAME>";

var Key = "test.xlsx";

/* Create a simple workbook and write XLSX to buffer */
var ws = XLSX.utils.aoa_to_sheet(["SheetJS".split(""), [5,4,3,3,7,9,5]]);
var wb = XLSX.utils.book_new(); XLSX.utils.book_append_sheet(wb, ws, "Sheet1");
var Body = XLSX.write(wb, {type: "buffer", bookType: "xlsx"});

/* upload buffer */
var s3 = new AWS.S3({
  apiVersion: '2006-03-01',
  credentials: {
    accessKeyId: accessKeyId,
    secretAccessKey: secretAccessKey
  }
});
s3.upload({ Bucket: Bucket, Key: Key, Body: Body }, function(err, data) {
  if(err) throw err;
  console.log("Uploaded to " + data.Location);
});
- Edit
SheetJSWriteToS3.jsand replace the highlighted lines:
accessKeyId: access key for the AWS accountsecretAccessKey: secret access key for the AWS accountBucket: name of the bucket
The keys are found in the CSV from step 22. The Bucket is the name from step 5.
- Run the script:
node SheetJSWriteToS3.js
This file will be stored with the object name test.xlsx. It can be manually
downloaded from the S3 web interface.
Read Test
This sample will download and process the test file from "Write Test".
- Save the following script to
SheetJSReadFromS3.js:
var XLSX = require("xlsx");
var AWS = require('aws-sdk');

/* replace these constants */
var accessKeyId = "<REPLACE WITH ACCESS KEY ID>";
var secretAccessKey = "<REPLACE WITH SECRET ACCESS KEY>";
var Bucket = "<REPLACE WITH BUCKET NAME>";

var Key = "test.xlsx";

/* Get stream */
var s3 = new AWS.S3({
  apiVersion: '2006-03-01',
  credentials: {
    accessKeyId: accessKeyId,
    secretAccessKey: secretAccessKey
  }
});
var f = s3.getObject({ Bucket: Bucket, Key: Key }).createReadStream();

/* collect data */
var bufs = [];
f.on('data', function(data) { bufs.push(data); });
f.on('end', function() {
  /* concatenate and parse */
  var wb = XLSX.read(Buffer.concat(bufs));
  console.log(XLSX.utils.sheet_to_csv(wb.Sheets[wb.SheetNames[0]]));
});
- Edit
SheetJSReadFromS3.jsand replace the highlighted lines:
accessKeyId: access key for the AWS accountsecretAccessKey: secret access key for the AWS accountBucket: name of the bucket
The keys are found in the CSV from Step 22. The Bucket is the name from Step 5.
- Run the script:
node SheetJSReadFromS3.js
The program will display the data in CSV format.
S,h,e,e,t,J,S
5,4,3,3,7,9,5
Footnotes
-
See "Building Lambda functions with Node.js" in the AWS documentation ↩
-
The
busboymodule is distributed on the public NPM registry ↩ -
See "Workbook Object" in "SheetJS Data Model" for more details. ↩
-
Registering for a free account on the AWS Free Tier requires a valid phone number and a valid credit card. ↩
-
The
aws-sdkmodule is distributed on the public NPM registry ↩ -
See "Managing access keys for IAM users" in the AWS documentation ↩
-
See "Workbook Object" in "SheetJS Data Model" for more details. ↩
-
Registering for a free account on the AWS Free Tier requires a valid phone number and a valid credit card. ↩