Azure Cloud Services
Azure Cloud Services is a cloud services platform which includes traditional virtual machine support, "Serverless Functions" and cloud storage.
SheetJS is a JavaScript library for reading and writing data from spreadsheets.
This demo explores two key Azure offerings:
-
"Azure Functions" ("Lambda") explores the serverless computing offering. The demo creates a JavaScript function that can process user-submitted files and generate spreadsheets.
-
"Blob Storage" explores the cloud storage offering. The demo uses the NodeJS connection library to read spreadsheets from storage and write spreadsheets back to cloud storage.
Azure iterates quickly and there is no guarantee that the referenced services will be available in the future.
This demo was last tested on 2025-05-11.
Telemetry
Each command-line tool related to Azure embeds telemetry.
Azure tools embed telemetry without proper disclaimer.
It is strongly recommended to disable telemetry before working with Azure.
Azure Functions Core Tools
Azure Functions Core Tools (func) telemetry is controlled through the
FUNCTIONS_CORE_TOOLS_TELEMETRY_OPTOUT environment variable.
- Linux/MacOS
- Windows
Add the following line to .profile, .bash_profile, .bashrc, .zprofile,
.zshrc, and any other configuration files:
export FUNCTIONS_CORE_TOOLS_TELEMETRY_OPTOUT=1
Close and restart the Terminal to load the changes.
Type env in the search bar and select "Edit the system environment variables".
In the new window, click the "Environment Variables..." button.
In the new window, look for the "System variables" section and click "New..."
Set the "Variable name" to FUNCTIONS_CORE_TOOLS_TELEMETRY_OPTOUT and the value
to 1.
Click "OK" in each window (3 windows) and restart your computer.
Azure CLI
Azure CLI (az) telemetry can be disabled using a subcommand (after installing
the CLI tool)1:
az configure -d collect_telemetry=false
Azure Functions
The SheetJS NodeJS module can be required in Azure Functions that use the NodeJS runtime.
This discussion focuses on the "HTTP Trigger" function type.
In earlier tests, to enable binary data processing, function.json required a
dataType option:
{
  "bindings": [
    {
      "type": "httpTrigger",
      "direction": "in",
      "dataType": "binary",
      "name": "req",
In the most recent test, the template did not create a function.json and the
option was not required.
Reading Data
Using @azure/functions, the handler callback receives a Request object.
Uploaded files can be pulled into ArrayBuffer objects.
Code Snippet (click to show)
This function returns a promise that resolves to an ArrayBuffer object:
const { Blob } = require('buffer');

async function get_file_from_request(request, form_field_name) {
  /* parse the request body */
  const formData = await request.formData();

  /* pull the specified field */
  const file = formData.get(form_field_name);

  /* if a file was submitted, `file` will be a Blob */
  if(!(file instanceof Blob)) throw new Error(`File is missing!`);

  /* pull data into an ArrayBuffer object */
  const ab = await file.arrayBuffer();
  return ab;
}
The SheetJS read method2 can read the ArrayBuffer objects and generate
SheetJS workbook objects3 which can be processed with other API functions.
For example, a handler can use sheet_to_csv4 to generate CSV text from
user-submitted spreadsheets:
const { Blob } = require('buffer');
const { app } = require('@azure/functions');
const XLSX = require('xlsx');

app.http('SheetJSAzure', {
  methods: ['POST'],
  handler: async (req, context) => {
    /* grab the file at form key `upload` */
    const formData = await req.formData();
    const f = formData.get("upload");

    /* if a file was submitted, `f` will be a Blob object */
    if(!(f instanceof Blob)) return { status: 400, body: "Must submit a file" };

    /* parse file */
    const ab = await f.arrayBuffer();
    const wb = XLSX.read(ab);

    /* generate CSV from first sheet */
    const ws = wb.Sheets[wb.SheetNames[0]];
    const csv = XLSX.utils.sheet_to_csv(ws);
    return { status: 200, body: csv };
  }
});
Writing Data
The SheetJS write method5 with the option type: "buffer" will generate
NodeJS buffers which can be sent in the callback handler response.
The following example generates a sample worksheet using the aoa_to_sheet6
method, generates a sample workbook using worksheet helper methods7, writes
the workbook to XLSX format in a Buffer, and sends the Buffer in the response:
const { app } = require('@azure/functions');
const XLSX = require('xlsx');

app.http('SheetJSAzure', {
  methods: ['GET'],
  handler: async (req, context) => {
    /* generate sample worksheet */
    var ws = XLSX.utils.aoa_to_sheet(["SheetJS".split(""), [5, 4, 3, 3, 7, 9, 5]]);
    /* generate workbook */
    var wb = XLSX.utils.book_new(); XLSX.utils.book_append_sheet(wb, ws, "Data");
    /* write to XLSX, returning a NodeJS Buffer */
    var buf = XLSX.write(wb, { type: "buffer", bookType: "xlsx" });
    /* send Buffer to client */
    return {
      status: 200,
      /* Content-Disposition header */
      headers: { "Content-Disposition": `attachment; filename="SheetJSAzure.xlsx";` },
      /* data */
      body: buf
    };
  }
});
Functions Demo
At the time of writing, the Azure Free Tier included an allowance of 1 million free requests per month.
- If you do not have an account, create a new Azure free tier account8.
Local Setup
-
Install the CLI tool using npm:
npm i -g azure-functions-core-tools@4 --unsafe-perm true
On macOS and Linux, sudo may be required:
sudo npm i -g azure-functions-core-tools@4 --unsafe-perm true
- Install Azure CLI
Installation Notes (click to show)
On macOS, azure-cli can be installed from Homebrew:
brew install azure-cli
- Disable Azure CLI telemetry:
az configure -d collect_telemetry=false
Start Project
- Create a new JavaScript HTTP Trigger project:
mkdir SheetJSAzure
cd SheetJSAzure
func new --template httpTrigger --language JavaScript --name SheetJSAzure
If prompted for a worker runtime, select node (Press 3)
If prompted for a language, select javascript (Press 1)
When the demo was last tested, the stock TypeScript template did not work.
This is a bug in the Azure Functions Core Tools
Until the bugs are resolved, JavaScript should be preferred over TypeScript.
- Start the local server:
npm start
The process will display the functions and respective URLs:
Functions:

  SheetJSAzure: [GET,POST] http://localhost:7071/api/SheetJSAzure
    (access this URL)------^^^^^^^^^^^^^^^^^^^^^^^^^^^^^^^^^^^^^^
- While the server is running, open a new terminal window and make a GET request to the URL listed in the previous step:
curl http://localhost:7071/api/SheetJSAzure
The terminal should display Hello, world!
Add SheetJS
- Install the SheetJS NodeJS module:
npm i --save https://cdn.sheetjs.com/xlsx-0.20.3/xlsx-0.20.3.tgz
- Download the sample script:
curl -L -o src/functions/SheetJSAzure.js https://docs.sheetjs.com/azure/index.js
Local Test
- Stop and restart the dev server:
npm start
- In a new terminal window, download https://docs.sheetjs.com/pres.numbers and make a POST request to the dev server:
curl -o pres.numbers https://docs.sheetjs.com/pres.numbers
curl -X POST -F "[email protected]" http://localhost:7071/api/SheetJSAzure
If the test succeeded, the terminal will print CSV rows from the test file data.
- Open a web browser and access
http://localhost:7071/api/SheetJSAzure.
If the test succeeded, the browser will attempt to download SheetJSAzure.xlsx.
Open in Excel or another spreadsheet editor to confirm the file is valid.
Create Remote Function
-
Sign into the Azure Portal
-
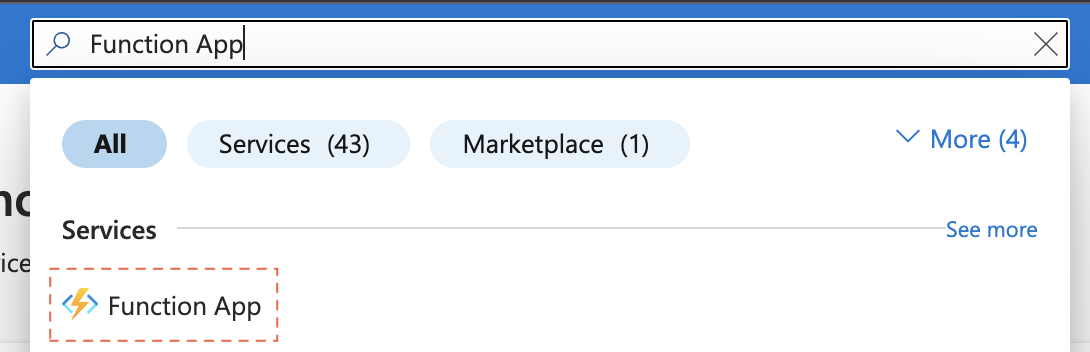
Type "Function App" in the top search box and click "Function App":
-
Click "+ Create"
-
In the "Create Function App" screen, click "Consumption" and click "Select".
-
In the next screen, select the following options:
-
Look for the "Function App name" input field and type a memorable function name. When this demo was last tested, the name "sheetjsazure" was chosen.
-
"Operating System": "Windows"
-
"Runtime stack": select
Node.js
- Click "Review + create", then click "Create" to create the function.
The page will redirect to a new page. It will display a status message:
... Deployment is in progress
When the resources are configured, the status will change to
Your deployment is complete
- Click "Go to Resource".
Deploy to Azure
- Sign into Azure from the command line:
az login
The login flow resumes in the browser.
- Deploy to Azure. Replace
FUNCTION_NAMEwith the name from Step 17:
func azure functionapp publish FUNCTION_NAME
After publishing, the process will print the "Invoke url":
Functions in sheetjsazure:
    SheetJSAzure - [httpTrigger]
        Invoke url: https://sheetjsazure.azurewebsites.net/api/sheetjsazure
Take note of that URL.
When this demo was last tested using the "Linux" operating system, the command failed with a support error:
Azure Functions Core Tools does not support this deployment path. Please configure the app to deploy from a remote package using the steps here: https://aka.ms/deployfromurl
This is a limitation of the Azure CLI tool with Linux functions!
Ensure that the selected operating system is "Windows".
SheetJS libraries run in Linux-based functions.
Remote Test
- In a new terminal window, download https://docs.sheetjs.com/pres.numbers and
make a POST request to the production server. Replace
FUNCTION_URLwith the Invoke URL from Step 21:
curl -o pres.numbers https://docs.sheetjs.com/pres.numbers
curl -X POST -F "[email protected]" FUNCTION_URL
If the test succeeded, the terminal will print CSV rows from the test file data.
- Open a web browser and access the Invoke URL from Step 21.
If the test succeeded, the browser will attempt to download SheetJSAzure.xlsx.
Open in Excel or another spreadsheet editor to confirm the file is valid.
Blob Storage
The main module for Azure Blob Storage is @azure/storage-blob. This example
was tested using the "Connection String" authentication method. The strings
are found in the Azure Portal under "Access Keys" for the storage account.
Downloading Data
The BlobClient#download method returns a Stream. After collecting into a
Buffer, the SheetJS read method9 can parse the data into a workbook10.
The following demo uses the sheet_to_csv11 utility function to display the
contents of a file in Azure Blob Storage:
import { BlobServiceClient } from "@azure/storage-blob";
import { read, utils } from "xlsx";

/* replace these constants */
const connStr = "<REPLACE WITH CONNECTION STRING>";
const containerName = "<REPLACE WITH CONTAINER NAME>";

/* Blob name */
const blobName = "SheetJSBloblobber.xlsx";

/* get a readable stream*/
const blobServiceClient = BlobServiceClient.fromConnectionString(connStr);
const containerClient = blobServiceClient.getContainerClient(containerName);
const blobClient = containerClient.getBlobClient(blobName);
const response = (await blobClient.download()).readableStreamBody;

/* collect data into a Buffer */
const bufs = [];
for await(const buf of response) bufs.push(buf);
const downloaded = Buffer.concat(bufs);

/* parse downloaded buffer */
const wb = read(downloaded);
/* print first worksheet */
console.log(utils.sheet_to_csv(wb.Sheets[wb.SheetNames[0]]));
Uploading Data
The SheetJS write method12 with the option type: "buffer" will generate
NodeJS buffers which can be uploaded with BlockBlobClient#upload.
The following example generates a sample worksheet using the aoa_to_sheet13
method, generates a sample workbook using worksheet helper methods14, writes
the workbook to XLSX format in a Buffer, and sends the Buffer in the response:
import { BlobServiceClient } from "@azure/storage-blob";
import { write, utils } from "xlsx";

/* replace these constants */
const connStr = "<REPLACE WITH CONNECTION STRING>";
const containerName = "<REPLACE WITH CONTAINER NAME>";

/* Blob name */
const blobName = "SheetJSBloblobber.xlsx";

/* Create a simple workbook and write XLSX to buffer */
const ws = utils.aoa_to_sheet(["SheetJS".split(""), [5,4,3,3,7,9,5]]);
const wb = utils.book_new(); utils.book_append_sheet(wb, ws, "Sheet1");
const buf = write(wb, {type: "buffer", bookType: "xlsx"});

/* upload buffer */
const blobServiceClient = BlobServiceClient.fromConnectionString(connStr);
const containerClient = blobServiceClient.getContainerClient(containerName);
const blockBlobClient = containerClient.getBlockBlobClient(blobName);
const uploadBlobResponse = await blockBlobClient.upload(buf, buf.length);
Blob Demo
At the time of writing, new Azure accounts were granted a 12-month trial of Blob Storage. The trial includes 5GB of "Locally-redundant storage" with 20,000 read requests and 2000 write requests per month.
- If you do not have an account, create a new Azure free tier account15.
Storage Account Setup
-
Sign into the Azure Portal
-
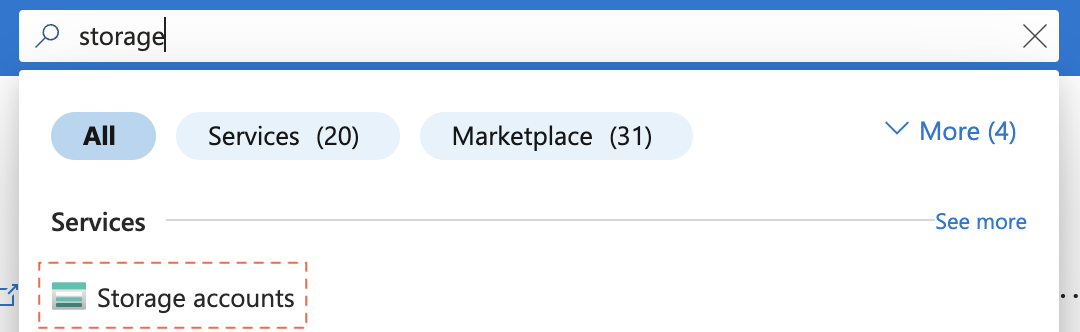
Type "Storage" in the top search box and click "Storage accounts":
-
Click "+ Create"
-
Select the following options:
-
Type a memorable "Storage account name" ("sheetjstorage" when last tested)
-
"Redundancy": select LRS (Locally-redundant storage)
- Click "Review + create", then click "Create" to create the storage.
The page will redirect to a new page. It will display a status message:
... Deployment is in progress
When the resources are configured, the status will change to
Your deployment is complete
- Click "Go to Resource".
Access Keys
-
Click "Access keys" in the left sidebar (under "Security + networking").
-
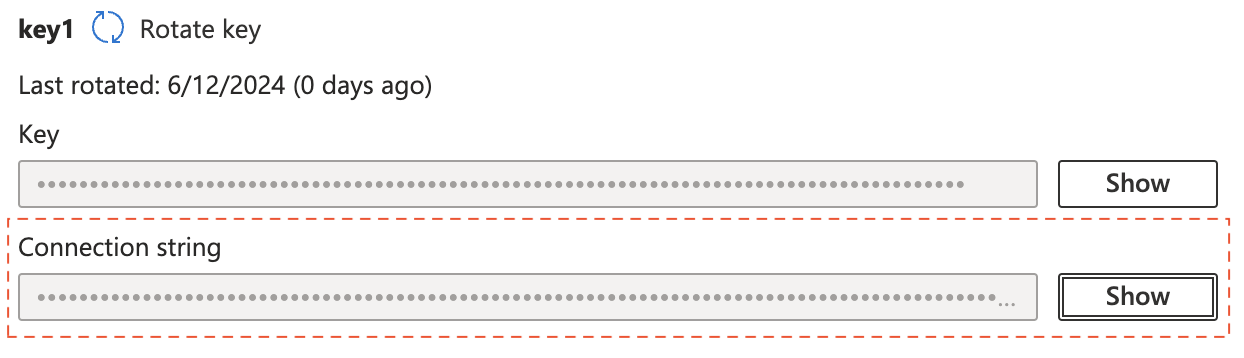
Look for the "Connection string" title under "key1". In the row below the title, click "Show" to reveal the key. Click the copy icon or manually copy the key, storing it in a safe place.
Container Setup
-
Click "Containers" in the left sidebar (under "Data storage").
-
Click "+ Container"
-
Select the following options:
- Type a memorable "Name" ("sheetjs-container" when last tested)
- Click "Create" to create the container.
Project Setup
- Create a new project folder:
mkdir SheetJSBlob
cd SheetJSBlob
npm init -y
- Install dependencies:
npm i --save https://cdn.sheetjs.com/xlsx-0.20.3/xlsx-0.20.3.tgz @azure/storage-blob
- Save the following codeblock to
SheetJSReadFromAzure.mjs:
import { BlobServiceClient } from "@azure/storage-blob";
import { read, utils } from "xlsx";

/* replace these constants */
const connStr = "<REPLACE WITH CONNECTION STRING>";
const containerName = "<REPLACE WITH CONTAINER NAME>";

/* Blob name */
const blobName = "SheetJSBloblobber.xlsx";

/* get a readable stream*/
const blobServiceClient = BlobServiceClient.fromConnectionString(connStr);
const containerClient = blobServiceClient.getContainerClient(containerName);
const blobClient = containerClient.getBlobClient(blobName);
const response = (await blobClient.download()).readableStreamBody;

/* collect data into a Buffer */
const bufs = [];
for await(const buf of response) bufs.push(buf);
const downloaded = Buffer.concat(bufs);

/* parse downloaded buffer */
const wb = read(downloaded);
/* print first worksheet */
console.log(utils.sheet_to_csv(wb.Sheets[wb.SheetNames[0]]));
- Save the following codeblock to
SheetJSWriteToAzure.mjs:
import { BlobServiceClient } from "@azure/storage-blob";
import { write, utils } from "xlsx";

/* replace these constants */
const connStr = "<REPLACE WITH CONNECTION STRING>";
const containerName = "<REPLACE WITH CONTAINER NAME>";

/* Blob name */
const blobName = "SheetJSBloblobber.xlsx";

/* Create a simple workbook and write XLSX to buffer */
const ws = utils.aoa_to_sheet(["SheetJS".split(""), [5,4,3,3,7,9,5]]);
const wb = utils.book_new(); utils.book_append_sheet(wb, ws, "Sheet1");
const buf = write(wb, {type: "buffer", bookType: "xlsx"});

/* upload buffer */
const blobServiceClient = BlobServiceClient.fromConnectionString(connStr);
const containerClient = blobServiceClient.getContainerClient(containerName);
const blockBlobClient = containerClient.getBlockBlobClient(blobName);
const uploadBlobResponse = await blockBlobClient.upload(buf, buf.length);
- Edit both
SheetJSReadFromAzure.mjsandSheetJSWriteToAzure.mjs:
- Replace the
connStrvalue with the connection string from Step 8 - Replace the
containerNamevalue with the container name from Step 11
Test
The write demo creates a simple workbook, generates a NodeJS buffer, and uploads
the buffer to a file named SheetJSBloblobber.xlsx on Azure Blob Storage.
The read demo fetches SheetJSBloblobber.xlsx and displays the data.
   | A | B | C | D | E | F | G |
---+---|---|---|---|---|---|---|
 1 | S | h | e | e | t | J | S |
 2 | 5 | 4 | 3 | 3 | 7 | 9 | 5 |
- Run the write test:
node SheetJSWriteToAzure.mjs
This will write the file SheetJSBloblobber.xlsx to the container.
- Run the read test:
node SheetJSReadFromAzure.mjs
It will fetch the file created in the previous step and display CSV rows.
S,h,e,e,t,J,S
5,4,3,3,7,9,5
-
Sign into the Azure Portal
-
Type "Storage" in the top search box and click "Storage accounts"
-
Click on the name of the storage
-
In the left sidebar, click "Containers". It will be under "Data storage".
-
Click on the name of the container in the table
-
Verify that the table shows
SheetJSBloblobber.xlsx:

-
Click on the name
SheetJSBloblobber.xlsx. -
Click "Download" in the row below the file name:

The downloaded file is the raw file stored in Azure Blob Storage. To confirm it is valid, open the file in Excel or another spreadsheet editor.
Footnotes
-
The platform-specific installers are available at https://learn.microsoft.com/en-us/cli/azure/install-azure-cli ↩
-
See "Workbook Object" in "SheetJS Data Model" for more details. ↩
-
See "Workbook Helpers" in "Utilities" for details on
book_newandbook_append_sheet. ↩ -
Registering for a free account on the Azure Free Tier requires a valid phone number and a valid credit card. ↩
-
See "Workbook Object" in "SheetJS Data Model" for more details. ↩
-
See "Workbook Helpers" in "Utilities" for details on
book_newandbook_append_sheet. ↩ -
Registering for a free account on the Azure Free Tier requires a valid phone number and a valid credit card. ↩