Salesforce LWC
Salesforce is a suite of cloud-based software systems for Customer Relationship Management (CRM). "Lightning Web Components" (LWC) is a robust JavaScript extension platform available to Salesforce apps1.
SheetJS is a JavaScript library for reading and writing data from spreadsheets.
This demo explores the LWC scripting features in Salesforce. We'll explore how to install SheetJS scripts in Lightning Web Components and build a sample app for exporting lists to XLSX workbooks.
Salesforce may change the platform in backwards-incompatible ways, so the demo may require some adjustments. The official documentation should be consulted.
This demo was tested in the following deployments:
| Lightning API | Date |
|---|---|
62.0 | 2025-05-27 |
The Salesforce developer tools embed telemetry. It can be disabled by setting
the environment variable SF_DISABLE_TELEMETRY to true or running a command:
npx @salesforce/cli config set disable-telemetry=true --global
Integration Details
Lightning Web Components can load scripts stored in static resources.
Installation
The SheetJS Standalone scripts can be downloaded and added as a static resource.
Due to Salesforce name restrictions, the script must be renamed to sheetjs.js.
There are known performance regressions with the new Lightning Web Security. SheetJS users have reported that sub-second exports using the older Lightning Locker Service will take over 20 seconds using the new system.
This is a bug in Salesforce Lightning Web Security!
Until Salesforce fixes the bug, it is strongly recommended to disable the broken "Lightning Web Security" and use the battle-tested "Lightning Locker Service":
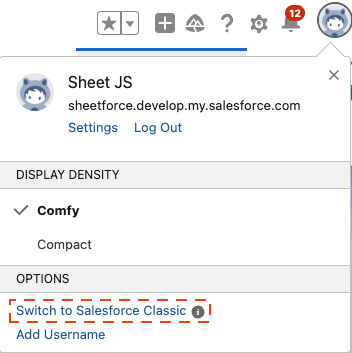
- Switch to the Salesforce Classic view.
If a profile icon appears in the top-right corner of the Salesforce page, click on the icon and select "Switch to Salesforce Classic" in the popover menu:
-
Click the "Setup" link in the right side of the top bar.
-
In the "Quick Find" box, type "Session" and select "Session Settings".
-
Scroll down to "Lightning Web Security" and uncheck the box next to
Use Lightning Web Security for Lightning web components and Aura components

- Scroll down to the bottom of the page and click "Save".
Loading SheetJS
Assuming the script was renamed to sheetjs.js, the name of the resource will
be sheetjs. async functions can use loadScript to fetch and load the
library. The script will define the variable XLSX2
It is recommended to load the library in a callback. For example, the following
@api method loads the library and exports sample data to a spreadsheet file:
import { LightningElement, api } from 'lwc';
import { loadScript } from 'lightning/platformResourceLoader';
import sheetjs from '@salesforce/resourceUrl/sheetjs';

export default class SheetComponent extends LightningElement {
  @api async download() {
    await loadScript(this, sheetjs); // load the library
    // At this point, the library is accessible with the `XLSX` variable

    /* Create worksheet */
    var ws = XLSX.utils.aoa_to_sheet([
      [ "S", "h", "e", "e", "t", "J"," S" ],
      [  5 ,  4 ,  3 ,  3 ,  7 ,  9 ,  5  ]
    ]);

    /* Create workbook and add worksheet */
    var wb = XLSX.utils.book_new();
    XLSX.utils.book_append_sheet(wb, ws, "Data");

    /* Export data and attempt to download a XLSX workbook */
    XLSX.writeFile(wb, "SheetForceExport.xlsx");
  }
}
Exporting Data from SF List
Using the LWC Wire Service, components receive data in separate events.3 Event handlers typically store the updated data in component state, ensuring the data is available when a spreadsheet export is requested.
Getting Account Data
This demo uses the deprecated getListUi function4 to pull account data.
getListUi requires the name of the LWC object (objectApiName property) and
name of the LWC list view (listViewApiName property)
The following snippet receives data from the "All Accounts" list view:
import { LightningElement, wire } from 'lwc';
import { getListUi } from 'lightning/uiListApi';
import ACCOUNT_OBJECT from '@salesforce/schema/Account';

// ...

export default class SheetComponent extends LightningElement {
  @wire(getListUi, {
    objectApiName: ACCOUNT_OBJECT.objectApiName,
    listViewApiName: 'AllAccounts'
  }) listInfo({ error, data }) {

    // LIST DATA AVAILABLE HERE

  };
  // ...
}
Array of Arrays
SheetJS most reliably translates "arrays of arrays"5, a nested array which directly maps to individual cell addresses.
For example, using the Accounts list, each row represents one account. Each column represents the account name, phone number, or another field.
var aoa = [
  ["Name",         "Phone"],           // row 1 -- column titles
  ["Mike Jones",   "(281) 330-8004"],  // row 2 -- first data row
  ["Jenny Sheets", "(201) 867-5309"]   // row 3 -- second data row
];
The APIs typically return nested objects, so the array of arrays must be manually constructed by iterating over the data.
The "Export Tutorial" covers JavaScript array methods and transformation in more detail.
Salesforce Representation (click to show)
The data parameter in the callback has a deep structure. Typically one would
set a property in the component and display data in a template:
  // ...
  // declare records variable in the component
  records;
  @wire(getListUi, {
    objectApiName: ACCOUNT_OBJECT.objectApiName,
    listViewApiName: 'AllAccounts'
  }) listInfo({ error, data }) {
    if (data) {
      // data.records.records is the array of interest
      this.records = data.records.records;
      this.error = undefined;
    }
  }
  // ...
The template itself would iterate across the records:
<template>
  <template if:true={records}>
    <table>
      <tr><th>Name</th><th>Phone</th></tr>
      <template for:each={records} for:item="record">
        <tr key={record.fields.Id.value}>
          <td>{record.fields.Name.value}</td>
          <td>{record.fields.Phone.value}</td>
        </tr>
      </template>
    </table>
  </template>
</template>
A suitable SheetJS array of arrays can be constructed by mapping across records:
      var headers = [ "Name", "Phone" ]; // First row of the spreadsheet
      var aoa = [headers].concat(data.records.records.map(record => [
        record.fields.Name.value,  // Name field
        record.fields.Phone.value, // Phone field
      ]));
State
This data is available in a wire service callback, but it is common to export the data in a separate API event. This flow is handled with a state variable:
export default class SheetComponent extends LightningElement {
  aoa; // will hold data for export
  @wire(getListUi, {
    objectApiName: ACCOUNT_OBJECT.objectApiName,
    listViewApiName: 'AllAccounts'
  }) listInfo({ error, data }) {
    if (data) {
      var headers = [ "Name", "Phone" ];
      // create AOA
      var _aoa = [headers].concat(data.records.records.map(record => [
        record.fields.Name.value,  // Name field
        record.fields.Phone.value, // Phone field
      ]));

      // assign to state
      this.aoa = _aoa;
    } else if (error) console.log(error);
  };
}
Exporting Data
Data is readily exported to a spreadsheet in a callback function. Starting from
the array of arrays, the SheetJS aoa_to_sheet method6 generates a SheetJS
sheet object7. A workbook object8 is created with book_new9 and the
sheet is added with book_append_sheet10. Finally, the SheetJS writeFile
method creates a XLSX file and initiates a download11.
  @api async download() {
    await loadScript(this, sheetjs); // load the library
    // get data from state
    var _aoa = this.aoa;

    // create workbook
    var wb = XLSX.utils.book_new();
    var ws = XLSX.utils.aoa_to_sheet(_aoa);
    XLSX.utils.book_append_sheet(wb, ws, "Data");

    // export
    XLSX.writeFile(wb, "SheetForceExport.xlsx");
  };
Complete Example
This demo was built on a "Developer Edition" account. At the time of writing, an account can be created for free.
- Create a "Developer Edition" account. Take note of the unique Username
Configure Tools
-
Install NodeJS LTS.
-
Disable telemetry:
npx @salesforce/cli config set disable-telemetry=true --global
- Confirm the CLI tool works by checking version information:
npx @salesforce/cli --version
When the demo was last tested, the command printed
@salesforce/cli/2.89.8 win32-x64 node-v24.1.0
- Log into the org from the CLI tool:
npx @salesforce/cli org login web
This will open a web browser. Sign in and authorize the application.
Create Project
- Create the "SheetForce" sample project with the
project generatecommand:
npx @salesforce/cli project generate -n SheetForce
Enter the project directory:
cd SheetForce
- Create a LWC component with the
lightning generate componentcommand:
npx @salesforce/cli lightning generate component --type lwc -n sheetComponent -d force-app/main/default/lwc
- Replace
force-app\main\default\lwc\sheetComponent\sheetComponent.htmlwith the following template code:
<template>
  <b>SheetForce demo</b>
</template>
- Replace
force-app\main\default\lwc\sheetComponent\sheetComponent.js-meta.xmlwith the following XML:
<?xml version="1.0" encoding="UTF-8"?>
<LightningComponentBundle xmlns="http://soap.sforce.com/2006/04/metadata">
  <apiVersion>62.0</apiVersion>
  <isExposed>true</isExposed>
  <masterLabel>SheetForce</masterLabel>
  <description>SheetJS Demo</description>
  <targets>
    <target>lightning__AppPage</target>
  </targets>
</LightningComponentBundle>
Deploy Sample Project
- Deploy the project from the CLI. You will need the Salesforce unique
Username. For example, if the Username was
[email protected], the command is:
npx @salesforce/cli project deploy start -d force-app -o SF@USER.NAME
- Find the new component:
- Lightning Experience
- Classic
To find the new component in "Lightning Experience" view:
A) In the Salesforce site, click on the gear icon in the top-right corner of the page and select "Setup" (Setup for current app).
B) Type "Custom Code" in the left sidebar search box. Expand "Custom Code", expand "Lightning Components" and click the inner "Lightning Components".
With certain security settings, Salesforce will show an error:
We can't display this page because your browser blocks cross-domain cookies, but you can view this page in Salesforce Classic.
Click the link to open the page in Salesforce Classic.
A) Click the "Setup" link in the top-right corner of the page.
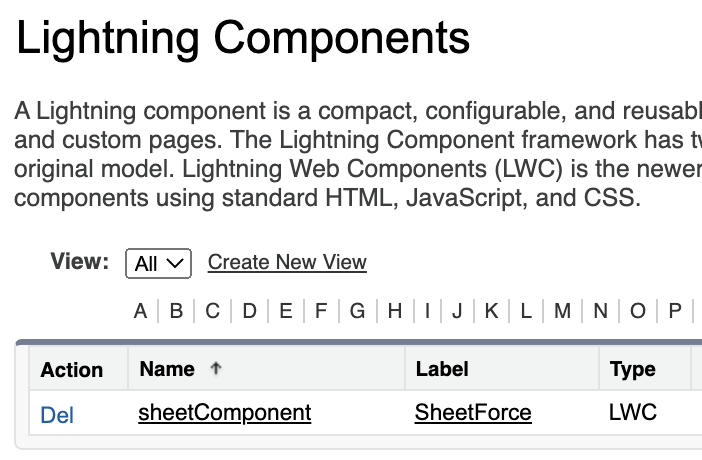
B) Type "Custom Code" in the left sidebar search box. In the section, expand "Lightning Components" and click the inner "Lightning Components".
The page in Salesforce Classic will look like the screenshot below:
Initialize App Page
Create App Page
- Create an "App Page" in the "Lightning App Builder":
- Lightning Experience
- Classic
A) In the Salesforce site, click on the gear icon in the top-right corner of the page and select "Setup" (Setup for current app).
B) Type "App Build" in the left sidebar search box. Expand "User Interface" and click "Lightning App Builder".
With certain security settings, Salesforce will show an error:
We can't display this page because your browser blocks cross-domain cookies, but you can view this page in Salesforce Classic.
Click the link to open the page in Salesforce Classic.
C) Click the "New" button.
A) Click the "Setup" link in the top-right corner of the page.
B) Type "App Build" in the left search box and select "Lightning App Builder".
C) Click the "New" button.
App Wizard
D) Select "App Page" in the left list and click "Next"
E) Type "SheetJS Demo" in the Label textbox and click "Next"
F) Select "One Region" in the left list and click "Done"
App Builder
- Add the "SheetForce" component to the App Page.
In the left "Components" sidebar, under the "Custom" section, there should be a "SheetForce" entry.
Click and drag "SheetForce" into the "Add Component(s) Here" frame in the app builder main view to add it to the page.
Click "Save".
- Activate the page.
When the "Page Saved" modal is displayed, click "Activate".
The following options should be set:
- Click "Change..." next to "Icon" and pick a memorable icon
- Under "Lightning Experience" select "LightningBolt" in the left column and click "Add page to app" in the right side
Click "Save" to activate the page.
- Open the demo page.
Click the left arrow in the top-left corner of the page to return to Setup.
If there is a "Switch to Lightning Experience" at the top, click the link.
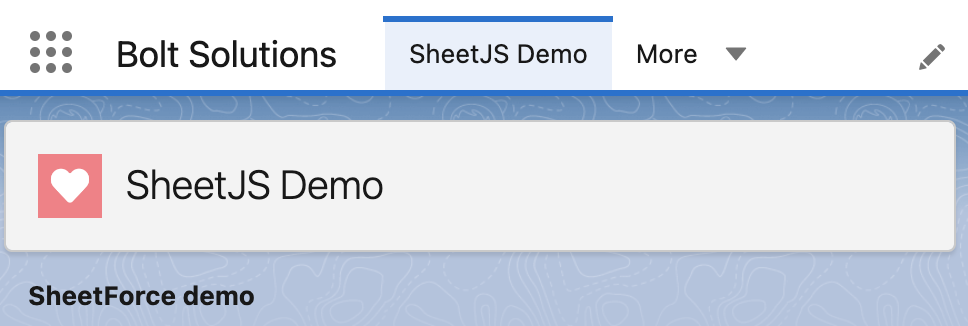
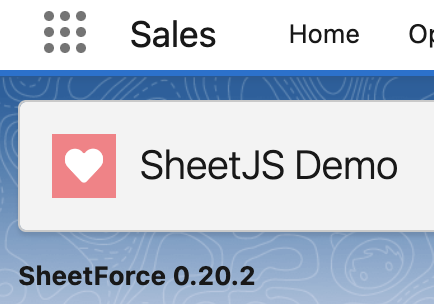
Click the App Launcher (᎒᎒᎒) and search for "SheetJS". Under "Items", the new
"SheetJS Demo" will be listed, Click "SheetJS Demo".
The app will display the "SheetForce demo" text from the component template:
Add SheetJS
DO NOT "COPY AND PASTE"! The file should be explicitly downloaded. Copying and pasting corrupts the source code and the component will fail in subtle ways.
The easiest approach is to right-click the link and select "Save Link As..."
The following command can be run in PowerShell or bash:
curl -o xlsx.full.min.js https://cdn.sheetjs.com/xlsx-0.20.3/package/dist/xlsx.full.min.js
- Move the file to the
force-app/main/default/staticresources/folder and rename the file tosheetjs.js.
If the file was downloaded from the previous command, mv can move and rename:
mv xlsx.full.min.js force-app/main/default/staticresources/sheetjs.js
- Create
force-app/main/default/staticresources/sheetjs.resource-meta.xml(sheetjs.resource-meta.xmlin the folder from step 2) with the following XML:
<?xml version="1.0" encoding="UTF-8"?>
<StaticResource xmlns="http://soap.sforce.com/2006/04/metadata">
  <cacheControl>Private</cacheControl>
  <contentType>application/javascript</contentType>
</StaticResource>
- Deploy the project again with the same command from step 9:
npx @salesforce/cli project deploy start -d force-app -o SF@USER.NAME
Replace [email protected] with the unique Username.
- Look for the static resource:
- Lightning Experience
- Classic
A) In the Salesforce site, click on the gear icon in the top-right corner of the page and select "Setup" (Setup for current app).
B) Type "Static" in the left sidebar search box. Click "Static Resources"
With certain security settings, Salesforce will show an error:
We can't display this page because your browser blocks cross-domain cookies, but you can view this page in Salesforce Classic.
Click the link to open the page in Salesforce Classic.
A) Click the "Setup" link in the top-right corner of the page.
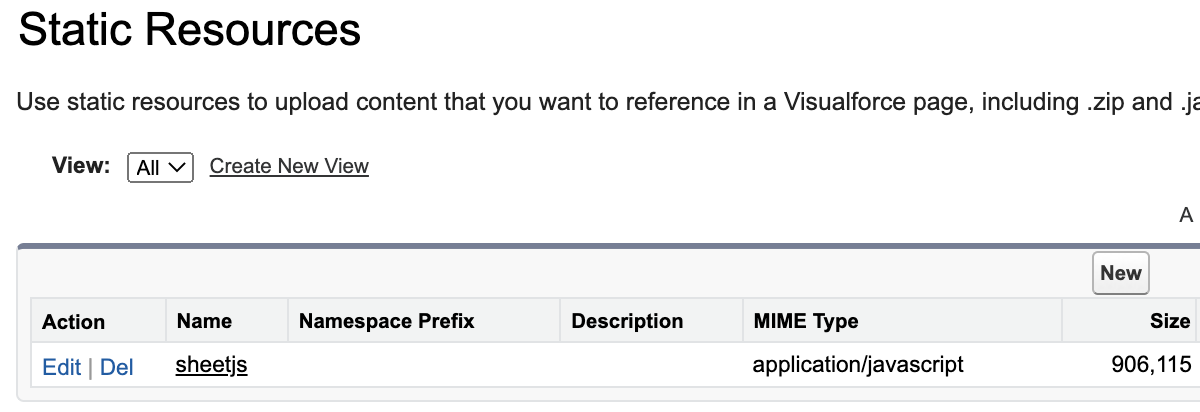
B) Type "Static" in the left sidebar search box. Click "Static Resources"
The page in Salesforce Classic will look like the screenshot below:
Test the Static Resource
- Replace
force-app/main/default/lwc/sheetComponent/sheetComponent.jswith the following script:
import { LightningElement } from 'lwc';
import { loadScript } from 'lightning/platformResourceLoader';
import sheetjs from '@salesforce/resourceUrl/sheetjs';

export default class SheetComponent extends LightningElement {
  version = "???"; // start with ???
  async connectedCallback() {
    await loadScript(this, sheetjs); // load the library
    // At this point, the library is accessible with the `XLSX` variable
    this.version = XLSX.version;
  }
}
This component exposes a version property based on the SheetJS version.
- Replace
force-app/main/default/lwc/sheetComponent/sheetComponent.htmlwith the following template:
<template>
  <b>SheetForce {version}</b>
</template>
This template references the version property.
- Deploy the project again with the same command from step 9:
npx @salesforce/cli project deploy start -d force-app -o SF@USER.NAME
Replace [email protected] with the unique Username.
- Reload the "SheetJS Demo" page. The page should display the SheetJS version:
It may take a few minutes for Salesforce to refresh. If the demo still shows the original "SheetForce demo" text after refreshing, close and reopen the demo app.
Export Data from SF Lists
- Add a button to
sheetComponent.htmlthat will call adownloadcallback:
<template>
  <!-- if the `aoa` property is set, show a button -->
  <template if:true={aoa}>
    <button onclick={download}><b>Click to Export!</b></button>
  </template>
  <!-- if the `aoa` property is not set, show a message -->
  <template if:false={aoa}><b>Please wait for data to load ...</b></template>
</template>
- Replace
sheetComponent.jswith the following:
import { LightningElement, wire, api } from 'lwc';
import { loadScript } from 'lightning/platformResourceLoader';
import { getListUi } from 'lightning/uiListApi';
import ACCOUNT_OBJECT from '@salesforce/schema/Account';

import sheetjs from '@salesforce/resourceUrl/sheetjs';

export default class SheetComponent extends LightningElement {
  aoa; // will hold data for export
  @wire(getListUi, {
    objectApiName: ACCOUNT_OBJECT.objectApiName,
    listViewApiName: 'AllAccounts'
  }) listInfo({ error, data }) {
    if (data) {
      var headers = [ "Name", "Phone" ];
      // create AOA and assign to `aoa` property
      this.aoa = [headers].concat(data.records.records.map(record => [
        record.fields.Name.value,  // Name field
        record.fields.Phone.value, // Phone field
      ]));
    } else if (error) console.log(error);
  };
  @api async download() {
    await loadScript(this, sheetjs); // load the library
    // create workbook
    var wb = XLSX.utils.book_new();
    var ws = XLSX.utils.aoa_to_sheet(this.aoa);
    XLSX.utils.book_append_sheet(wb, ws, "Data");
    // export
    XLSX.writeFile(wb, "SheetForceExport.xlsx");
  };
}
- Deploy the project again with the same command from step 9:
npx @salesforce/cli project deploy start -d force-app -o SF@USER.NAME
Replace [email protected] with the unique Username.
- Reload the "SheetJS Demo" page. The page should include a button for export:
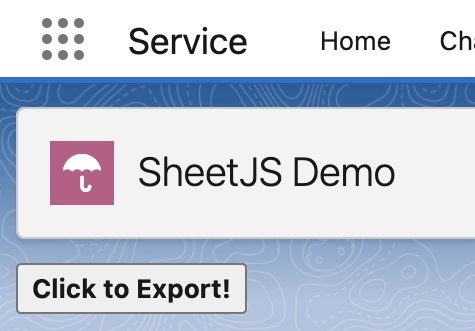
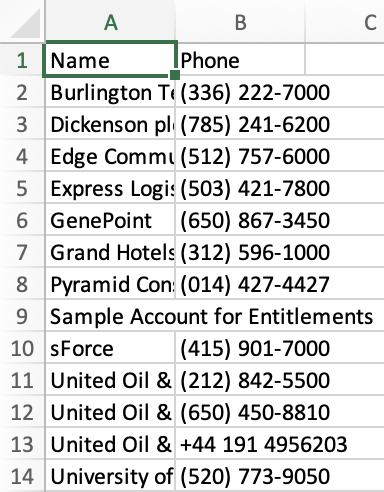
- Click the "Click to Export!" button. The app will attempt to download a file.
The simple export includes all of the data:
SheetJS Pro offers additional styling options like cell styling, automatic column width calculations, and frozen rows.
Footnotes
-
It is strongly recommended to review the detailed introduction in the Salesforce documentation ↩
-
The
XLSXvariable is the main global for the SheetJS library. It exposes methods as described in "API Reference" ↩ -
See "Understand the Wire Service" in the Salesforce LWC documentation. ↩
-
See "Array of Arrays" in "Utilities" for more details. ↩
-
See "Sheet Objects" ↩
-
See "Workbook Object" ↩