Storing Sheets with CapacitorJS
CapacitorJS is a mobile app runtime for building iOS and Android apps.
SheetJS is a JavaScript library for reading and writing data from spreadsheets.
This demo uses CapacitorJS and SheetJS to process data and export spreadsheets. We'll explore how to load SheetJS in an CapacitorJS app and use APIs and plugins to extract data from, and write data to, spreadsheet files on the device.
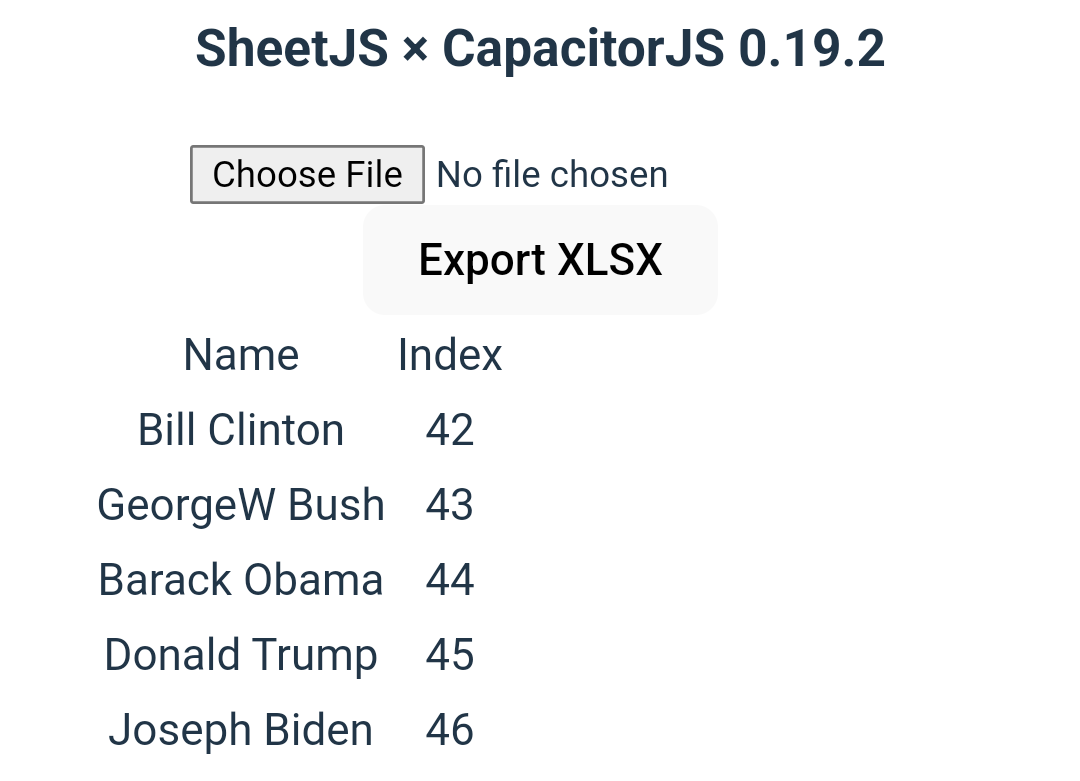
The "Demo" creates an app that looks like the screenshots below:
| iOS | Android |
|---|---|
|
|

This demo was tested in the following environments:
Real Devices
| OS | Device | CapacitorJS + FS | Date |
|---|---|---|---|
| Android 30 | NVIDIA Shield | 6.2.0 / 6.0.3 | 2025-01-19 |
| iOS 15.1 | iPad Pro | 6.2.0 / 6.0.3 | 2025-01-19 |
Simulators
| OS | Device | CapacitorJS + FS | Dev Platform | Date |
|---|---|---|---|---|
| Android 34 | Pixel 3a | 7.1.0 / 7.0.0 | darwin-arm | 2025-03-30 |
| iOS 18.2 | iPhone 16 Pro Max | 7.1.0 / 7.0.0 | darwin-arm | 2025-03-30 |
| Android 35 | Pixel 9 Pro XL | 7.3.0 / 7.1.1 | win11-x64 | 2025-06-08 |
| Android 36 | Pixel 9 | 7.4.1 / 7.1.2 | linux-x64 | 2025-07-06 |
Before starting this demo, manually disable telemetry. On Linux and MacOS:
npx -y @capacitor/cli telemetry off
To verify telemetry was disabled:
npx -y @capacitor/cli telemetry
Integration Details
The SheetJS NodeJS Module can be imported from any component or script in the app.
This demo uses SvelteJS, but the same principles apply to other frameworks.
Reading data
The standard HTML5 File Input API works as expected in CapacitorJS.
Apps will typically include an input type="file" element. When the element is
activated, CapacitorJS will show a file picker. After the user selects a file,
the element will receive a change event.
The following example parses the selected file using the SheetJS read1
method, generates an HTML table from the first sheet using sheet_to_html2,
and displays the table by setting the innerHTML attribute of a div element:
<script>
import { read, utils } from 'xlsx';

let html = "";

/* show file picker, read file, load table */
async function importFile(evt) {
  const f = evt.target.files[0];
  const wb = read(await f.arrayBuffer());
  const ws = wb.Sheets[wb.SheetNames[0]]; // get the first worksheet
  html = utils.sheet_to_html(ws); // generate HTML and update state
}
</script>

<main>
  <input type="file" on:change={importFile}/>
  <div bind:this={tbl}>{@html html}</div>
</main>
Writing data
Starting from a SheetJS workbook object3, the write method with the option
type: "base64"4 will generate Base64-encoded files.
The @capacitor/filesystem plugin can write Base64 strings to the device.
The following example uses the SheetJS table_to_book method5 to create a
workbook object from an HTML table. The workbook object is exported to the XLSX
format and written to the device.
<script>
import { Filesystem, Directory } from '@capacitor/filesystem';
import { utils, write } from 'xlsx';

let html = "";
let tbl;

/* get state data and export to XLSX */
async function exportFile() {
  /* generate workbook object from HTML table */
  const elt = tbl.getElementsByTagName("TABLE")[0];
  const wb = utils.table_to_book(elt);

  /* export to XLSX encoded in a Base64 string  */
  const data = write(wb, { bookType: "xlsx", type: "base64" });

  /* attempt to write to the device */
  await Filesystem.writeFile({
    data,
    path: "SheetJSCap.xlsx",
    directory: Directory.Documents
  });
}

</script>

<main>
  <button on:click={exportFile}>Export XLSX</button>
  <div bind:this={tbl}>{@html html}</div>
</main>
Filesystem.writeFile cannot overwrite existing files. Production apps should
attempt to delete the file before writing:
  /* attempt to delete file first */
  try {
    await Filesystem.deleteFile({
      path: "SheetJSCap.xlsx",
      directory: Directory.Documents
    });
  } catch(e) {}
  /* attempt to write to the device */
  await Filesystem.writeFile({
    data,
    path: "SheetJSCap.xlsx",
    directory: Directory.Documents
  });
Demo
The app in this demo will display data in a table.
When the app is launched, a test file will be fetched and processed.
When a document is selected with the file picker, it will be processed and the table will refresh to show the contents.
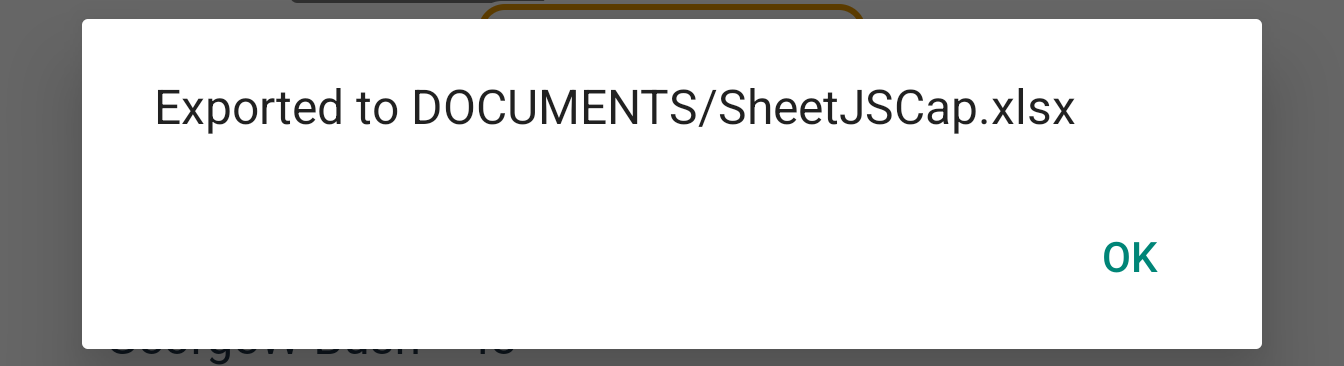
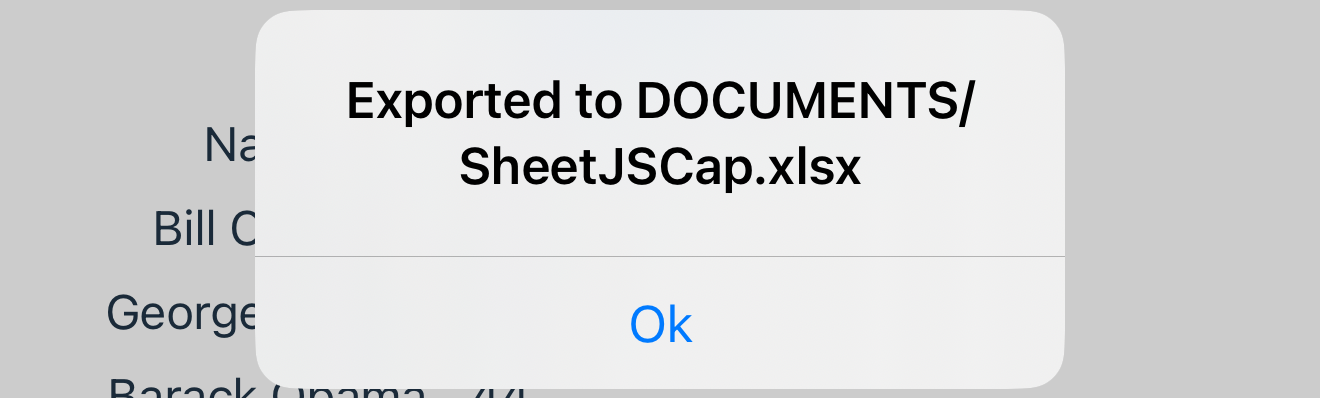
"Export XLSX" will attempt to export the table data to SheetJSCap.xlsx in the
app Documents folder. An alert will display the location of the file.
Base Project
- Follow the official "Environment Setup"6 instructions to set up Android and iOS targets
iOS development is only supported on macOS.
Installation Notes (click to show)
For Android development, CapacitorJS requires a Java version compatible with the expected Gradle version:
| CapacitorJS | Gradle | Java |
|---|---|---|
6.2.0 | 8.2.1 | 20 |
7.4.1 | 8.11.1 | 21 |
- Disable telemetry.
npx -y @capacitor/cli telemetry off
Verify that telemetry is disabled by running
npx -y @capacitor/cli telemetry
(it should print Telemetry is off)
- Create a new Svelte project:
npm create vite@latest sheetjs-cap -- --template svelte
cd sheetjs-cap
- Install dependencies:
npm i --save https://cdn.sheetjs.com/xlsx-0.20.3/xlsx-0.20.3.tgz
npm i --save @capacitor/core @capacitor/cli @capacitor/filesystem
When this demo was last tested, parts of the official project required ViteJS 6 and other parts required ViteJS 7. The install failed.
This is a bug in the Svelte integration!
Until the bug is fixed, the --force option should be used:
npm i --save https://cdn.sheetjs.com/xlsx-0.20.3/xlsx-0.20.3.tgz --force
npm i --save @capacitor/core @capacitor/cli @capacitor/filesystem --force
- Create CapacitorJS structure:
npx cap init sheetjs-cap com.sheetjs.cap --web-dir=dist
npm run build
If prompted to create an Ionic account, Press N to opt out.
- Download
src/App.svelteand replace:
curl -o src/App.svelte https://docs.sheetjs.com/cap/App.svelte
Android
- Create Android app
npm i --save @capacitor/android
npx cap add android
When this demo was last tested, parts of the official project required ViteJS 6 and other parts required ViteJS 7. The install failed.
This is a bug in the Svelte integration!
Until the bug is fixed, the --force option should be used:
npm i --save @capacitor/android --force
npx cap add android
If the wrong Java version is installed, the last command will fail with a message that references a "class file major version"
> BUG! exception in phase 'semantic analysis' in source unit '_BuildScript_' Unsupported class file major version 67
The correct Java version must be installed. When this demo was last tested, Java 20 was compatible with CapacitorJS Android projects.
- Enable file reading and writing in the Android app.
Add the highlighted lines to android/app/src/main/AndroidManifest.xml after
the Permissions comment:
    <!-- Permissions -->

    <uses-permission android:name="android.permission.READ_EXTERNAL_STORAGE"/>
    <uses-permission android:name="android.permission.WRITE_EXTERNAL_STORAGE"/>

    <uses-permission android:name="android.permission.INTERNET" />
-
Start the Android simulator through Android Studio.
-
Run the app in the simulator:
npm run build
npx cap sync
npx cap run android
The app should look like the screenshot at the top of the page.
- Test the export functionality.
Touch "Export XLSX". If the emulator asks for permission, tap "Allow". A popup will show the exported path.
Open the "Files" app in the simulator, tap the ≡ icon and tap "Documents". Tap
the "Documents" folder to find SheetJSCap.xlsx.
Downloading the generated file (click to hide)
The file location can be found by searching for SheetJSCap.xlsx:
adb exec-out find / -name SheetJSCap.xlsx
There may be a number of error messages that start with find:. There will be
at least one line starting with /:
/data/media/0/Documents/SheetJSCap.xlsx
/storage/emulated/0/Documents/SheetJSCap.xlsx
The /storage path can be pulled using adb pull:
adb pull "/storage/emulated/0/Documents/SheetJSCap.xlsx" SheetJSCap.xlsx
SheetJSCap.xlsx can be opened with a spreadsheet editor such as Excel.
- Test the import functionality.
Edit SheetJSCap.xlsx, setting cell A7 to SheetJS Dev and setting cell B7
to 47. Save the file.
Click and drag the file into the Android emulator window. The file will be uploaded to a Downloads folder in the emulator.
Switch back to the app and tap "Choose File". In the selector, tap ≡, select
"Downloads" and tap SheetJSCap.xlsx. The table will refresh with the new row.
iOS
- Create iOS app.
npm i --save @capacitor/ios
npx cap add ios
- Enable file sharing and make the documents folder visible in the iOS app.
The following lines must be added to
ios/App/App/Info.plist:
<plist version="1.0">
<dict>
  <key>UIFileSharingEnabled</key>
  <true/>
  <key>LSSupportsOpeningDocumentsInPlace</key>
  <true/>
  <key>CFBundleDevelopmentRegion</key>
(The root element of the document is plist and it contains one dict child)
- Run the app in the simulator.
npm run build
npx cap sync
npx cap run ios
If prompted to select a target device, select "iPhone 16 Pro Max (simulator)".
The app should look like the screenshot at the top of the page.
- Test the export functionality.
Touch "Export XLSX" and a popup will be displayed.
To see the generated file, switch to the "Files" app in the simulator and look
for SheetJSCap.xlsx in "On My iPhone" > "sheetjs-cap"
Downloading the generated file (click to hide)
The app files are available in the filesystem in ~/Library/Developer. Open a
terminal and run the following command to find the file:
find ~/Library/Developer -name SheetJSCap.xlsx
- Test the import functionality.
Edit SheetJSCap.xlsx, setting cell A7 to SheetJS Dev and setting cell B7
to 47. Save the file.
Click and drag the file into the iOS simulator window. The simulator will show a
picker for saving the file. Select the sheetjs-cap folder and tap "Save". If
prompted to "Replace Existing Items?", tap "Replace".
Switch back to the app and tap "Choose File". Tap "Choose File" in the popup.
In the picker, tap "Recents" and select the newest SheetJSCap file. The table
will refresh with the new data.
Android Device
- Connect an Android device using a USB cable.
If the device asks to allow USB debugging, tap "Allow".
- Confirm the device is detected by
adb.
adb devices
If the device is detected, the command will list the device:
List of devices attached
1234567890	device
-
Close any Android / iOS emulators.
-
Build APK and run on device:
npm run build
npx cap sync
npx cap run android
If the Android emulators are closed and an Android device is connected, the last command will build an APK and install on the device.
In some tests, the last command asked for a target device. Select the Android device in the list and press Enter
For real devices running API level 29 or below, the following line must be added
to the application open tag in android/app/src/main/AndroidManifest.xml:
    <application
        android:allowBackup="true"
        android:icon="@mipmap/ic_launcher"
        android:label="@string/app_name"
        android:roundIcon="@mipmap/ic_launcher_round"
        android:supportsRtl="true"
        android:requestLegacyExternalStorage="true"
        android:theme="@style/AppTheme">
iOS Device
- Connect an iOS device using a USB cable
If prompted to "Trust This Computer", tap "Trust" and enter the device passcode.
-
Close any Android / iOS emulators.
-
Enable developer code signing certificates.
Open ios/App/App.xcworkspace in Xcode. Select the "Project Navigator" and
select the "App" project. In the main view, select "Signing & Capabilities".
Under "Signing", select a team in the dropdown menu.
- Run on device:
npm run build
npx cap sync
npx cap run ios
When prompted to select a target device, select the real device in the list.
In some test runs, the build failed with a provisioning error:
error: Provisioning profile "iOS Team Provisioning Profile: com.sheetjs.cap" doesn't include the currently selected device "SheetJS Test Device" (identifier 12345678-9ABCDEF012345678). (in target 'App' from project 'App')
This error was resolved by manually selecting the device as the primary target in the Xcode workspace.
In some tests, the app failed to launch with a "Untrusted Developer" error.
Switch to the Settings app and select General > VPN & Device Management. There
will be a new item in the "DEVELOPER APP" section. Tap the line and verify that
sheetjs-cap is listed in the screen. Tap "Trust" and tap "Trust" in the popup.
After trusting the certificate, re-run the app:
npx cap run ios
Footnotes
-
See "Workbook Object" ↩
-
See "Environment Setup" in the CapacitorJS documentation. ↩