Sheets on the Go with React Native
React Native is a mobile app framework. It builds iOS and Android apps that use JavaScript for describing layouts and events.
SheetJS is a JavaScript library for reading and writing data from spreadsheets.
This demo uses React Native and SheetJS to process and generate spreadsheets. We'll explore how to load SheetJS in a React Native app in a few ways:
- "Fetching Remote Data" uses the built-in
fetchto download and parse remote workbook files. - "Local Files" uses native libraries to read and write files on the device.
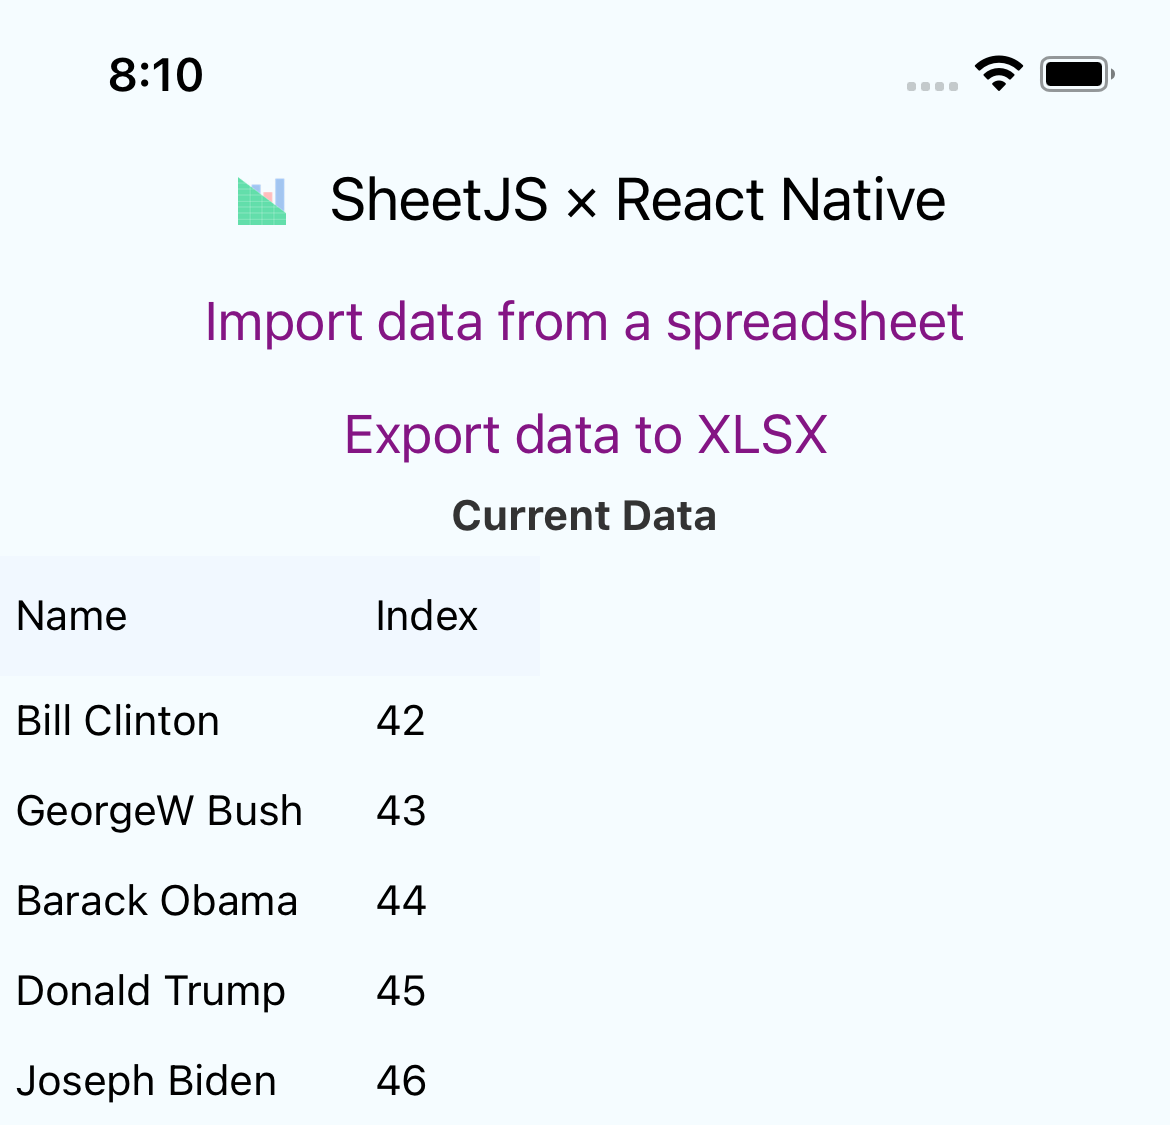
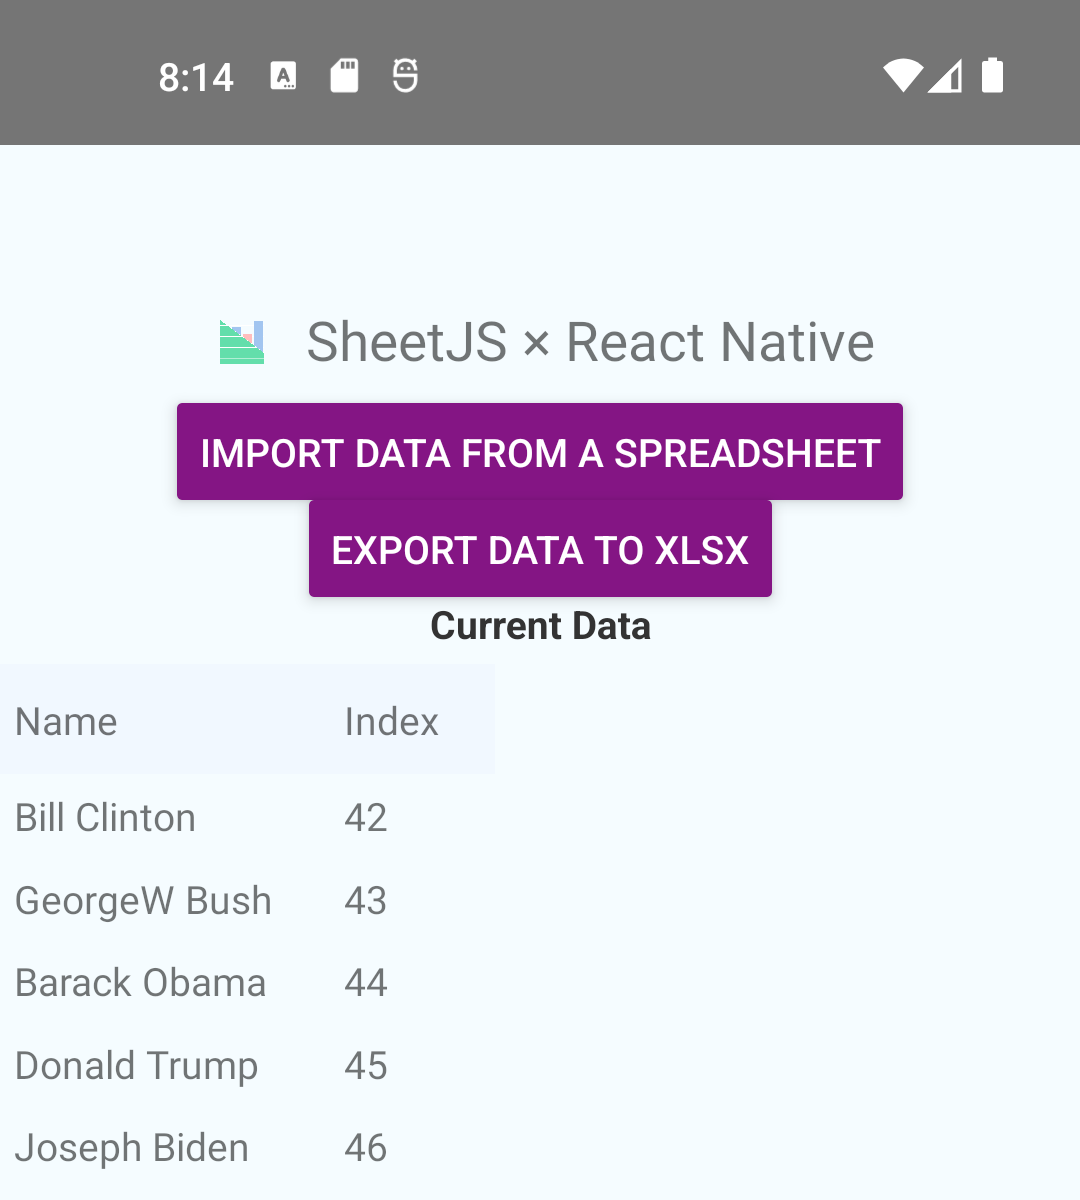
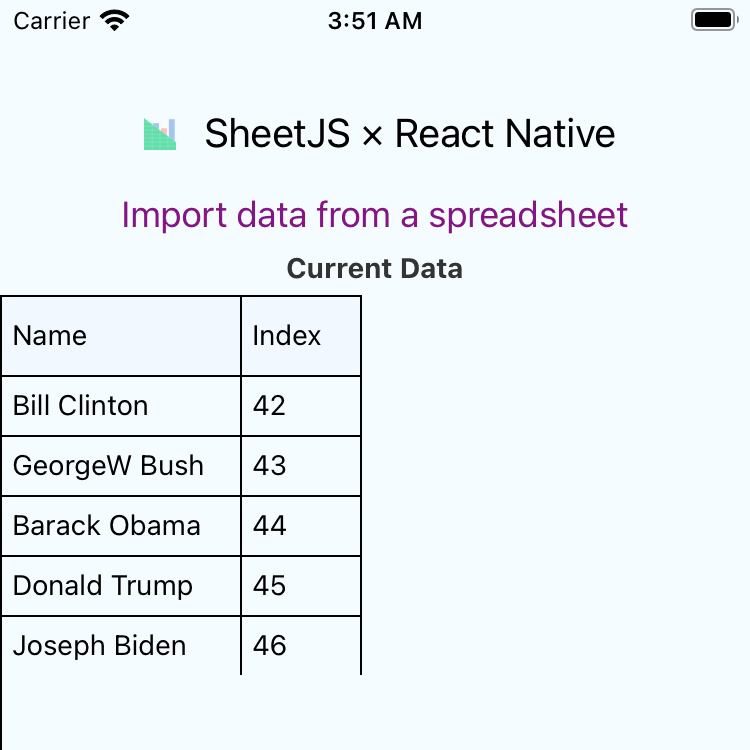
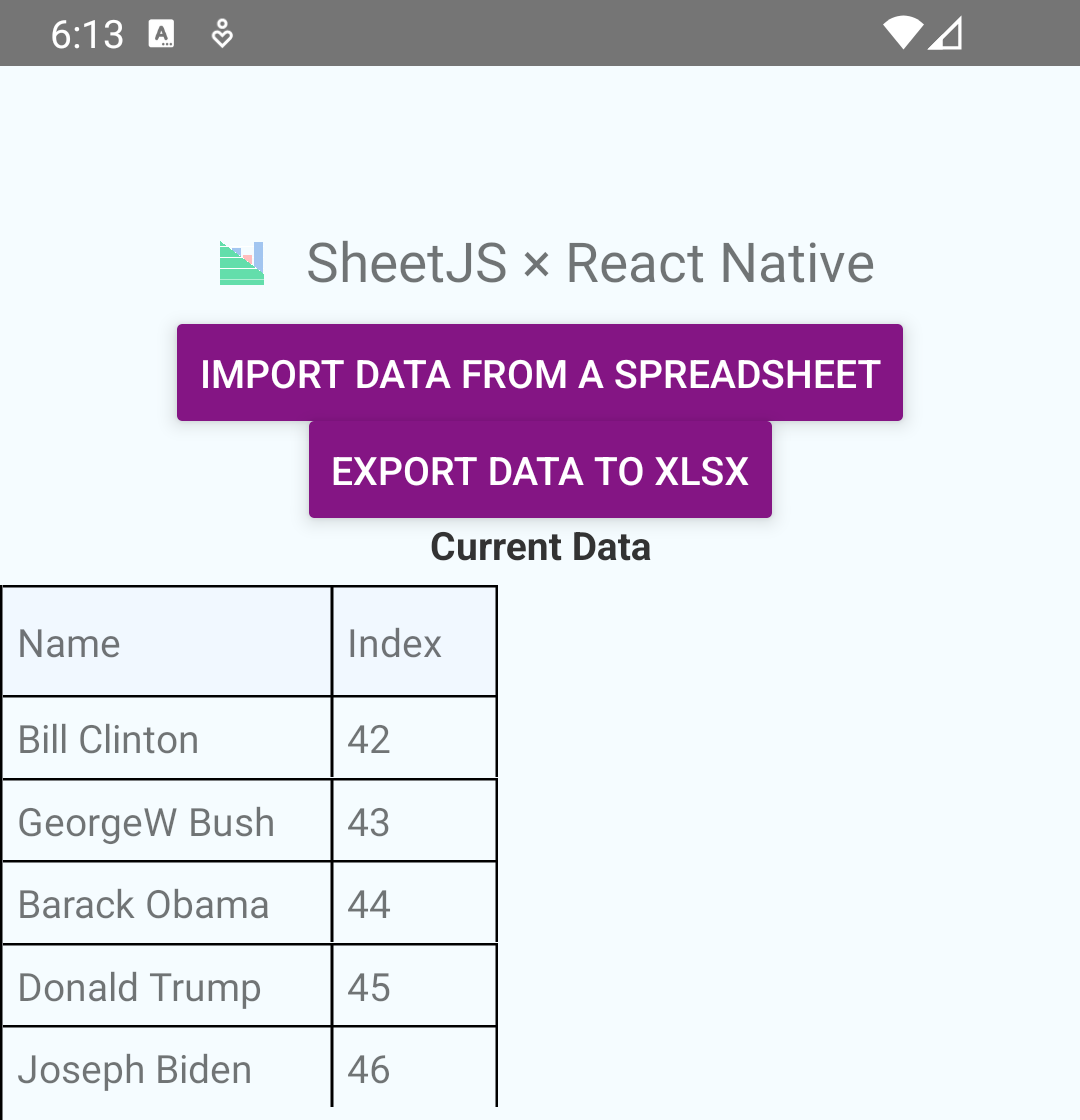
The "Local Files" example creates an app that looks like the screenshots below:
| iOS | Android |
|---|---|
|
|
Before testing this demo, follow the official React Native CLI Guide!1
Follow the instructions for iOS (requires macOS) and for Android. They will cover installation and system configuration. You should be able to build and run a sample app in the Android and the iOS (if applicable) simulators.
Integration Details
The SheetJS NodeJS Module can be imported from any component or script in the app.
Internal State
For simplicity, this demo uses an "Array of Arrays"2 as the internal state.
| Spreadsheet | Array of Arrays |
|---|---|
| |

Each array within the structure corresponds to one row.
This demo also keeps track of the column widths as a single array of numbers. The widths are used by the display component.
Complete State
The complete state is initialized with the following snippet:
const [data, setData] = useState([
  "SheetJS".split(""),
  [5,4,3,3,7,9,5],
  [8,6,7,5,3,0,9]
]);
const [widths, setWidths] = useState(Array.from({length:7}, () => 20));
Updating State
Starting from a SheetJS worksheet object, sheet_to_json3 with the header
option can generate an array of arrays:
/* assuming `wb` is a SheetJS workbook */
function update_state(wb) {
  /* convert first worksheet to AOA */
  const wsname = wb.SheetNames[0];
  const ws = wb.Sheets[wsname];
  const data = utils.sheet_to_json(ws, {header:1});

  /* update state */
  setData(data);

  /* update column widths */
  setWidths(make_width(data));
}
Calculating Column Widths
Column widths can be calculated by walking each column and calculating the max data width. Using the array of arrays:
/* this function takes an array of arrays and generates widths */
function make_width(aoa) {
  /* walk each row */
  aoa.forEach((r) => {
    /* walk each column */
    r.forEach((c, C) => {
      /* update column width based on the length of the cell contents */
      res[C] = Math.max(res[C]||60, String(c).length * 10);
    });
  });
  /* use a default value for columns with no data */
  for(let C = 0; C < res.length; ++C) if(!res[C]) res[C] = 60;
  return res;
}
Exporting State
aoa_to_sheet4 builds a SheetJS worksheet object from the array of arrays:
/* generate a SheetJS workbook from the state */
function export_state() {
  /* convert AOA back to worksheet */
  const ws = utils.aoa_to_sheet(data);

  /* build new workbook */
  const wb = utils.book_new();
  utils.book_append_sheet(wb, ws, "SheetJS");

  return wb;
}
Displaying Data
React Native does not ship with a component for displaying tabular data.
react-native-table-component is a simple UI component designed for legacy
versions of React Native.
react-native-tabeller
uses a similar API and follows modern React Native design patterns.
The demos use components similar to the example below:
import { ScrollView } from 'react-native';
import { Table, Row, Rows, TableWrapper } from 'react-native-tabeller';

(
  {/* Horizontal scroll */}
  <ScrollView horizontal={true} >
    {/* Table container */}
    <Table>
      {/* Frozen Header Row */}
      <TableWrapper>
        {/* First row */}
        <Row data={data[0]} widthArr={widths}/>
      </TableWrapper>
      {/* Scrollable Data Rows */}
      <ScrollView>
        <TableWrapper>
          {/* Remaining Rows */}
          <Rows data={data.slice(1)} widthArr={widths}/>
        </TableWrapper>
      </ScrollView>
    </Table>
  </ScrollView>
)
data.slice(1) in the Rows component returns data starting from the second
row. This neatly skips the first header row.
Fetching Remote Data
React Native versions starting from 0.72.05 support binary data in fetch.
This snippet downloads and parses https://docs.sheetjs.com/pres.xlsx:
/* fetch data into an ArrayBuffer */
const ab = await (await fetch("https://docs.sheetjs.com/pres.xlsx")).arrayBuffer();
/* parse data */
const wb = XLSX.read(ab);
Fetch Demo
This demo was tested in the following environments:
Real Devices
| OS | Device | RN | Date |
|---|---|---|---|
| iOS 15.6 | iPhone 13 Pro Max | 0.76.8 | 2025-03-26 |
| Android 34 | NVIDIA Shield | 0.76.8 | 2025-03-26 |
Simulators
| OS | Device | RN | Dev Platform | Date |
|---|---|---|---|---|
| Android 34 | Pixel 3a | 0.76.8 | darwin-arm | 2025-03-26 |
| iOS 18.3 | iPhone 16 Pro | 0.76.8 | darwin-arm | 2025-03-26 |
| Android 35 | Pixel 9 Pro XL | 0.79.2 | win11-x64 | 2025-06-08 |
| Android 36 | Pixel 9 | 0.79.2 | linux-x64 | 2025-07-06 |
Before testing this demo, follow the official React Native CLI Guide!1
Make sure you can run a basic test app on your phone/simulator before continuing!
- Install React Native dependencies
Installation Notes (click to show)
Java JDK
On the Steam Deck, JDK17 was installed using pacman:
sudo pacman -Syu jdk17-openjdk
Debian and Ubuntu require the openjdk-17-jdk package:
sudo apt install openjdk-17-jdk
Android Studio for Linux
The Android Studio tarball was downloaded and extracted. After extracting:
cd ./android-studio/bin
./studio.sh
In Android Studio, select "SDK Manager" and switch to the "SDK Tools" tab. Check "Show Package Details" and install "Android SDK Command-line Tools (latest)".
Environment Variables for Linux
When this demo was last tested, the following environment variables were used:
export ANDROID_HOME=~/Android/Sdk
export PATH=$PATH:$ANDROID_HOME/emulator:$ANDROID_HOME/platform-tools
export JAVA_HOME=/usr/lib/jvm/java-17-openjdk
- Create project:
npx -y @react-native-community/cli@18 init SheetJSRNFetch --version="0.79.2"
On macOS, if prompted to install CocoaPods, press Y
If you were prompted to install CocoaPods, verify it worked by opening a new terminal and running:
pod --version
If you see "command not found", install it via brew:
brew install cocoapods
Older versions of this demo used the react-native package. The init command
was officially deprecated.
React Native now recommends using @react-native-community/cli. The versioning
scheme is fundamentally different from react-native.6
- Install shared dependencies:
cd SheetJSRNFetch
curl -LO https://docs.sheetjs.com/logo.png
npm i -S https://cdn.sheetjs.com/xlsx-0.20.3/xlsx-0.20.3.tgz
npm i -S https://cdn.sheetjs.com/react-native-tabeller-0.1.0/react-native-tabeller-0.1.0.tgz
In PowerShell, the command may fail with a parameter error:
Invoke-WebRequest : A parameter cannot be found that matches parameter name 'LO'.
curl.exe must be invoked directly:
cd SheetJSRNFetch
curl.exe -LO https://docs.sheetjs.com/logo.png
npm i -S https://cdn.sheetjs.com/xlsx-0.20.3/xlsx-0.20.3.tgz
npm i -S https://cdn.sheetjs.com/react-native-tabeller-0.1.0/react-native-tabeller-0.1.0.tgz
- Download and replace
App.tsx:
curl -LO https://docs.sheetjs.com/reactnative/App.tsx
In PowerShell, the command may fail with a parameter error:
Invoke-WebRequest : A parameter cannot be found that matches parameter name 'LO'.
curl.exe must be invoked directly:
curl.exe -LO https://docs.sheetjs.com/reactnative/App.tsx
Android Testing
-
Install or switch to Java 177
-
Start the Android emulator:
npx react-native run-android
On Linux, the command may silently stall. It is strongly recommended to launch the interactive CLI tool:
npx react-native start
Once the dev server is ready, the terminal will display a few options. Press r to relaod the app.
If the initial launch fails with an error referencing the emulator, manually start the emulator from Android Studio and try again.
Gradle errors typically stem from a Java version mismatch:
> Failed to apply plugin 'com.android.internal.application'.
   > Android Gradle plugin requires Java 17 to run. You are currently using Java 11.
This error can be resolved by installing and switching to the requested version.
When this demo was last tested on Windows 11, there was a Gradle error mentioning a "temporary workspace":
> java.io.UncheckedIOException: Could not move temporary workspace (C:\Users\sheetjs\Documents\SheetJSRNFetch\android\.gradle\8.10.2\dependencies-accessors\569c8b261a8a714d7731d5f568e0e5c05babae10-4756c477-c60a-4328-ba8c-e12cc53b4ed0) to immutable location (C:\Users\sheetjs\Documents\SheetJSRNFetch\android\.gradle\8.10.2\dependencies-accessors\569c8b261a8a714d7731d5f568e0e5c05babae10)
This is a known bug in the version of Gradle used by React Native 0.76.5!
The Gradle version should be set to 8.11.1 in gradle-wrapper.properties:
distributionUrl=https\://services.gradle.org/distributions/gradle-8.11.1-all.zip
When this demo was last tested on Linux, the process failed to launch the emulator:
warn Please launch an emulator manually or connect a device. Otherwise app may fail to launch.
This is a known bug in React Native!
If an emulator is installed, run the following command:
npx react-native doctor
Under Android, there will be one error:
Android

 ✖ Adb - No devices and/or emulators connected. Please create emulator with Android Studio or connect Android device.
Press f and a list of available emulators will be shown. Select the emulator
(typically the last line) and press Enter.
✔ Select the device / emulator you want to use › Emulator Pixel_3a_API_34_extension_level_7_x86_64 (disconnected)
The text in green is the name of the virtual device
(Pixel_3a_API_34_extension_level_7_x86_64 in this example).
Run the following command to manually start the emulator:
$ANDROID_HOME/tools/emulator -avd Pixel_3a_API_34_extension_level_7_x86_64
(replace Pixel_3a_API_34_extension_level_7_x86_64 with the name of the virtual device)
To confirm React Native detects the emulator, run the following command again:
npx react-native doctor
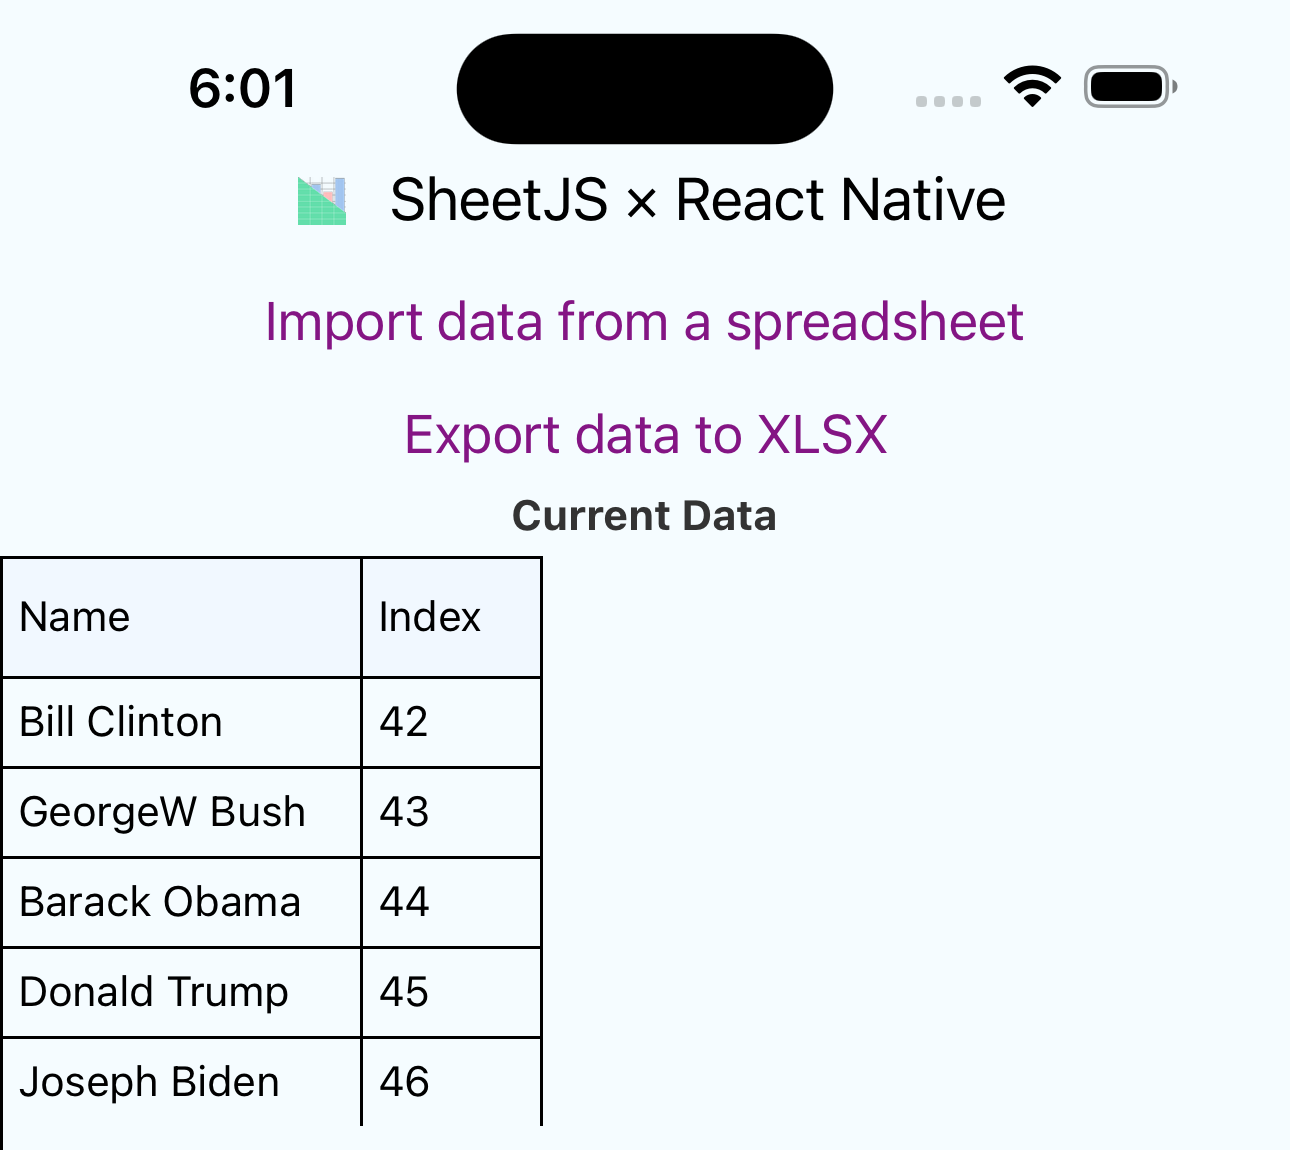
- When opened, the app should look like the "Before" screenshot below. After tapping "Import data from a spreadsheet", verify that the app shows new data:
| Before | After |
|---|---|
|
|

iOS Testing
iOS testing can only be performed on Apple hardware running macOS!
Xcode and iOS simulators are not available on Windows or Linux.
- Refresh iOS project by running
pod installfrom theiossubfolder:
cd ios; pod install; cd -
- Start the iOS emulator:
npx react-native run-ios
- When opened, the app should look like the "Before" screenshot below. After tapping "Import data from a spreadsheet", verify that the app shows new data:
| Before | After |
|---|---|
|
|
Android Device Testing
- Connect an Android device using a USB cable.
If the device asks to allow USB debugging, tap "Allow".
-
Close any Android / iOS emulators.
-
Build APK and run on device:
npx react-native run-android
Depending on the device, it may take up to 10 seconds for app to update.
iOS Device Testing
- Connect an iOS device using a USB cable.
If the device asks to trust the computer, tap "Trust" and enter the passcode.
-
Close any Android / iOS emulators.
-
Enable developer code signing certificates8.
Enabling Code Signing (click to show)
These instructions were verified against Xcode 16.2.
A) Open the included iOS workspace in Xcode:
open ios/SheetJSRNFetch.xcworkspace
B) Select "SheetJSRNFetch" in the Project Navigator:
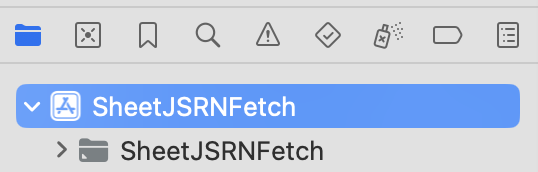
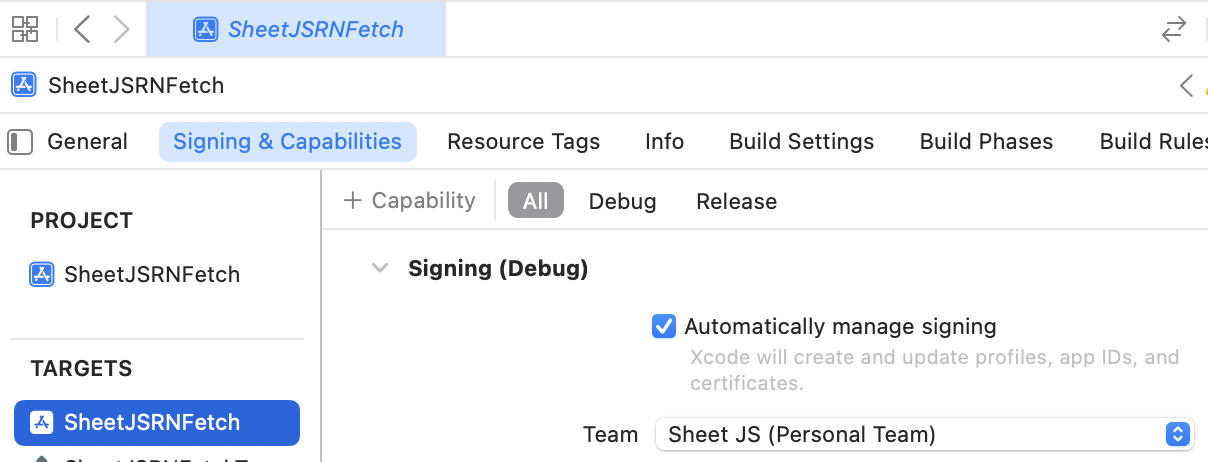
C) Select "Signing & Capabilities" in the main view.
D) Select "All" in the lower bar and ensure a Team is selected in the dropdown:
- Install
ios-deploythrough Homebrew:
brew install ios-deploy
- Run on device:
npx react-native run-ios
If the device is not detected, the terminal will print
info No booted devices or simulators found. Launching first available simulator...
This may happen if the device goes to sleep while connected. Disconnect and reconnect the device before trying again.
In some test runs, the app requested for local network access:
"SheetJSRNFetch" would like to find and connect to devices on your local network.
Local network access is not required for the demo. Select "Don't Allow".
In some tests, the app failed to run on the device due to "Untrusted Developer":
Your device management settings do not allow apps from developer ... on this iPhone. You can allow using these apps in Settings.
These instructions were verified against iOS 15.6.
A) Open the Settings app and select "General" > "VPN & Device Management".
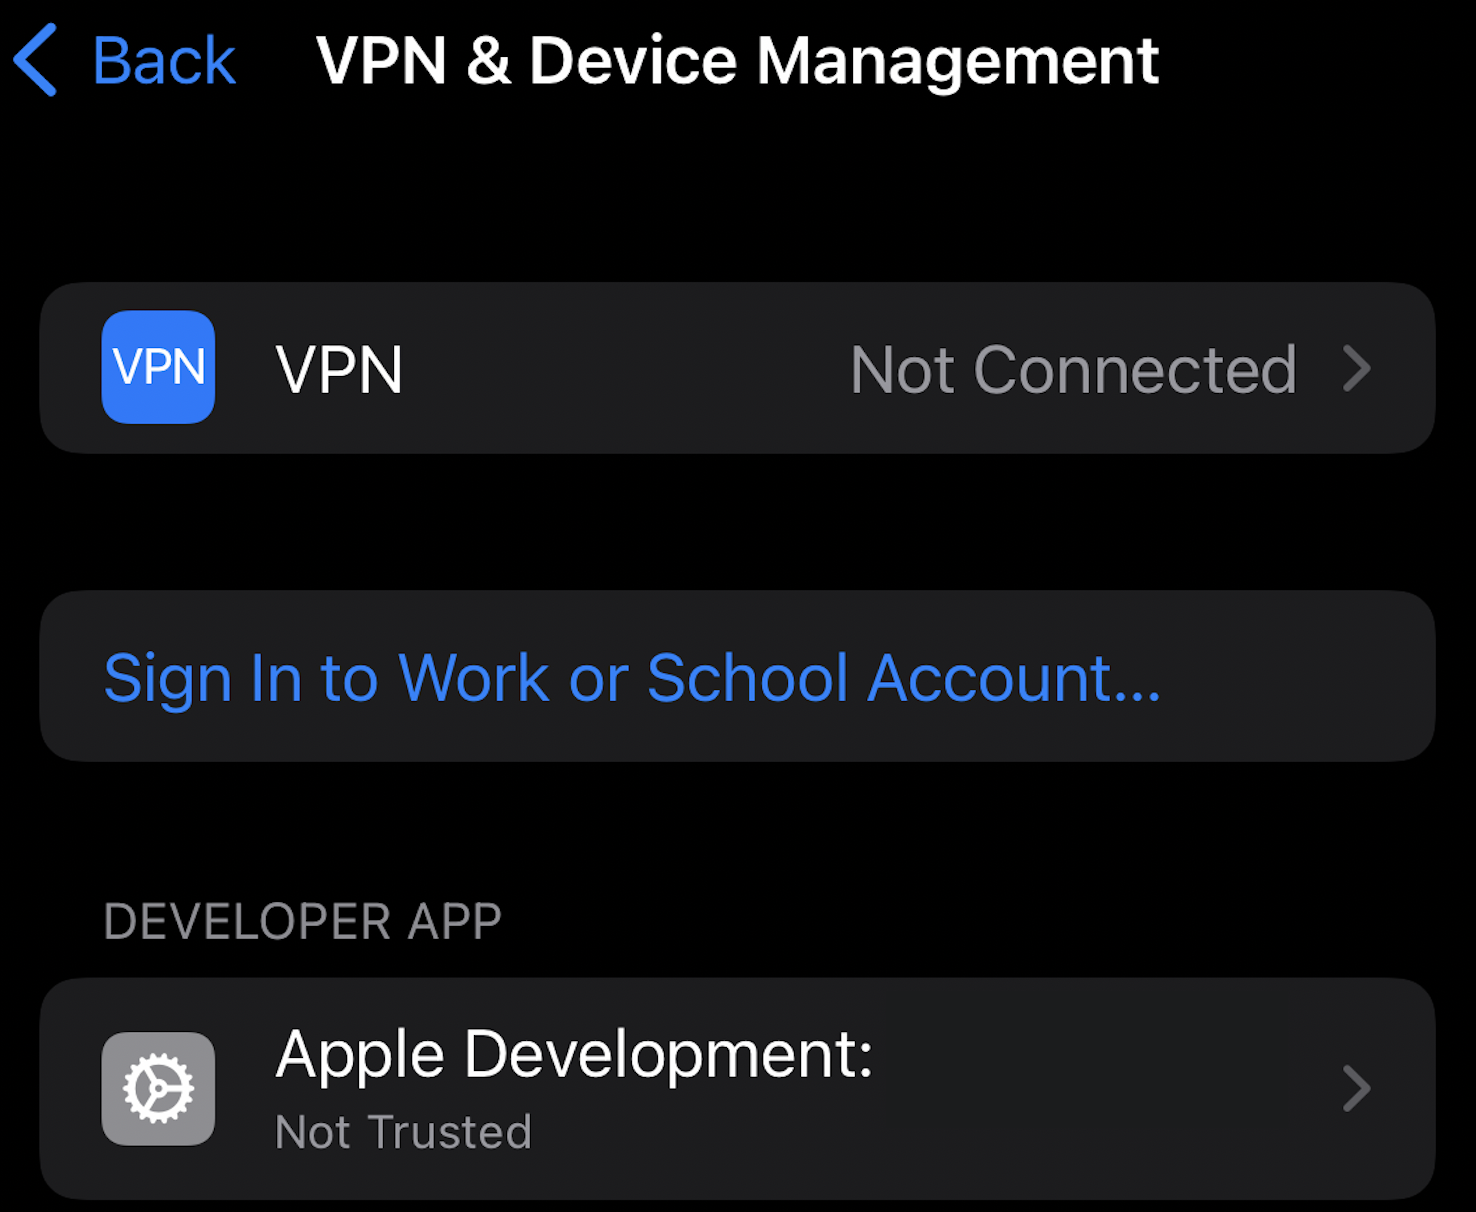
B) Select the Apple Development certificate under "Developer App".
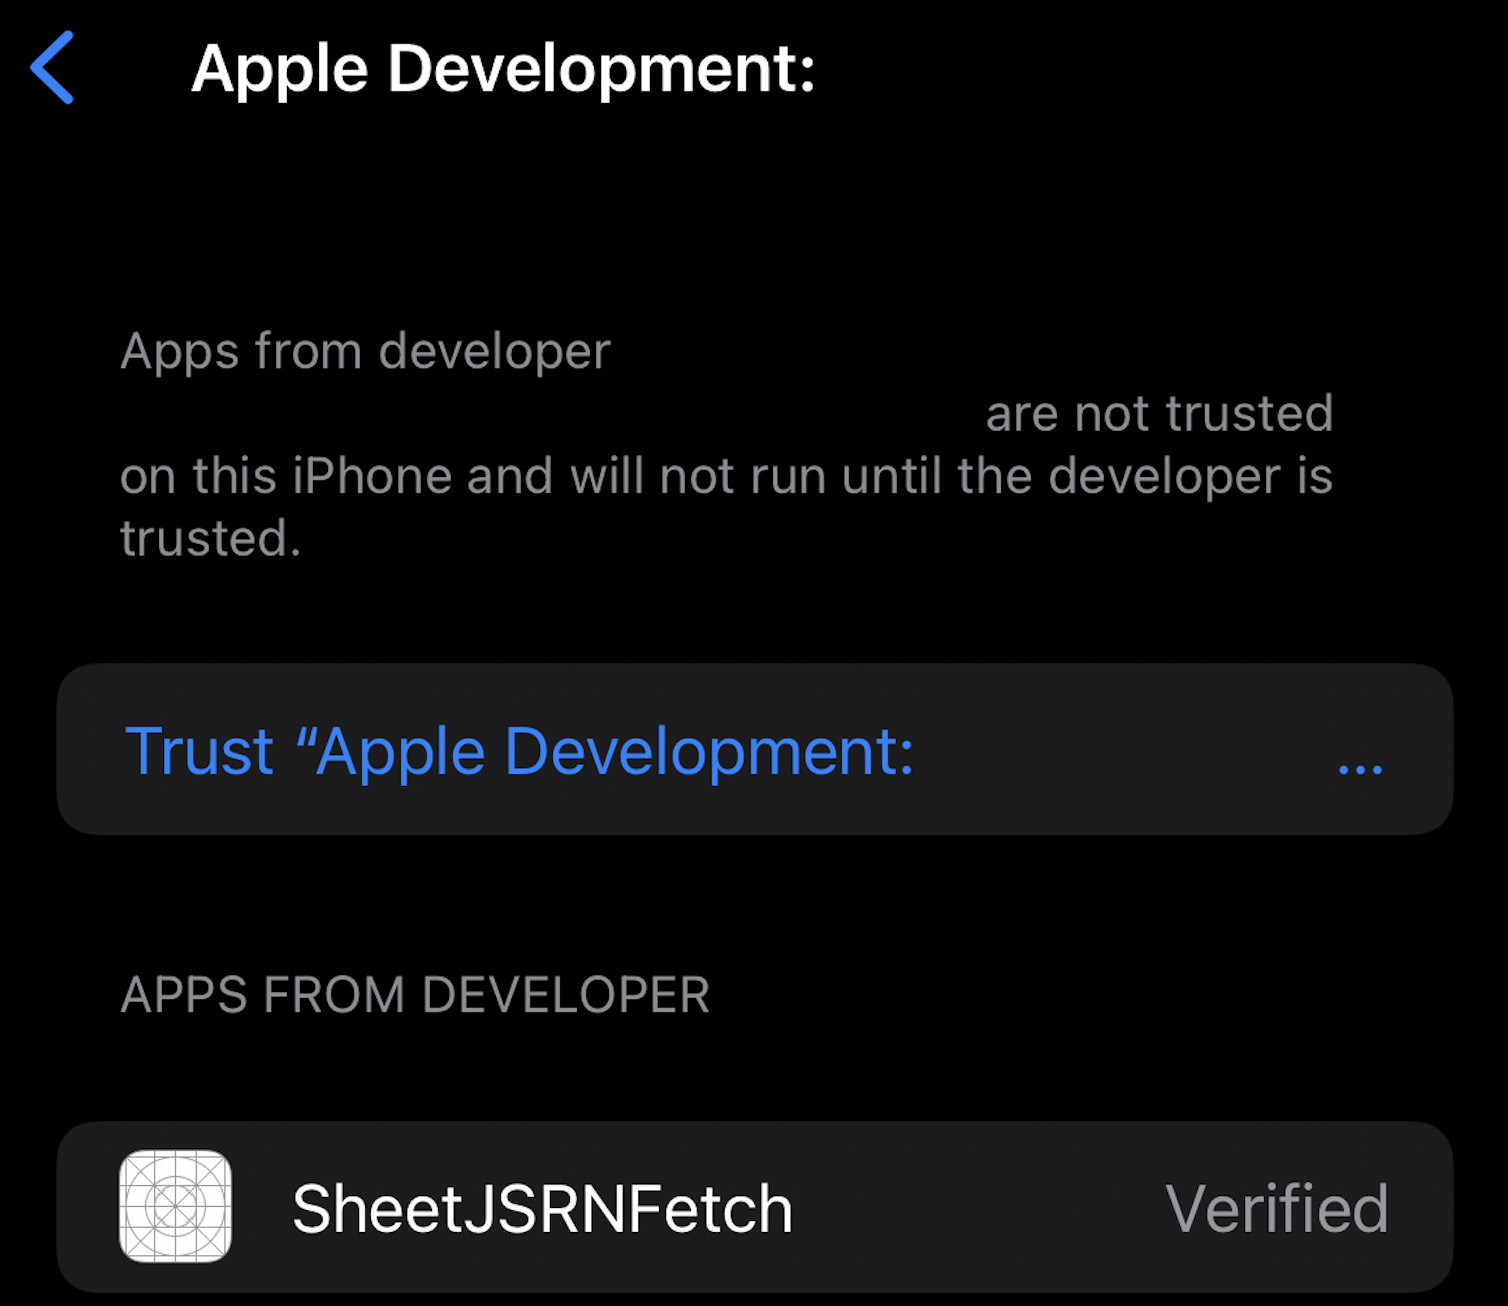
In the new screen, the name "SheetJSRNFetch" will be displayed in the Apps list.
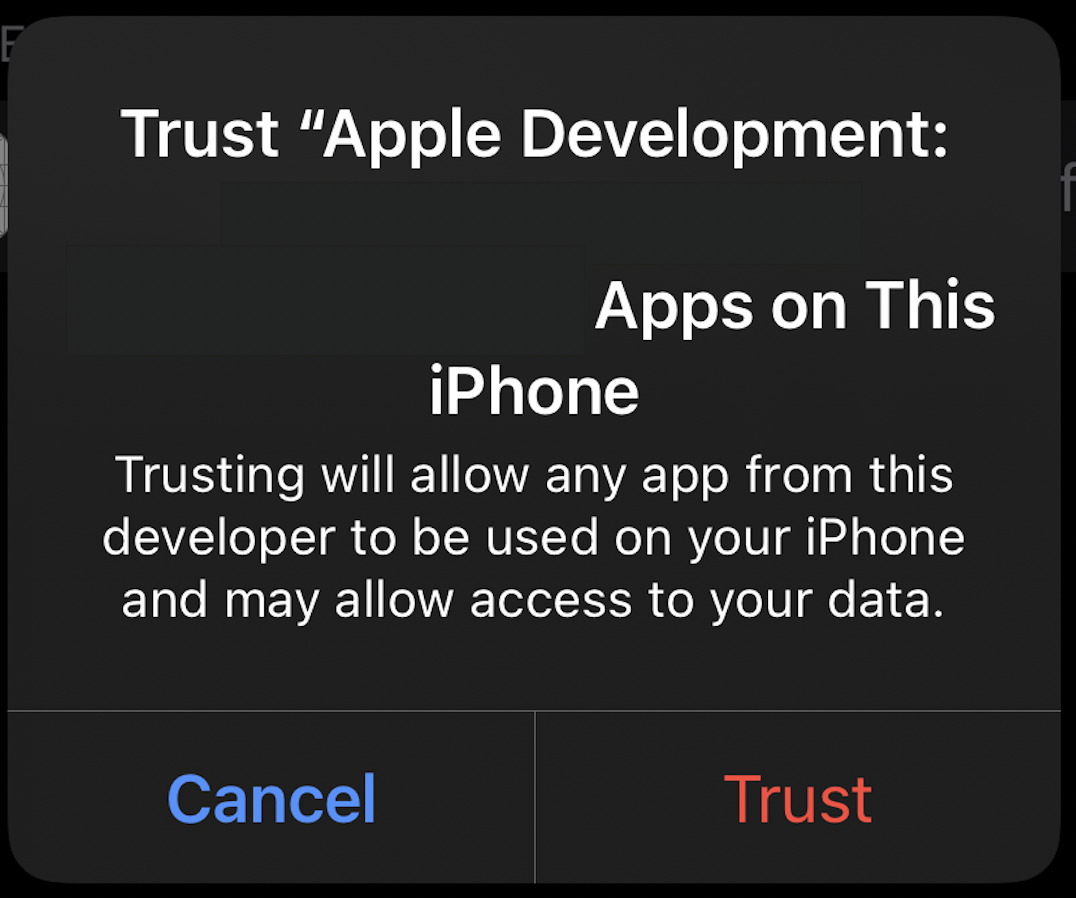
C) Tap "Trust ..." and tap "Trust" in the popup.
D) Close the Settings app on the device.
E) Close the Metro window on the computer.
F) Run npx react-native run-ios again.
In some tests, the build failed with the following error:
PhaseScriptExecution failed with a nonzero exit code
This was due to an error in the react-native package. The script
node_modules/react-native/scripts/react-native-xcode.sh must be edited.
Near the top of the script, there will be a set statement:
# Print commands before executing them (useful for troubleshooting)
set -x -e
DEST=$CONFIGURATION_BUILD_DIR/$UNLOCALIZED_RESOURCES_FOLDER_PATH
The -e argument must be removed:
# Print commands before executing them (useful for troubleshooting)
set -x
DEST=$CONFIGURATION_BUILD_DIR/$UNLOCALIZED_RESOURCES_FOLDER_PATH
In some test runs, the error mentioned a development team:
error: Signing for "SheetJSRNFetch" requires a development team. Select a development team in the Signing & Capabilities editor. (in target 'SheetJSRNFetch' from project 'SheetJSRNFetch')
Code signing must be enabled in the project!
By default, React Native generates applications that exclusively target iPhone. On a physical iPad, a pixellated iPhone app will be run.
The "targeted device families" setting must be changed to support iPad:
A) Open the Xcode workspace:
open ./ios/SheetJSRNFetch.xcworkspace
B) Select the project in the left sidebar:
C) Select the "SheetJSRNFetch" target in the sidebar.
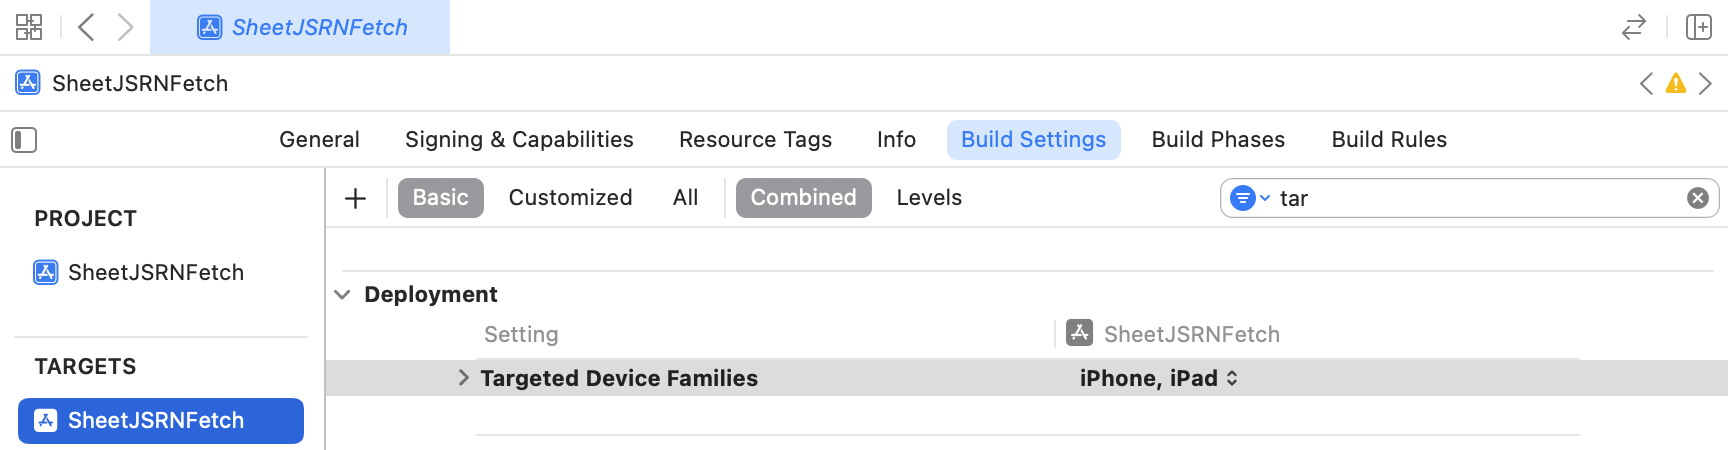
D) Select the "Build Settings" tab in the main area.
E) In the search bar below "Build Settings", type "tar"
F) In the "Targeted Device Families" row, change the value to "iPhone, iPad".
In some test runs, the build failed with a Provisioning message:
error: Provisioning profile "..." doesn't include the currently selected device "..." (identifier ...).
This was resolved by manually selecting the target device:
A) Open the Xcode workspace:
open ./ios/SheetJSRNFetch.xcworkspace
B) Select the project in the left sidebar:
C) In the top bar, next to the project name, there will be a gray device icon. Click on the icon and select the real device from the list.
Local Files
React Native does not provide a native file picker or a method for reading and writing data from documents on the devices. A third-party library must be used.
Since React Native internals change between releases, libraries may only work with specific versions of React Native. Project documentation should be consulted before picking a library.
The following table lists tested file plugins. "OS" lists tested platforms ("A" for Android and "I" for iOS).
| File system Plugin | File Picker Plugin | OS |
|---|---|---|
react-native-file-access | react-native-document-picker | AI |
react-native-blob-util | react-native-document-picker | AI |
expo-file-system | expo-document-picker | AI |
App Configuration
Due to privacy concerns, apps must request file access. There are special APIs for accessing data and are subject to change in future platform versions.
Technical Details (click to show)
iOS
iOS applications typically require two special settings in Info.plist:
-
UIFileSharingEnabled9 allows users to use files written by the app. A special folder will appear in the "Files" app. -
LSSupportsOpeningDocumentsInPlace10 allows the app to open files without creating a local copy.
Both settings must be set to true:
<plist version="1.0">
<dict>
  <key>UIFileSharingEnabled</key>
  <true/>
  <key>LSSupportsOpeningDocumentsInPlace</key>
  <true/>
  <key>CFBundleDevelopmentRegion</key>
Once the options are set, generated files are visible to users and can be shared with other apps including "Mail", "Messages", and "Numbers".
Android
Permissions and APIs have evolved over time. For broadest compatibility, the
following permissions must be enabled in AndroidManifest.xml:
-
READ_EXTERNAL_STORAGEandWRITE_EXTERNAL_STORAGEallow apps to access files outside of the app scope. These are required for scoped storage access. -
android:requestLegacyExternalStorage="true"enabled legacy behavior in some older releases.
The manifest is saved to android/app/src/main/AndroidManifest.xml:
    <uses-permission android:name="android.permission.INTERNET" />
    <uses-permission android:name="android.permission.READ_EXTERNAL_STORAGE"/>
    <uses-permission android:name="android.permission.WRITE_EXTERNAL_STORAGE"/>
    <application
      android:requestLegacyExternalStorage="true"
      android:name=".MainApplication"
      android:label="@string/app_name"
      android:icon="@mipmap/ic_launcher"
      android:roundIcon="@mipmap/ic_launcher_round"
      android:allowBackup="false"
      android:theme="@style/AppTheme">
Depending on the Android API level, there are three strategies for writing files:
-
In "legacy" mode (supported in API levels up to 29), files can be written to the user Downloads or Documents folder directly.
-
Using the
MediaStoreAPI, files should be copied to a visible location. -
Using the "Storage Access Framework", the user grants access to a folder and the app uses SAF APIs to create files and write data.
RN File Picker
The "File Picker" library handles two platform-specific steps:
-
Show a view that allows users to select a file from their device
-
Copy the selected file to a location that can be read by the application
The following libraries have been tested:
react-native-document-picker
react-native-document-picker
provides a pickSingle method for users to select one file.
The file plugins generally require the copyTo: "cachesDirectory" option:
import { pickSingle } from 'react-native-document-picker';

const f = await pickSingle({
  allowMultiSelection: false,
  copyTo: "cachesDirectory",
  mode: "open"
});
const path = f.fileCopyUri; // this path can be read by RN file plugins
expo-document-picker
expo-document-picker is a picker
that works with other modules in the Expo ecosystem.
The getDocumentAsync method allows users to select a file. The Expo file
plugin requires the copyToCacheDirectory option:
import * as DocumentPicker from 'expo-document-picker';

const result = await DocumentPicker.getDocumentAsync({
  copyToCacheDirectory: true,
  type: ['application/vnd.ms-excel', 'application/vnd.openxmlformats-officedocument.spreadsheetml.sheet']
});
const path = result.assets[0].uri; // this path can be read by RN file plugins
RN File Plugins
The following libraries have been tested:
react-native-blob-util
react-native-blob-util
is the continuation of other libraries that date back to 2016.
The ascii type returns an array of numbers corresponding to the raw bytes.
A Uint8Array from the data is compatible with the buffer type.
Reading and Writing snippets (click to hide)
Reading Data
import * as XLSX from "xlsx";
import RNFetchBlob from 'react-native-blob-util';
const { readFile } = RNFetchBlob.fs;

const res = await readFile(path, 'ascii');
const wb = XLSX.read(new Uint8Array(res), {type:'buffer'});
On iOS, the URI from react-native-document-picker must be massaged:
import { pickSingle } from 'react-native-document-picker';
import RNFetchBlob from 'react-native-blob-util';
const { readFile, dirs: { DocumentDir } } = RNFetchBlob.fs;

const f = await pickSingle({
  // Instruct the document picker to copy file to Documents directory
  copyTo: "documentDirectory",
  allowMultiSelection: false, mode: "open" });
// `f.uri` is the original path and `f.fileCopyUri` is the path to the copy
let path = f.fileCopyUri;
// iOS workaround
if (Platform.OS === 'ios') path = path.replace(/^.*\/Documents\//, DDP + "/");

const res = await readFile(path, 'ascii');
Writing Data
import * as XLSX from "xlsx";
import RNFetchBlob from 'react-native-blob-util';
const { writeFile, readFile, dirs:{ DocumentDir } } = RNFetchBlob.fs;

const wbout = XLSX.write(wb, {type:'buffer', bookType:"xlsx"});
const file = DocumentDir + "/sheetjsw.xlsx";
const res = await writeFile(file, Array.from(wbout), 'ascii');
Sharing Files in Android
copyToMediaStore uses the MediaStore API to share files.
The file must be written to the device before using the MediaStore API!
// ... continuation of "writing data"
const { MediaCollection } = RNFetchBlob;

/* Copy to downloads directory (android) */
try {
  await MediaCollection.copyToMediaStore({
    parentFolder: "",
    mimeType: "application/vnd.openxmlformats-officedocument.spreadsheetml.sheet",
    name: "sheetjsw.xlsx"
  }, "Download", file);
} catch(e) {}
react-native-file-access
react-native-file-access
is a filesystem API that uses modern iOS and Android development patterns.
The base64 encoding returns strings compatible with the base64 type:
Reading and Writing snippets (click to hide)
Reading Data
import * as XLSX from "xlsx";
import { FileSystem } from "react-native-file-access";

const b64 = await FileSystem.readFile(path, "base64");
/* b64 is a Base64 string */
const workbook = XLSX.read(b64, {type: "base64"});
Writing Data
import * as XLSX from "xlsx";
import { Dirs, FileSystem } from "react-native-file-access";
const DDP = Dirs.DocumentDir + "/";

const b64 = XLSX.write(workbook, {type:'base64', bookType:"xlsx"});
/* b64 is a Base64 string */
await FileSystem.writeFile(DDP + "sheetjs.xlsx", b64, "base64");
Sharing Files in Android
cpExternal uses the MediaStore API to share files.
The file must be written to the device before using the MediaStore API!
// ... continuation of "writing data"

/* Copy to downloads directory (android) */
try {
  await FileSystem.cpExternal(file, "sheetjsw.xlsx", "downloads");
} catch(e) {}
expo-file-system
expo-file-system is a filesystem API
that works with other modules in the Expo ecosystem.
Some Expo APIs return URI that cannot be read with expo-file-system. This
will manifest as an error:
Unsupported scheme for location '...'
The expo-document-picker snippet makes a local copy.
The EncodingType.Base64 encoding is compatible with base64 type.
Reading and Writing snippets (click to hide)
Reading Data
Calling FileSystem.readAsStringAsync with FileSystem.EncodingType.Base64
encoding returns a promise resolving to a string compatible with base64 type:
import * as XLSX from "xlsx";
import * as FileSystem from 'expo-file-system';

const b64 = await FileSystem.readAsStringAsync(uri, { encoding: FileSystem.EncodingType.Base64 });
const workbook = XLSX.read(b64, { type: "base64" });
Writing Data
The FileSystem.EncodingType.Base64 encoding accepts Base64 strings:
import * as XLSX from "xlsx";
import * as FileSystem from 'expo-file-system';

const b64 = XLSX.write(workbook, {type:'base64', bookType:"xlsx"});
/* b64 is a Base64 string */
await FileSystem.writeAsStringAsync(FileSystem.documentDirectory + "sheetjs.xlsx", b64, { encoding: FileSystem.EncodingType.Base64 });
Sharing Files in Android
StorageAccessFramework uses the "Storage Access Framework" to share files.
SAF API methods must be used to request permissions, make files and write data:
import * as XLSX from "xlsx";
import { documentDirectory, StorageAccessFramework } from 'expo-file-system';

const b64 = XLSX.write(workbook, {type:'base64', bookType:"xlsx"});
/* b64 is a Base64 string */
try {
  /* request access to a folder */
  const perms = await StorageAccessFramework.requestDirectoryPermissionsAsync(documentDirectory);
  /* if the user selected a folder ... */
  if(perms.granted) {

    /* create a new file */
    const uri = perms.directoryUri;
    const file = await StorageAccessFramework.createFileAsync(uri, "sheetjsw", "application/vnd.openxmlformats-officedocument.spreadsheetml.sheet");

    /* write data to file */
    await StorageAccessFramework.writeAsStringAsync(file, wbout, { encoding: "base64" });
  }
} catch(e) {}
Demo
This demo was tested in the following environments:
Real Devices
| OS | Device | RN | Date |
|---|---|---|---|
| iOS 15.6 | iPhone 13 Pro Max | 0.76.5 | 2025-01-05 |
| Android 34 | NVIDIA Shield | 0.76.5 | 2025-01-05 |
Simulators
| OS | Device | RN | Dev Platform | Date |
|---|---|---|---|---|
| Android 34 | Pixel 3a | 0.76.5 | darwin-arm | 2025-01-05 |
| iOS 18.2 | iPhone 16 Pro | 0.76.5 | darwin-arm | 2025-01-05 |
| Android 35 | Pixel 9 Pro XL | 0.76.5 | win11-x64 | 2025-06-08 |
| Android 36 | Pixel 9 | 0.76.5 | linux-x64 | 2025-07-06 |
There are many moving parts and pitfalls with React Native apps. It is strongly recommended to follow the official React Native tutorials for iOS and Android before approaching this demo.11 Details including Android Virtual Device configuration are not covered here.
This example tries to separate the library-specific functions.
Project Setup
- Create project:
npx -y @react-native-community/cli@15 init SheetJSRN --version="0.76.5"
On macOS, if prompted to install CocoaPods, press Y
- Install shared dependencies:
cd SheetJSRN
curl -LO https://docs.sheetjs.com/logo.png
npm i -S https://cdn.sheetjs.com/xlsx-0.20.3/xlsx-0.20.3.tgz
npm i -S https://cdn.sheetjs.com/react-native-tabeller-0.1.0/react-native-tabeller-0.1.0.tgz [email protected]
In PowerShell, the command may fail with a parameter error:
Invoke-WebRequest : A parameter cannot be found that matches parameter name 'LO'.
curl.exe must be invoked directly:
cd SheetJSRN
curl.exe -LO https://docs.sheetjs.com/logo.png
npm i -S https://cdn.sheetjs.com/xlsx-0.20.3/xlsx-0.20.3.tgz
npm i -S https://cdn.sheetjs.com/react-native-tabeller-0.1.0/react-native-tabeller-0.1.0.tgz [email protected]
- Download
index.jsand replace:
curl -LO https://docs.sheetjs.com/mobile/index.js
In PowerShell, the command may fail with a parameter error:
Invoke-WebRequest : A parameter cannot be found that matches parameter name 'LO'.
curl.exe must be invoked directly:
curl.exe -LO https://docs.sheetjs.com/mobile/index.js
- Start the Android emulator:
npx react-native run-android
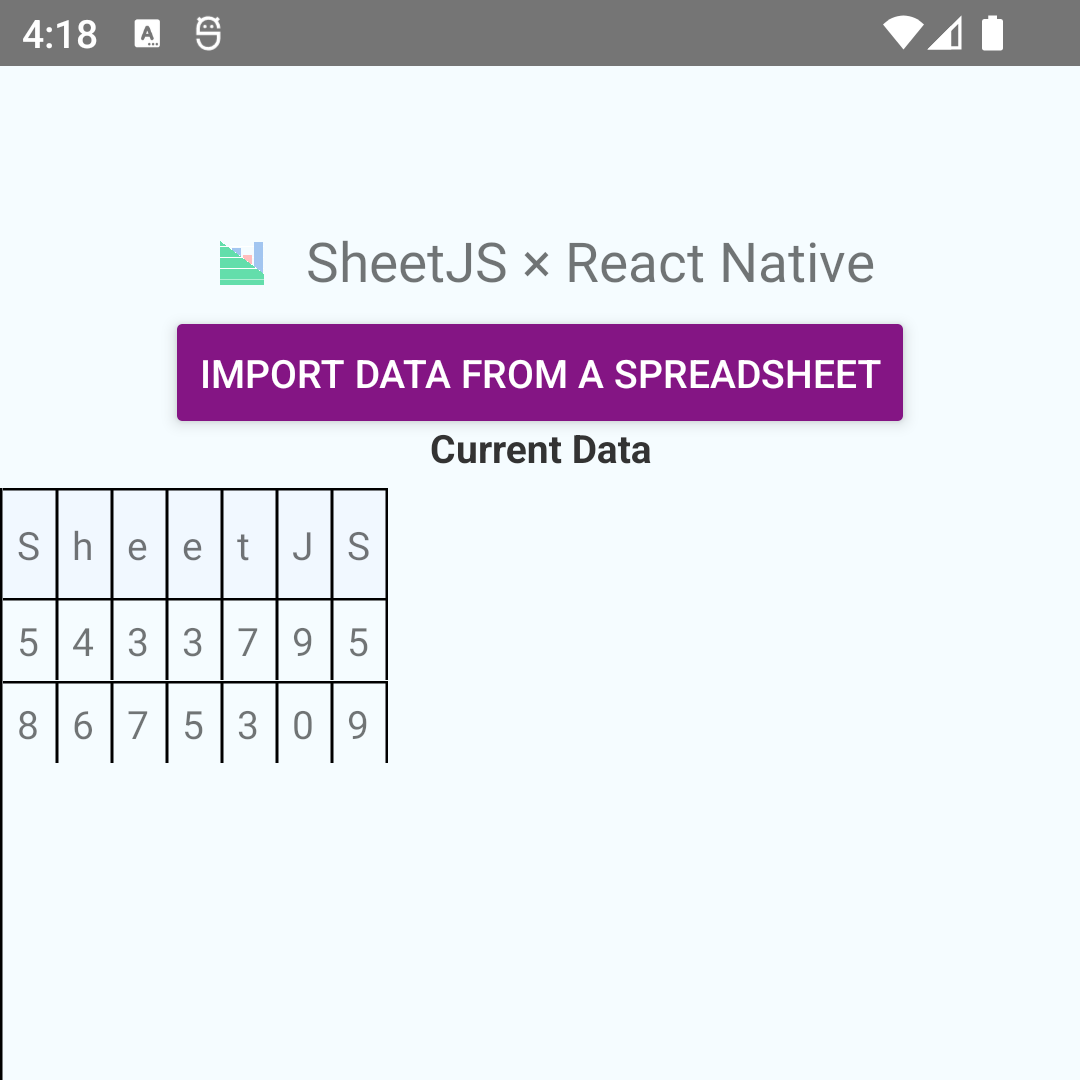
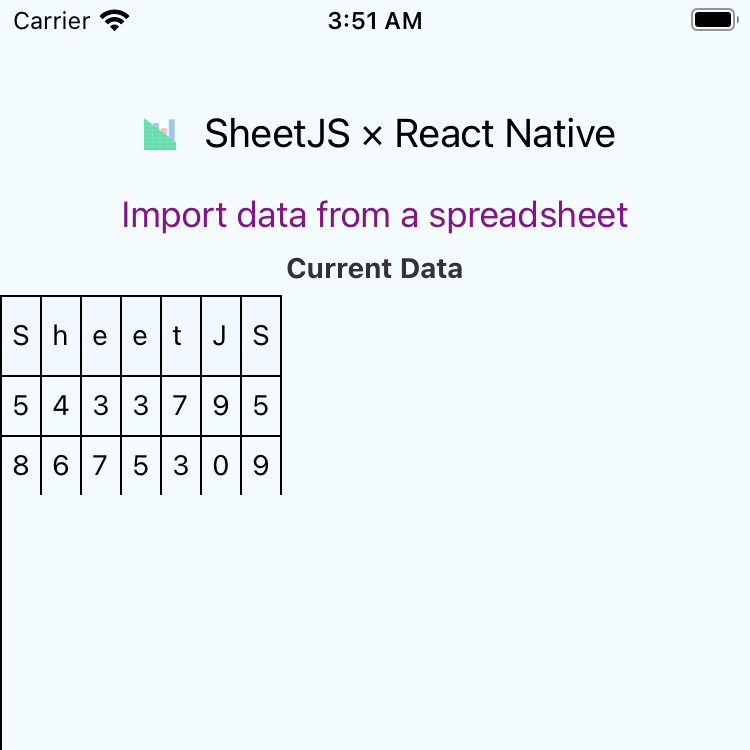
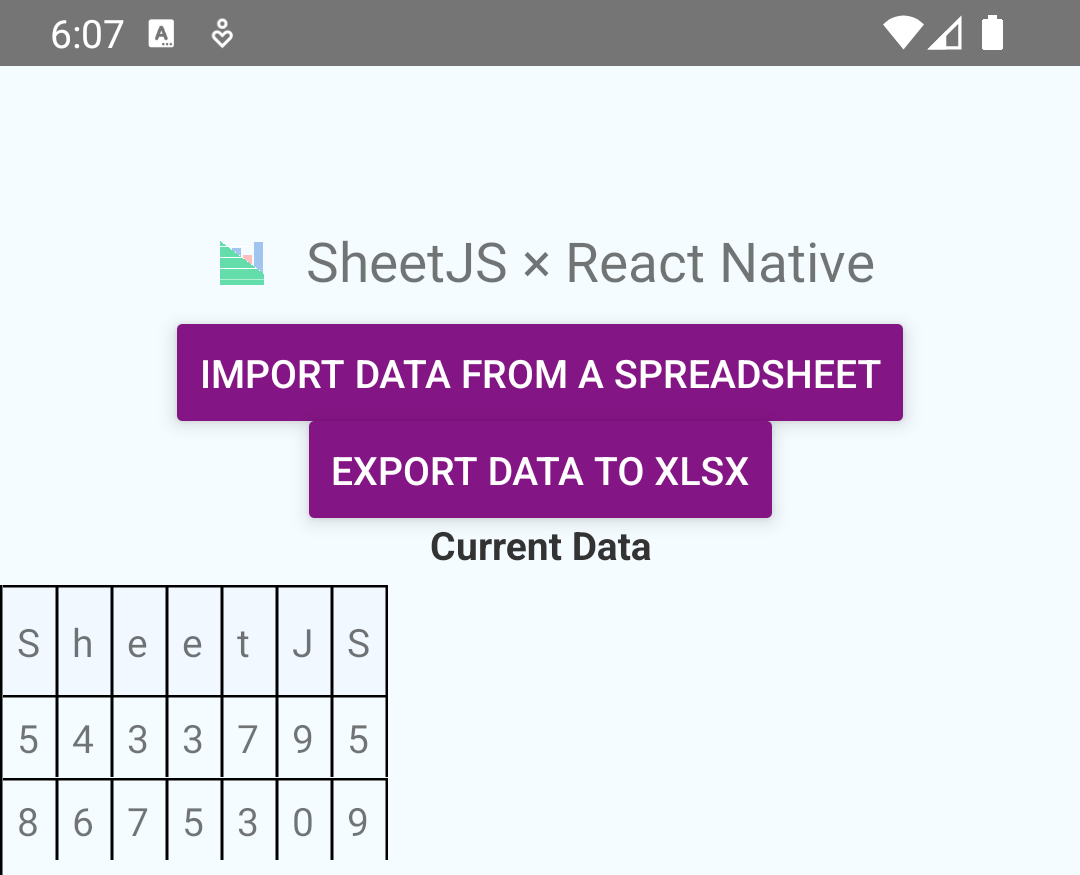
The app should look like the following screenshot:
On Linux, the command may silently stall. It is strongly recommended to launch the interactive CLI tool:
npx react-native start
Once the dev server is ready, the terminal will display a few options. Press r to relaod the app.
In some test runs on Windows, the build failed with an error:
> Failed to apply plugin 'com.android.internal.application'.
   > Android Gradle plugin requires Java 17 to run. You are currently using Java 11.
Java 17 must be installed12 and the JAVA_HOME environment variable must
point to the Java 17 location.
When this demo was last tested on Windows 11, there was a Gradle error mentioning a "temporary workspace":
> java.io.UncheckedIOException: Could not move temporary workspace (C:\Users\sheetjs\Documents\SheetJSRNFetch\android\.gradle\8.10.2\dependencies-accessors\569c8b261a8a714d7731d5f568e0e5c05babae10-4756c477-c60a-4328-ba8c-e12cc53b4ed0) to immutable location (C:\Users\sheetjs\Documents\SheetJSRNFetch\android\.gradle\8.10.2\dependencies-accessors\569c8b261a8a714d7731d5f568e0e5c05babae10)
This is a known bug in the version of Gradle used by React Native 0.76.5!
The Gradle version should be set to 8.11.1 in gradle-wrapper.properties:
distributionUrl=https\://services.gradle.org/distributions/gradle-8.11.1-all.zip
Stop the dev server and close the React Native Metro NodeJS window.
File Integration
- Pick a filesystem library for integration:
- RNBU
- RNFA
- EXPO
Install react-native-blob-util dependency:
npm i -S [email protected]
Add the highlighted lines to index.js:
import { Table, Row, Rows, TableWrapper } from 'react-native-tabeller';

import { read, write } from 'xlsx';
import { pickSingle } from 'react-native-document-picker';
import { Platform } from 'react-native';
import RNFetchBlob from 'react-native-blob-util';

async function pickAndParse() {
  const f = await pickSingle({allowMultiSelection: false, copyTo: "documentDirectory", mode: "open" });
  let path = f.fileCopyUri;
  if (Platform.OS === 'ios') path = path.replace(/^.*\/Documents\//, RNFetchBlob.fs.dirs.DocumentDir + "/");
  const res = await (await fetch(path)).arrayBuffer(); // RN >= 0.72
  // const res = await RNFetchBlob.fs.readFile(path, 'ascii'); // RN < 0.72
  return read(new Uint8Array(res), {type: 'buffer'});
}

async function writeWorkbook(wb) {
  const wbout = write(wb, {type:'buffer', bookType:"xlsx"});
  const file = RNFetchBlob.fs.dirs.DocumentDir + "/sheetjsw.xlsx";
  await RNFetchBlob.fs.writeFile(file, Array.from(wbout), 'ascii');

  /* Copy to downloads directory (android) */
  try { await RNFetchBlob.MediaCollection.copyToMediaStore({
    parentFolder: "",
    mimeType: "application/vnd.openxmlformats-officedocument.spreadsheetml.sheet",
    name: "sheetjsw.xlsx"
  }, "Download", file); } catch(e) {}

  return file;
}

const make_width = ws => {
Install react-native-file-access dependency:
npm i -S [email protected]
Add the highlighted lines to index.js:
import { Table, Row, Rows, TableWrapper } from 'react-native-tabeller';

import { read, write } from 'xlsx';
import { pickSingle } from 'react-native-document-picker';
import { Dirs, FileSystem } from 'react-native-file-access';

async function pickAndParse() {
  const f = await pickSingle({allowMultiSelection: false, copyTo: "documentDirectory", mode: "open" });
  let path = f.fileCopyUri;
  const res = await (await fetch(path)).arrayBuffer();
  return read(new Uint8Array(res), {type: 'buffer'});
}

async function writeWorkbook(wb) {
  const wbout = write(wb, {type:'base64', bookType:"xlsx"});
  const file = Dirs.DocumentDir + "/sheetjsw.xlsx";
  await FileSystem.writeFile(file, wbout, "base64");

  /* Copy to downloads directory (android) */
  try { await FileSystem.cpExternal(file, "sheetjsw.xlsx", "downloads"); } catch(e) {}

  return file;
}

const make_width = ws => {
Install expo-file-system and expo-document-picker dependencies:
npx install-expo-modules
npm i -S expo-file-system expo-document-picker
In the most recent test, the installation asked a few questions.
If prompted to change iOS deployment target, choose Yes.
If prompted to install Expo CLI integration, choose No.
On Windows, npx install-expo-modules will throw errors related to CocoaPods:
Uncaught Error CocoaPodsError: Command `pod install` failed.
└─ Cause: spawn pod ENOENT
'pod' is not recognized as an internal or external command,
operable program or batch file.
These errors can be ignored.
Add the highlighted lines to index.js:
import { Table, Row, Rows, TableWrapper } from 'react-native-tabeller';

import { read, write } from 'xlsx';
import { getDocumentAsync } from 'expo-document-picker';
import { documentDirectory, readAsStringAsync, writeAsStringAsync, StorageAccessFramework } from 'expo-file-system';

async function pickAndParse() {
  const result = await getDocumentAsync({copyToCacheDirectory: true});
  const path = result.assets[0].uri;
  const res = await readAsStringAsync(path, { encoding: "base64" });
  return read(res, {type: 'base64'});
}

async function writeWorkbook(wb) {
  const wbout = write(wb, {type:'base64', bookType:"xlsx"});
  const file = documentDirectory + "sheetjsw.xlsx";
  await writeAsStringAsync(file, wbout, { encoding: "base64" });

  /* Write to documents directory (android) */
  try {
  const perms = await StorageAccessFramework.requestDirectoryPermissionsAsync(documentDirectory);
  if(perms.granted) {
    const uri = perms.directoryUri;
    const file = await StorageAccessFramework.createFileAsync(uri, "sheetjsw", "application/vnd.openxmlformats-officedocument.spreadsheetml.sheet");
    await StorageAccessFramework.writeAsStringAsync(file, wbout, { encoding: "base64" });
  }
  } catch(e) {}
  return file;
}

const make_width = ws => {
Android Testing
- Restart the Android development process:
npx react-native run-android
The following app will be shown:
When this demo was last tested on macOS, the process failed to launch the emulator:
warn Please launch an emulator manually or connect a device. Otherwise app may fail to launch.
This is a known bug in React Native!
If an emulator is installed, run the following command:
npx react-native doctor
Under Android, there will be one error:
Android

 ✖ Adb - No devices and/or emulators connected. Please create emulator with Android Studio or connect Android device.
Press f and a list of available emulators will be shown. Select the emulator
(typically the last line) and press Enter.
✔ Select the device / emulator you want to use › Emulator Pixel_3a_API_34 (disconnected)
The text in green is the name of the virtual device (Pixel_3a_API_34 in this
example). Run the following command to manually start the emulator:
$ANDROID_HOME/tools/emulator -avd Pixel_3a_API_34
(replace Pixel_3a_API_34 with the name of the virtual device)
To confirm React Native detects the emulator, run the following command again:
npx react-native doctor
-
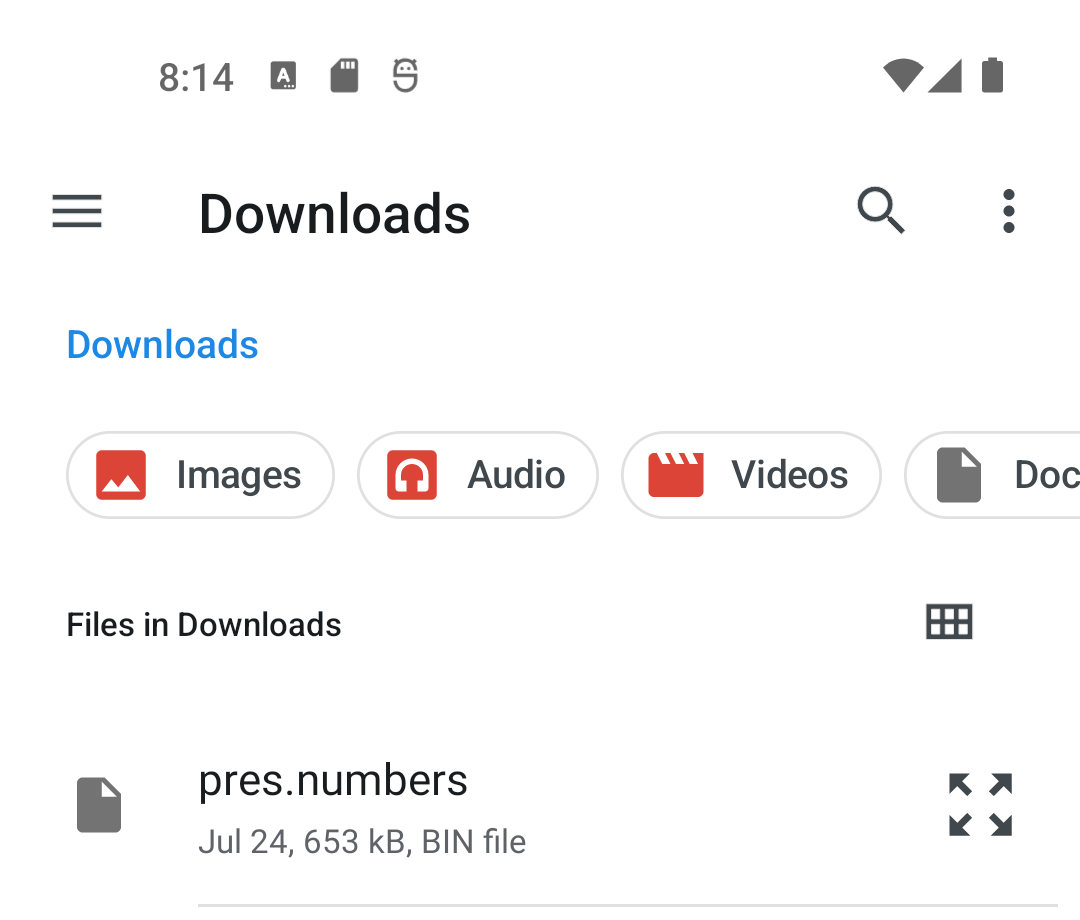
Download https://docs.sheetjs.com/pres.numbers and open the Downloads folder.
-
Click and drag
pres.numbersfrom the Downloads folder into the simulator. -
Click "Import data" and look for
pres.numbers.
If the file is not displayed, click the ≡ icon and click "Downloads".
- Select
pres.numbers.
The screen should refresh with new contents:
- Click "Export data".
expo-file-system on Android will prompt to grant access to a folder.
Tap the ≡ icon and tap the "Documents" folder with the download icon.
Tap the 'ALLOW ACCESS TO "DOCUMENTS"' button.
In the "Allow access" pop, tap "ALLOW".
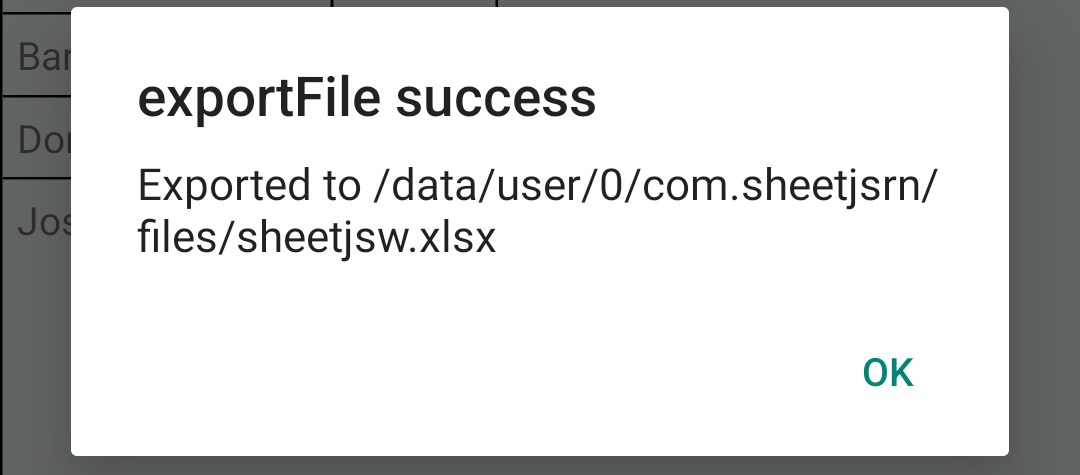
An alert will display the location to the file:
- Pull the file from the simulator and verify the contents:
adb exec-out run-as com.sheetjsrn cat files/sheetjsw.xlsx > /tmp/sheetjsw.xlsx
npx xlsx-cli /tmp/sheetjsw.xlsx
PowerShell mangles binary data in the redirect.
On Windows, the following commands must be run in the Command Prompt:
adb exec-out run-as com.sheetjsrn cat files/sheetjsw.xlsx > sheetjsw.xlsx
npx xlsx-cli sheetjsw.xlsx
- Stop the dev server and close the React Native Metro NodeJS window.
iOS Testing
iOS testing can only be performed on Apple hardware running macOS!
Xcode and iOS simulators are not available on Windows or Linux.
Scroll down to "Android Device Testing" for device tests.
- Refresh iOS project by running
pod installfrom theiossubfolder:
cd ios; pod install; cd -
- Start the iOS development process:
npx react-native run-ios
-
Download https://docs.sheetjs.com/pres.numbers and open the Downloads folder.
-
In the simulator, click the Home icon to return to the home screen.
-
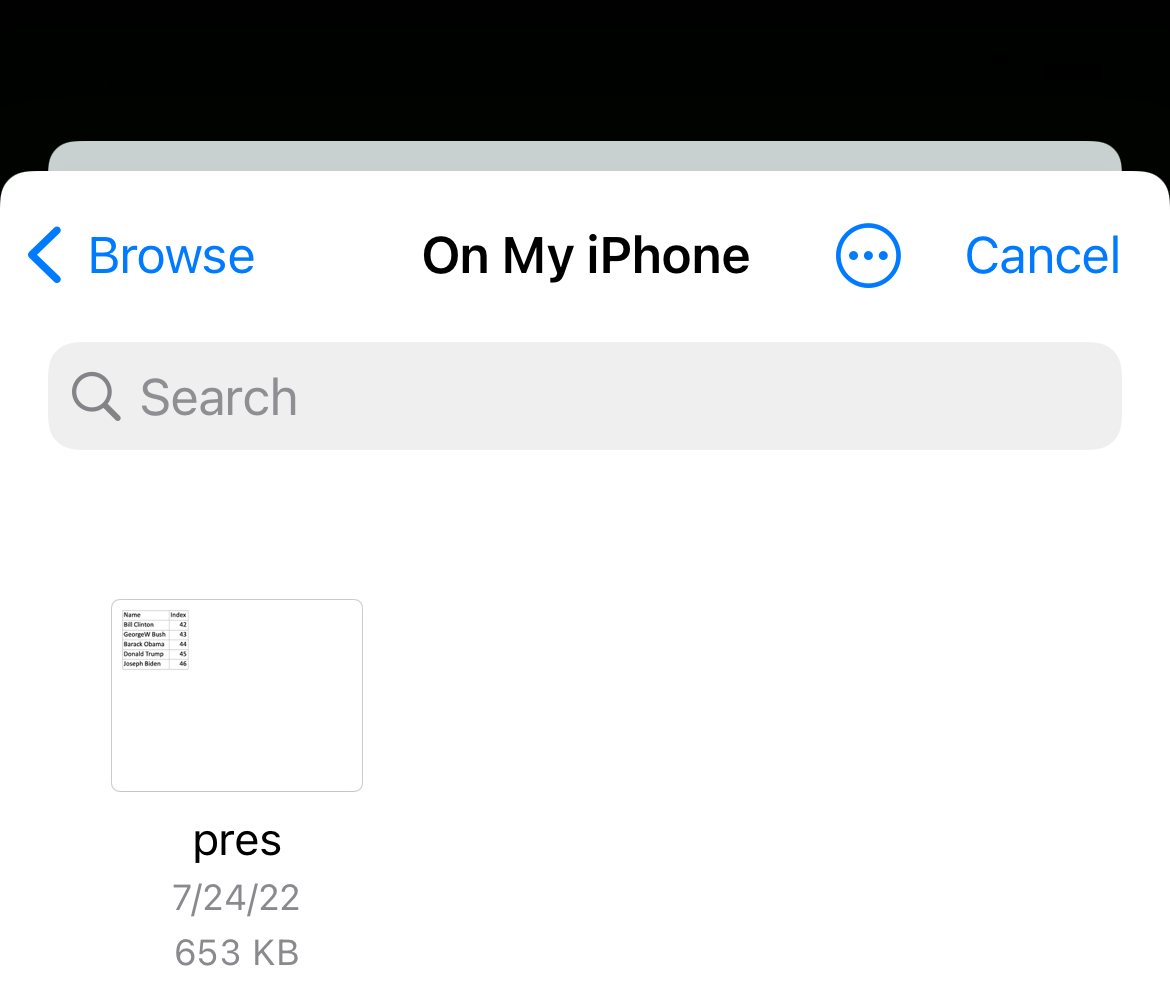
Click on the "Files" icon to open the app.
-
Click and drag
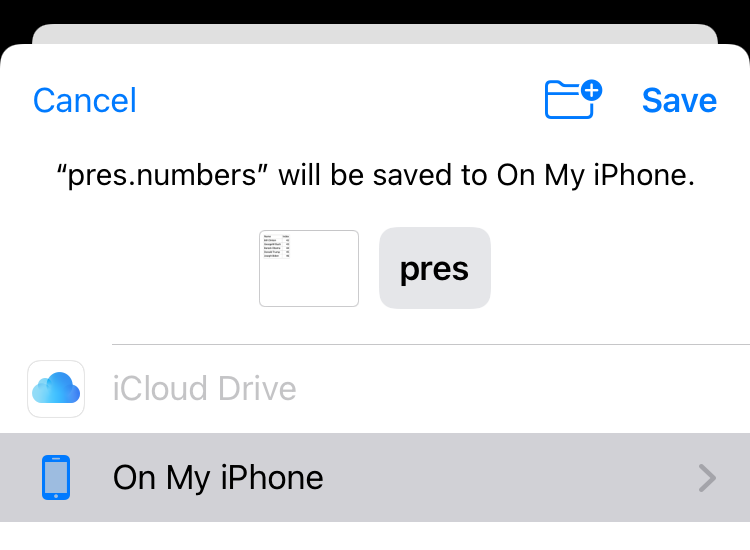
pres.numbersfrom the Downloads folder into the simulator.
-
Make sure "On My iPhone" is highlighted and select "Save".
-
Click the Home icon again then select the
SheetJSRNapp. -
Click "Import data" and select
pres:
Once selected, the screen should refresh with new contents:
- Click "Export data".
An alert will display the location to the file:

- Find the file and verify the contents are correct:
find ~/Library/Developer/CoreSimulator -name sheetjsw.xlsx |
  while read x; do echo "$x"; npx xlsx-cli "$x"; done
Once testing is complete, stop the simulator and the development process.
Android Device Testing
- Add the highlighted lines to
android/app/src/main/AndroidManifest.xml:
    <uses-permission android:name="android.permission.INTERNET" />
    <uses-permission android:name="android.permission.READ_EXTERNAL_STORAGE"/>
    <uses-permission android:name="android.permission.WRITE_EXTERNAL_STORAGE"/>
    <application
      android:requestLegacyExternalStorage="true"
      android:name=".MainApplication"
      android:label="@string/app_name"
      android:icon="@mipmap/ic_launcher"
      android:roundIcon="@mipmap/ic_launcher_round"
      android:allowBackup="false"
      android:theme="@style/AppTheme">
There will be two new uses-permission tags within the parent manifest tag.
The attribute android:requestLegacyExternalStorage="true" must be added to the
application tag.
- Close any Android / iOS simulators.
Stop the dev server and close the React Native Metro NodeJS window.
- Connect an Android device using a USB cable.
If the device asks to allow USB debugging, tap "Allow".
- Build APK and run on device:
npx react-native run-android
-
Download https://docs.sheetjs.com/pres.numbers on the device.
-
Switch back to the "SheetJSRN" app.
-
Tap "Import data" and tap
pres.numbers.
If the file is not displayed, tap the ≡ icon and tap "Downloads".
The table will refresh with data from the file.
- Tap "Export Data".
expo-file-system on Android will prompt to grant access to a folder.
Tap the ≡ icon and tap the "Documents" folder with the download icon.
Tap the 'ALLOW ACCESS TO "DOCUMENTS"' button.
In the "Allow access" pop, tap "ALLOW".
Tap "OK" in the exportFile popup.
- Switch to the Files app and navigate to the Downloads folder.
When testing expo-file-system, select "Documents".
There will be a new file sheetjsw.xlsx.
-
Close and reopen the "SheetJSRN" app. The data will reset.
-
Tap "Import data" and tap
sheetjsw.xlsx.
If the file is not displayed, tap the ≡ icon and tap "Downloads".
When testing expo-file-system, select "Documents".
The table will refresh with the data from the exported file.
iOS Device Testing
-
Close any Android / iOS emulators.
-
Enable file sharing and make the documents folder visible in the iOS app. Add the following lines to
ios/SheetJSRN/Info.plist:
<plist version="1.0">
<dict>
  <key>UIFileSharingEnabled</key>
  <true/>
  <key>LSSupportsOpeningDocumentsInPlace</key>
  <true/>
  <key>CFBundleDevelopmentRegion</key>
(The root element of the document is plist and it contains one dict child)
-
Enable developer code signing certificates. More details are covered in the "iOS Device Testing" part of the Fetch Demo (step 15).
-
Install
ios-deploythrough Homebrew:
brew install ios-deploy
- Run on device:
npx react-native run-ios
If the build fails, some troubleshooting notes are included in the "iOS Device Testing" part of the Fetch Demo (step 17).
-
Download https://docs.sheetjs.com/pres.numbers on the device.
-
Switch back to the "SheetJSRN" app.
-
Tap "Import data" and tap
presfrom the Recents list.
The table will refresh with data from the file.
-
Tap "Export Data" and tap "OK" in the
exportFilepopup. -
Install the "Numbers" app from the iOS App Store.
-
Open the "Files" app. Repeatedly tap the
<button in the top-left corner to return to the "Browse" view. -
Tap "On My iPhone" or "On My iPad". Tap "SheetJSRN" in the list.
The sheetjsw entry in this folder is the generated file.
-
Hold down the
sheetjswitem until the menu appears. Select "Share". -
In the sharing menu, below a list of contacts, there will be a row of app icons. Swipe left until the "Numbers" app icon appears and tap the app icon.
The Numbers app will load the spreadsheet, confirming that the file is valid.
Footnotes
-
Follow the "Set Up Your Environment" guide and select the appropriate "Development OS". ↩ ↩2
-
React-Native commit
5b597b5added the final piece required forfetchsupport. It is available in official releases starting from0.72.0. ↩ -
See the compatibility table in the CLI project repository to determine which version of
@react-native-community/cliis required for a givenreact-nativeversion. ↩ -
When the demo was last tested, the Temurin distribution of Java 17 was installed through the macOS Brew package manager by running
brew install temurin17. Direct downloads are available atadoptium.net↩ -
See "Running On Device" in the React Native documentation ↩
-
See
UIFileSharingEnabledin the Apple Developer Documentation. ↩ -
See
LSSupportsOpeningDocumentsInPlacein the Apple Developer Documentation. ↩ -
Follow the "React Native CLI Quickstart" for Android (and iOS, if applicable) ↩
-
See the JDK Archive for Java 17 JDK download links. ↩