Sheets in ReactJS Sites
ReactJS is a JavaScript library for building user interfaces.
SheetJS is a JavaScript library for reading and writing data from spreadsheets.
This demo uses ReactJS and SheetJS to process and generate spreadsheets. We'll explore how to load SheetJS in a ReactJS site and compare common state models and data flow strategies.
This demo focuses on ReactJS concepts. Other demos cover general deployments:
Installation
The "Frameworks" section covers installation with Yarn and other package managers.
The library can be imported directly from JS or JSX code with:
import { read, utils, writeFile } from 'xlsx';
Internal State
The various SheetJS APIs work with various data shapes. The preferred state depends on the application.
Array of Objects
Typically, some users will create a spreadsheet with source data that should be loaded into the site. This sheet will have known columns.
State
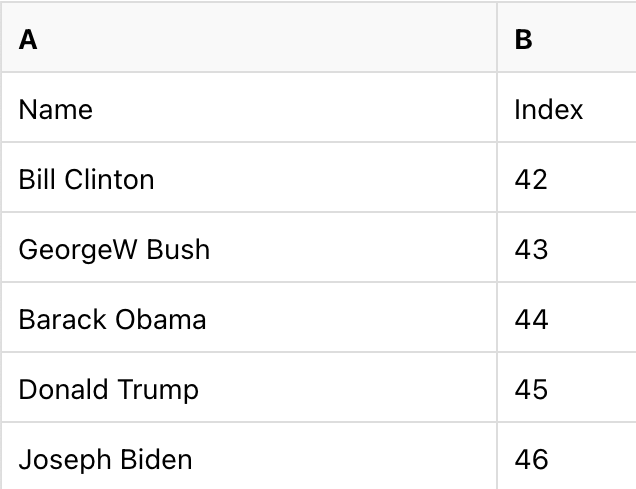
The example presidents sheet has one header row with "Name" and "Index" columns. The natural JS representation is an object for each row, where the keys are specified in the first row:
| Spreadsheet | State |
|---|---|
| |

The ReactJS useState1 hook can configure the state:
- JavaScript
- TypeScript
import { useState } from 'react';

/* the component state is an array of objects */
const [pres, setPres] = useState([]);
import { useState } from 'react';

/* the component state is an array of objects */
const [pres, setPres] = useState<any[]>([]);
When the spreadsheet header row is known ahead of time, row typing is possible:
import { useState } from 'react';

interface President {
  Name: string;
  Index: number;
}

/* the component state is an array of presidents */
const [pres, setPres] = useState<President[]>([]);
The types are informative. They do not enforce that worksheets include the named columns. A runtime data validation library should be used to verify the dataset.
When the file header is not known in advance, any should be used.
Updating State
The SheetJS read and sheet_to_json
functions simplify state updates. They are best used in the function bodies of
useEffect2 and useCallback3 hooks.
A useEffect hook can download and update state when the site is loaded:
- JavaScript
- TypeScript
import { useEffect } from 'react';
import { read, utils } from 'xlsx';

/* Fetch and update the state once */
useEffect(() => { (async() => {
  /* Download from https://docs.sheetjs.com/pres.numbers */
  const f = await fetch("https://docs.sheetjs.com/pres.numbers");
  const ab = await f.arrayBuffer();

  /* parse */
  const wb = read(ab);

  /* generate array of objects from first worksheet */
  const ws = wb.Sheets[wb.SheetNames[0]]; // get the first worksheet
  const data = utils.sheet_to_json(ws); // generate objects

  /* update state */
  setPres(data); // update state
})(); }, []);
import { useEffect } from 'react';
import { read, utils } from 'xlsx';

/* Fetch and update the state once */
useEffect(() => { (async() => {
  /* Download from https://docs.sheetjs.com/pres.numbers */
  const f = await fetch("https://docs.sheetjs.com/pres.numbers");
  const ab = await f.arrayBuffer();

  /* parse */
  const wb = read(ab);

  /* generate array of presidents from the first worksheet */
  const ws = wb.Sheets[wb.SheetNames[0]]; // get the first worksheet
  const data: President[] = utils.sheet_to_json<President>(ws); // generate objects

  /* update state */
  setPres(data); // update state
})(); }, []);
Rendering Data
Components typically render HTML tables from arrays of objects. The <tr> table
row elements are typically generated by mapping over the state array, as shown
in the example JSX code:
<table>
  {/* The `thead` section includes the table header row */}
  <thead><tr><th>Name</th><th>Index</th></tr></thead>
  {/* The `tbody` section includes the data rows */}
  <tbody>
    {/* generate row (TR) for each president */}
    {pres.map(row => (
      <tr>
        {/* Generate cell (TD) for name / index */}
        <td>{row.Name}</td>
        <td>{row.Index}</td>
      </tr>
    ))}
  </tbody>
</table>
Exporting Data
The writeFile and json_to_sheet
functions simplify exporting data. They are best used in the function bodies of
useCallback4 hooks attached to button or other elements.
A callback can generate a local file when a user clicks a button:
import { useCallback } from 'react';
import { utils, writeFile } from 'xlsx';

/* get state data and export to XLSX */
const exportFile = useCallback(() => {
  /* generate worksheet from state */
  const ws = utils.json_to_sheet(pres);
  /* create workbook and append worksheet */
  const wb = utils.book_new();
  utils.book_append_sheet(wb, ws, "Data");
  /* export to XLSX */
  writeFile(wb, "SheetJSReactAoO.xlsx");
}, [pres]);
Complete Component
This complete component example fetches a test file and displays the contents in an HTML table. When the export button is clicked, a callback will export a file:
import React, { useCallback, useEffect, useState } from "react";

import { read, utils, writeFileXLSX } from 'xlsx';

export default function SheetJSReactAoO() {
  /* the component state is an array of presidents */
  const [pres, setPres] = useState([] /* as any[] */);

  /* Fetch and update the state once */
  useEffect(() => { (async() => {
    const f = await (await fetch("https://docs.sheetjs.com/pres.xlsx")).arrayBuffer();
    const wb = read(f); // parse the array buffer
    const ws = wb.Sheets[wb.SheetNames[0]]; // get the first worksheet
    const data = utils.sheet_to_json(ws); // generate objects
    setPres(data); // update state
  })(); }, []);

  /* get state data and export to XLSX */
  const exportFile = useCallback(() => {
    const ws = utils.json_to_sheet(pres);
    const wb = utils.book_new();
    utils.book_append_sheet(wb, ws, "Data");
    writeFileXLSX(wb, "SheetJSReactAoO.xlsx");
  }, [pres]);

  return (<table><thead><tr><th>Name</th><th>Index</th></tr></thead><tbody>
    { /* generate row for each president */
      pres.map((pres, index) => (<tr key={index}>
        <td>{pres.Name}</td>
        <td>{pres.Index}</td>
      </tr>))
    }
  </tbody><tfoot><tr><td colSpan={2}>
    <button onClick={exportFile}>Export XLSX</button>
  </td></tr></tfoot></table>);
}
How to run the example (click to hide)
- ViteJS
- create-react-app
- NextJS
- Preact
This demo was tested in the following environments:
| ReactJS | ViteJS | Date |
|---|---|---|
19.1.0 | 6.3.5 | 2025-05-11 |
- Create a new site:
npm create vite@latest sheetjs-react -- --template react
- Install the SheetJS dependency and start the dev server:
cd sheetjs-react
npm i
npm i --save https://cdn.sheetjs.com/xlsx-0.20.3/xlsx-0.20.3.tgz
npm run dev
-
Open a web browser and access the displayed URL (
http://localhost:5173) -
Replace
src/App.jsxwith thesrc/SheetJSReactAoO.jsexample.
The page will refresh and show a table with an Export button. Click the button
and the page will attempt to download SheetJSReactAoO.xlsx.
- Build the site:
npm run build
The generated site will be placed in the dist folder.
- Start a local web server:
npx -y http-server dist
Access the displayed URL (typically http://localhost:8080) with a web browser
and test the page.
This demo was tested in the following environments:
| ReactJS | CRA | Date |
|---|---|---|
19.1.0 | 5.1.0 | 2025-05-11 |
- Create a new site:
npx -y [email protected] sheetjs-react
- Install the SheetJS dependency and start the dev server:
cd sheetjs-react
npm i
npm i [email protected] [email protected] web-vitals --save --save-exact
npm i --save https://cdn.sheetjs.com/xlsx-0.20.3/xlsx-0.20.3.tgz
npm start
-
Open a web browser and access the displayed URL (
http://localhost:3000) -
Replace
src/App.jswith thesrc/SheetJSReactAoO.jsexample.
The page will refresh and show a table with an Export button. Click the button
and the page will attempt to download SheetJSReactAoO.xlsx.
- Build the site:
npm run build
The generated site will be placed in the build folder.
- Start a local web server:
npx -y http-server build
Access the displayed URL (typically http://localhost:8080) with a web browser
and test the page.
This demo was tested in the following environments:
| ReactJS | NextJS | Date |
|---|---|---|
19.1.0 | 15.3.2 | 2025-05-11 |
This demo focuses on processing data in Client Components.
The NextJS demo covers static site generation.
NextJS requires a number of workarounds for simple client-side JavaScript code.
It is strongly recommended to use ViteJS or create-react-app when possible!
NextJS collects telemetry by default. The telemetry subcommand can disable it:
npx next telemetry disable
The setting can be verified by running
npx next telemetry status
- Disable NextJS telemetry:
npx next telemetry disable
- Create a new site:
npx create-next-app@latest sheetjs-nextjs --ts --no-eslint --no-tailwind --no-src-dir --no-app --import-alias "@/*" --no-turbopack
- Install the SheetJS dependency and start the dev server:
cd sheetjs-nextjs
npm i
npx next telemetry disable
npm i --save https://cdn.sheetjs.com/xlsx-0.20.3/xlsx-0.20.3.tgz
npm run dev
-
Open a web browser and access the displayed URL (
http://localhost:3000) -
Replace
pages/index.tsxwith thesrc/SheetJSReactAoO.jsexample.
After replacing the code:
- uncomment the type hint in the
useStatefunction call:
const [pres, setPres] = useState([] as any[]);
- add the following to the top of
pages/index.tsx:
"use client";
The goal is to run SheetJS code in the browser. NextJS will attempt to render
pages on the server by default. "use client"; instructs NextJS to treat the
exported component as a "Client Component" that will be rendered in the browser.
If the directive is not added, NextJS will report errors related to hydration:
Error: Hydration failed because the initial UI does not match what was rendered on the server.

Warning: Expected server HTML to contain a matching <td> in <tfoot>.

See more info here: https://nextjs.org/docs/messages/react-hydration-error
The page will refresh and show a table with an Export button. Click the button
and the page will attempt to download SheetJSReactAoO.xlsx.
- Build the site:
npm run build
- Start a local web server:
npm run start
Access the displayed URL (typically http://localhost:3000) with a web browser
and test the page.
This demo was tested in the following environments:
| Preact | ViteJS | Date |
|---|---|---|
10.26.6 | 5.4.19 | 2025-05-11 |
- Create a new site:
npm init preact sheetjs-preact
This will initiate the project creation process. Follow the on-screen prompts and press Enter to accept the default options:
Project language:JavaScriptUse router?NoPrerender app (SSG)?NoUse ESLint?No
- Install the SheetJS dependency and start the dev server:
cd sheetjs-preact
npm i --save https://cdn.sheetjs.com/xlsx-0.20.3/xlsx-0.20.3.tgz
npm run dev
-
Open a web browser and access the displayed URL (
http://localhost:5173) -
Copy
src/SheetJSReactAoO.jsdemo code tosrc/index.jsxand update the imports:
// Remove React import and replace with:
import { render } from 'preact';
import { useCallback, useEffect, useState } from 'preact/hooks';
- Add the following to the bottom of the file:
export function App() { return ( <SheetJSReactAoO/> );}

render(<App />, document.getElementById('app'));
The page will refresh and show a table with an Export button. Click the button
and the page will attempt to download SheetJSReactAoO.xlsx.
- Build the site:
npm run build
The generated site will be placed in the dist folder.
- Start a local web server:
npx -y http-server dist
Access the displayed URL (typically http://localhost:8080) with a web browser
and test the page.
When the page loads, the app will fetch https://docs.sheetjs.com/pres.xlsx and display the data from the first worksheet in a TABLE. The "Export XLSX" button will generate a workbook that can be opened in a spreadsheet editor.
HTML
The main disadvantage of the Array of Objects approach is the specific nature of the columns. For more general use, passing around an Array of Arrays works. However, this does not handle merge cells5 well!
HTML Tables support elements with rowspan and colspan attributes.
State
The state will be the serialized HTML string:
- JavaScript
- TypeScript
import { useState } from 'react';

/* the component state is a string */
const [__html, setHtml] = useState("");
import { useState } from 'react';

/* the component state is a string */
const [__html, setHtml] = useState<string>("");
__htmlExamples use the name __html due to the design of dangerouslySetInnerHTML.
dangerouslySetInnerHTML expects objects of the form { __html: "html code" }.
For example, the following snippet assumes html is the variable name:
<div ref={tbl} dangerouslySetInnerHTML={{ __html: html }} />
By using the name __html, the ES6 shorthand syntax simplifies the code:
<div ref={tbl} dangerouslySetInnerHTML={{ __html }} />
Updating State
The sheet_to_html function
generates HTML that is aware of merges and other worksheet features.
A useEffect hook can download and update state when the site is loaded:
import { useEffect } from 'react';
import { read, utils } from 'xlsx';

/* Fetch and update the state once */
useEffect(() => { (async() => {
  /* Download from https://docs.sheetjs.com/pres.numbers */
  const f = await fetch("https://docs.sheetjs.com/pres.numbers");
  const ab = await f.arrayBuffer();

  /* parse */
  const wb = read(ab);

  /* generate HTML TABLE from first worksheet */
  const ws = wb.Sheets[wb.SheetNames[0]]; // get the first worksheet
  const data = utils.sheet_to_html(ws); // generate objects

  /* update state */
  setHtml(data); // update state
})(); }, []);
Rendering Data
ReactJS dangerouslySetInnerHTML6 prop allows code to set the innerHTML
attribute, effectively inserting the code into the page.
It is strongly recommended to set the innerHTML of a parent DIV container.
By attaching a ref, callbacks will be able to access the live TABLE element.
<div ref={tbl} dangerouslySetInnerHTML={{ __html }} />
Exporting Data
The writeFile and table_to_book
functions simplify exporting data. They are best used in the function bodies of
useCallback4 hooks attached to button or other elements.
A callback can generate a local file when a user clicks a button:
import { useCallback } from 'react';
import { utils, writeFile } from 'xlsx';

/* get data from live HTML TABLE and export to XLSX */
const exportFile = useCallback(() => {
  /* get live reference to HTML TABLE element */
  const elt = tbl.current.getElementsByTagName("TABLE")[0];
  /* generate workbook from element */
  const wb = utils.table_to_book(elt);
  /* export to XLSX */
  writeFile(wb, "SheetJSReactAoO.xlsx");
}, [pres]);
Complete Component
In this example, the component attaches a ref to the DIV container. During
export, the first TABLE child element can be parsed with table_to_book to
generate a workbook object.
import React, { useCallback, useEffect, useRef, useState } from "react";

import { read, utils, writeFileXLSX } from 'xlsx';

export default function SheetJSReactHTML() {
  /* the component state is an HTML string */
  const [__html, setHtml] = useState("");
  /* the ref is used in export */
  const tbl = useRef(null);

  /* Fetch and update the state once */
  useEffect(() => { (async() => {
    const f = await (await fetch("https://docs.sheetjs.com/pres.xlsx")).arrayBuffer();
    const wb = read(f); // parse the array buffer
    const ws = wb.Sheets[wb.SheetNames[0]]; // get the first worksheet
    const data = utils.sheet_to_html(ws); // generate HTML
    setHtml(data); // update state
  })(); }, []);

  /* get live table and export to XLSX */
  const exportFile = useCallback(() => {
    const elt = tbl.current.getElementsByTagName("TABLE")[0];
    const wb = utils.table_to_book(elt);
    writeFileXLSX(wb, "SheetJSReactHTML.xlsx");
  }, [tbl]);

  return ( <>
    <button onClick={exportFile}>Export XLSX</button>
    <div ref={tbl} dangerouslySetInnerHTML={{ __html }} />
  </> );
}
How to run the example (click to hide)
- ViteJS
- create-react-app
- Preact
This demo was tested in the following environments:
| ReactJS | ViteJS | Date |
|---|---|---|
19.1.0 | 6.3.5 | 2025-05-11 |
- Create a new site:
npm create vite@latest sheetjs-react -- --template react
- Install the SheetJS dependency and start the dev server:
cd sheetjs-react
npm i
npm i --save https://cdn.sheetjs.com/xlsx-0.20.3/xlsx-0.20.3.tgz
npm run dev
-
Open a web browser and access the displayed URL (
http://localhost:5173) -
Replace
src/App.jsxwith thesrc/SheetJSReactHTML.jsexample.
The page will refresh and show a table with an Export button. Click the button
and the page will attempt to download SheetJSReactHTML.xlsx.
- Build the site:
npm run build
The generated site will be placed in the dist folder.
- Start a local web server:
npx -y http-server dist
Access the displayed URL (typically http://localhost:8080) with a web browser
and test the page.
This demo was tested in the following environments:
| ReactJS | CRA | Date |
|---|---|---|
19.1.0 | 5.1.0 | 2025-05-11 |
- Create a new site:
npx -y [email protected] sheetjs-react
- Install the SheetJS dependency and start the dev server:
cd sheetjs-react
npm i
npm i [email protected] [email protected] web-vitals --save --save-exact
npm i --save https://cdn.sheetjs.com/xlsx-0.20.3/xlsx-0.20.3.tgz
npm start
-
Open a web browser and access the displayed URL (
http://localhost:3000) -
Replace
src/App.jswith thesrc/SheetJSReactHTML.jsexample.
The page will refresh and show a table with an Export button. Click the button
and the page will attempt to download SheetJSReactHTML.xlsx.
- Build the site:
npm run build
The generated site will be placed in the build folder.
- Start a local web server:
npx -y http-server build
Access the displayed URL (typically http://localhost:8080) with a web browser
and test the page.
This demo was tested in the following environments:
| Preact | ViteJS | Date |
|---|---|---|
10.26.6 | 5.4.19 | 2025-05-11 |
npm init preact sheetjs-preact
This will initiate the project creation process. Follow the on-screen prompts and press Enter to accept the default options:
Project language:JavaScriptUse router?NoPrerender app (SSG)?NoUse ESLint?No
- Install the SheetJS dependency and start the dev server:
cd sheetjs-preact
npm i --save https://cdn.sheetjs.com/xlsx-0.20.3/xlsx-0.20.3.tgz
npm run dev
-
Open a web browser and access the displayed URL (
http://localhost:5173) -
Copy
src/SheetJSReactHTML.jsdemo code tosrc/index.jsxand update the imports:
// Remove React import and replace with:
import { render } from 'preact';
import { useCallback, useEffect, useRef, useState } from 'preact/hooks';
- Add the following to the bottom of the file:
export function App() { return ( <SheetJSReactHTML/> );}

render(<App />, document.getElementById('app'));
The page will refresh and show a table with an Export button. Click the button
and the page will attempt to download SheetJSReactHTML.xlsx.
- Build the site:
npm run build
The generated site will be placed in the dist folder.
- Start a local web server:
npx -y http-server dist
Access the displayed URL (typically http://localhost:8080) with a web browser
and test the page.
When the page loads, the app will fetch https://docs.sheetjs.com/pres.xlsx and display the data from the first worksheet in a TABLE. The "Export XLSX" button will generate a workbook that can be opened in a spreadsheet editor.
Rows and Columns
Some data grids and UI components split worksheet state in two parts: an array of column attribute objects and an array of row objects. The former is used to generate column headings and for indexing into the row objects.
The safest approach is to use an array of arrays for state and to generate column objects that map to A1-Style column headers.
The React Data Grid demo uses this approach with the following column and row structure:
/* rows are generated with a simple array of arrays */
const rows = utils.sheet_to_json(worksheet, { header: 1 });

/* column objects are generated based on the worksheet range */
const range = utils.decode_range(ws["!ref"]||"A1");
const columns = Array.from({ length: range.e.c + 1 }, (_, i) => ({
  /* for an array of arrays, the keys are "0", "1", "2", ... */
  key: String(i),
  /* column labels: encode_col translates 0 -> "A", 1 -> "B", 2 -> "C", ... */
  name: XLSX.utils.encode_col(i)
}));
Legacy Deployments
SheetJS Standalone Scripts use
simple SCRIPT tags and work with legacy deployments that do not use a bundler.
The legacy demo shows a simple ReactJS component transpiled in the browser using Babel standalone library.
Footnotes
-
See
useCallbackin the ReactJS documentation. ↩ -
See
useCallbackin the ReactJS documentation. ↩ ↩2 -
See "Merged Cells" in "SheetJS Data Model" for more details. ↩
-
dangerouslySetInnerHTMLis a ReactJS prop supported for all built-in components. ↩